Showing posts with label valentine's. Show all posts

Tuesday, 18 February 2014

Vintage Heart

This week at Sweet Pea Stamps it's our Featured Artist Week and this month the DT are featuring the gorgeous artwork of one of the newest additions to the roster of Sweet Pea artists, Charity Dauenhauer. I chose to work with this beautiful stamp called Vintage Heart:
 
 
I love the mix of steampunk, fantasy and romance in this image - just perfect for a Valentine's card, actually. ;) I coloured the image with a mixture of Promarkers and Prismacolor pencils and carefully cut around it.
 
 
I decorated my card with papers in warm tones (and continuing the heart/romance theme ;D) and textured gold mirri card. I added some delicate vintage lace and layered the image over it using foam tape.
 
 
I love the warm glow that this textured mirri card gives when the light hits it.
 
 
This stamp is available in red rubber or digi format from the Sweet Pea Stamps store.
 

Sunday, 10 February 2013

Anything Goes

This week's challenge at One Stitch at a Time is Anything Goes and this week I was lucky enough to have one of Barbara Jensen's fabulous digi stamps to work with - I love her gorgeous, slightly saucy images. :)
 
This is the card I made using Leatherbound:
 
 
I coloured her with my Promarkers and decided to dress her in electric blue - it suits her, doesn't it? I cut the image out and matted onto blue card using Framelits dies from Stampin' Up!:
 
 
I kept the card pretty simple with some patterned paper (which has a lovely sheen to the it when the light hits it), an embossing folder and a Memory Box die-cut flourish, and stamped my sentiment with a Stampin' Up! stamp.
 
 
I rather like this card as a slightly alternative, teensy bit saucy, Valentine's card. If I'd thought on I should have coloured her hair red and I could have given it to my DH for Valentine's... not that I have a figure anywhere near as nice as this lucky lady! :lol:
 
The OSAAT challenge runs for a week and you don't need to use a Stitchy Bear product to enter, though doing so gives you a chance to win the main prize. Entries not using a Stitchy Bear product go into the draw to win a $3 gift voucher for the Stitchy Bear Stamps store.
 

Monday, 14 February 2011

Happy Valentine's Day

Time to share with you a project I have been working on for a while...

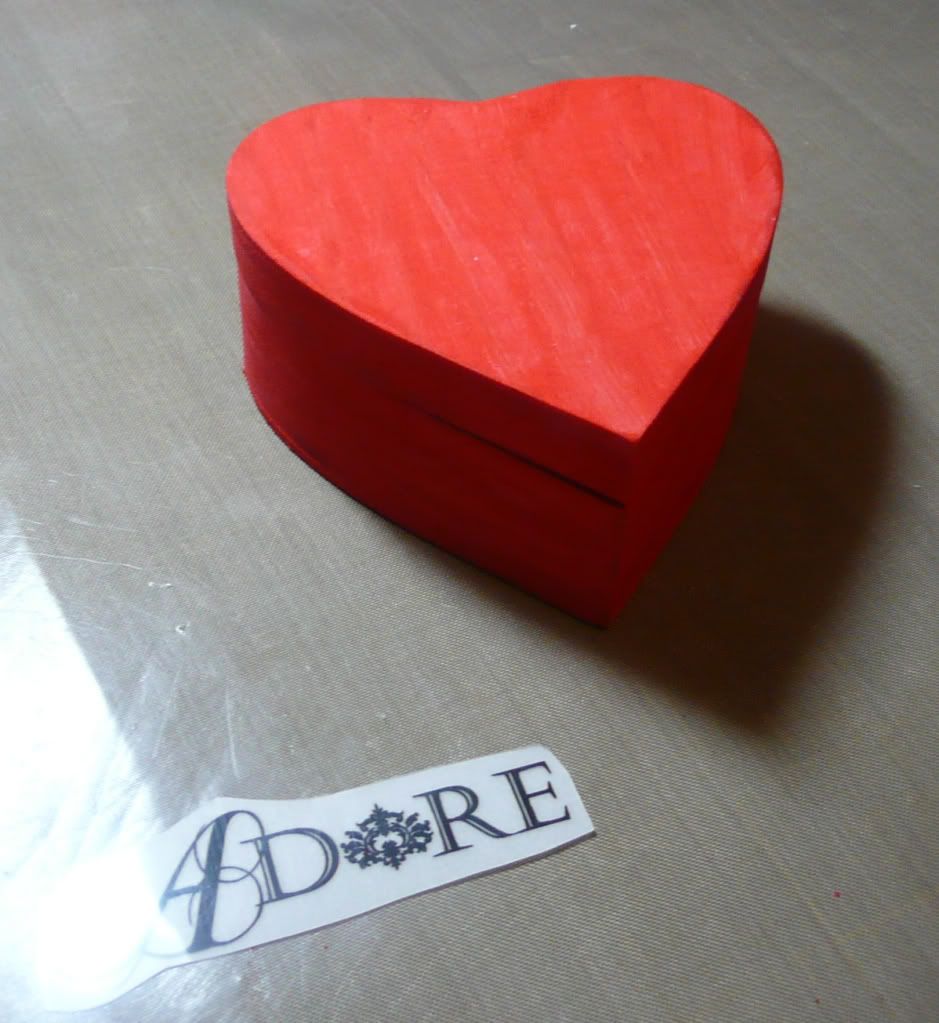
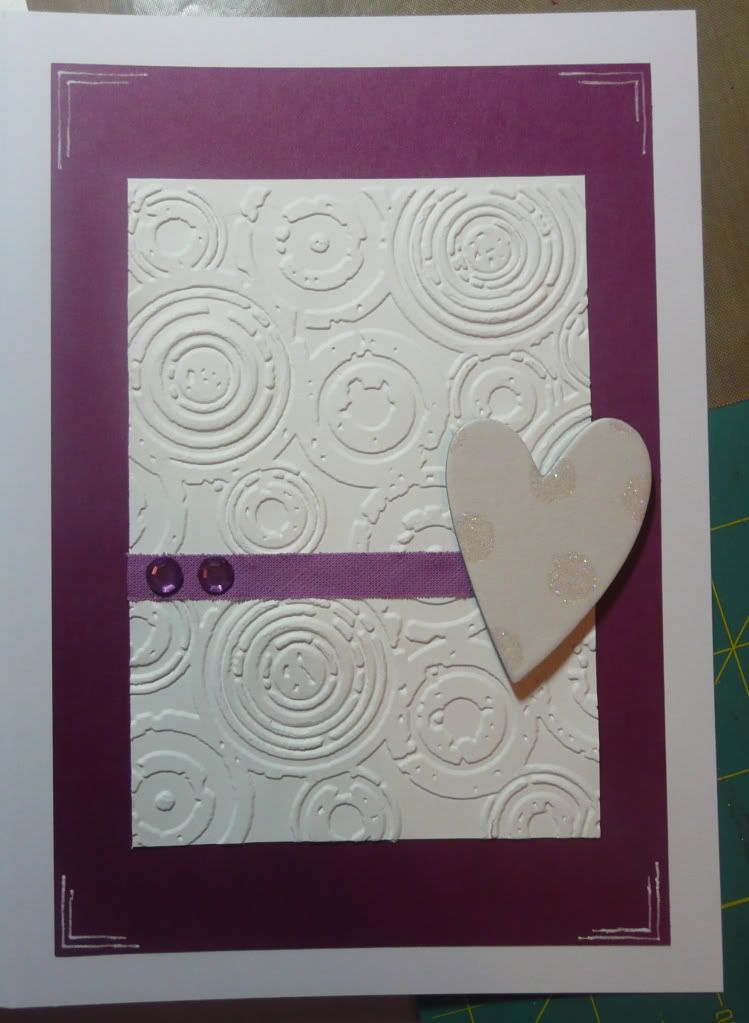
Hubby didn't get a Valentine's card this year... instead he got this:


And here's how I made it:

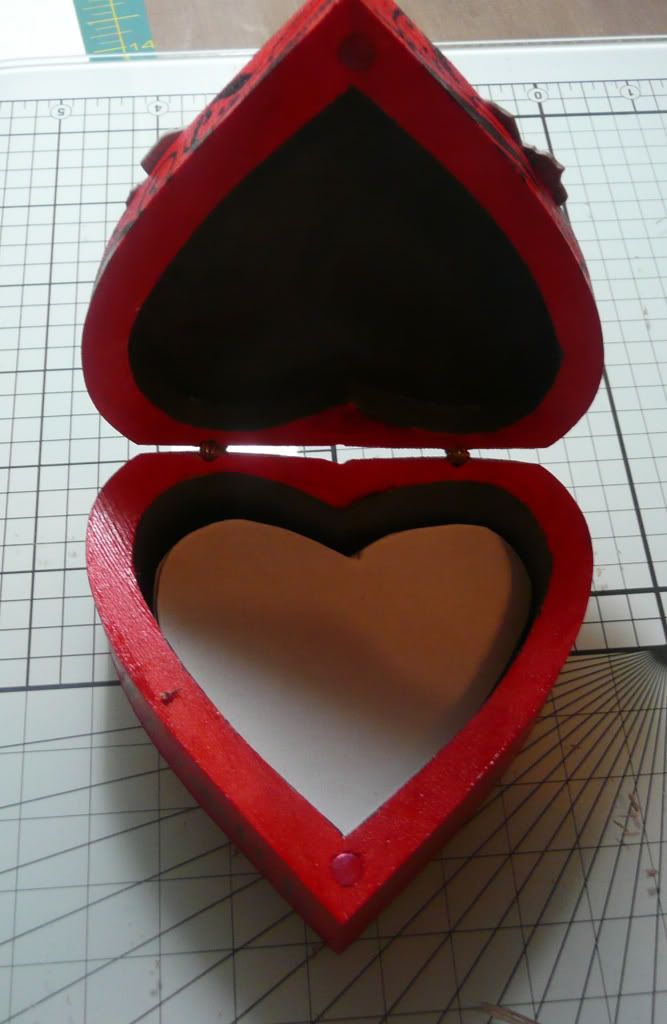
This little project started life as this cheapy kiddy's craft kit that I picked up for a couple of pounds in Wilkinson's!


I thought it would be a fun item to alter. You can also get wooden boxes in heart (and other) shapes for a couple of quid in craft shops like Hobbycraft.

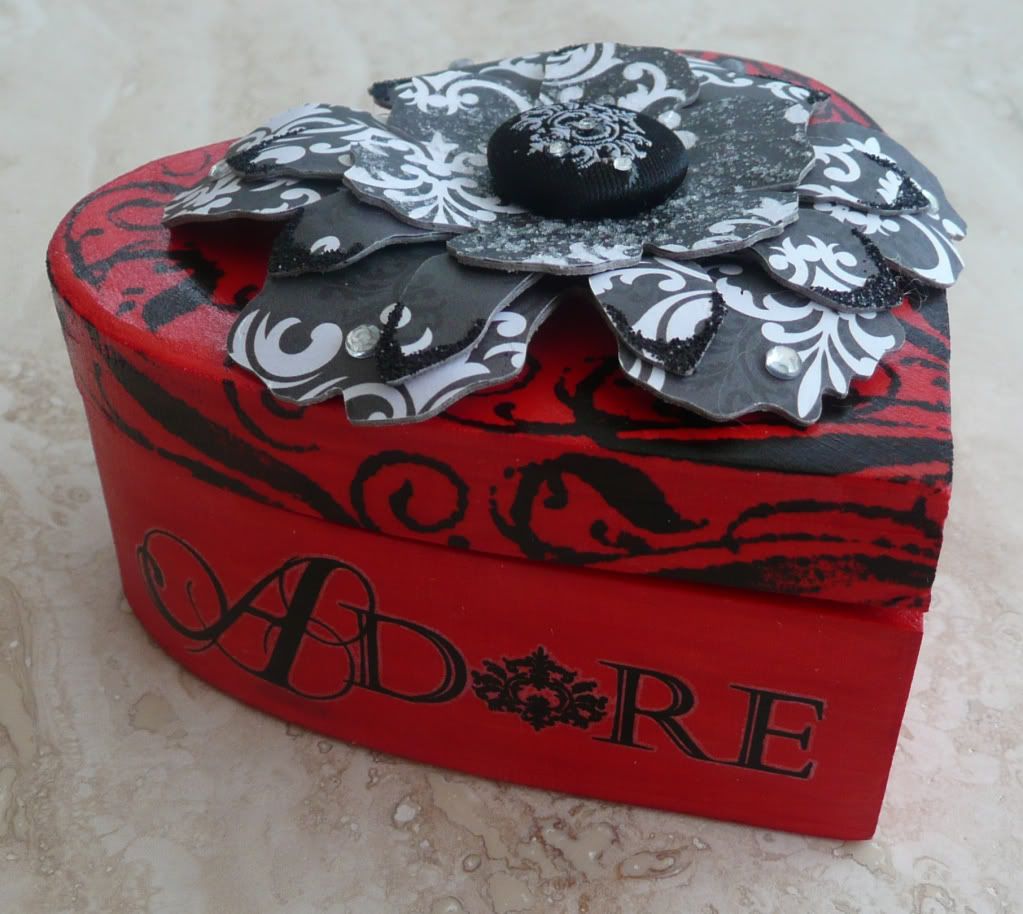
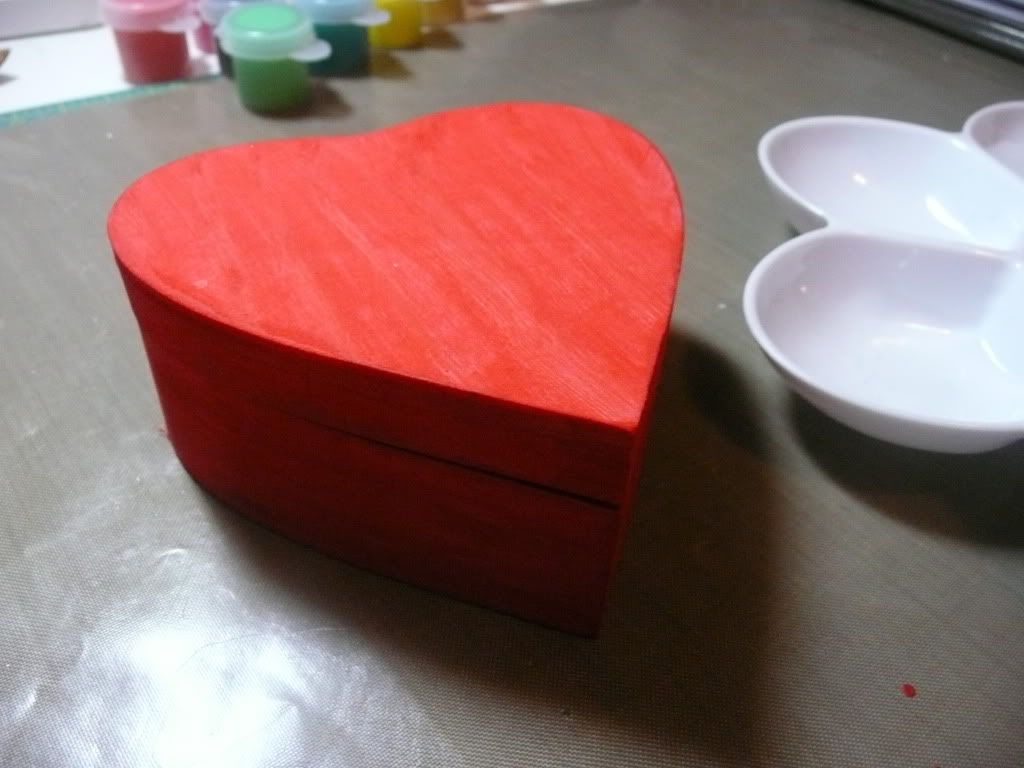
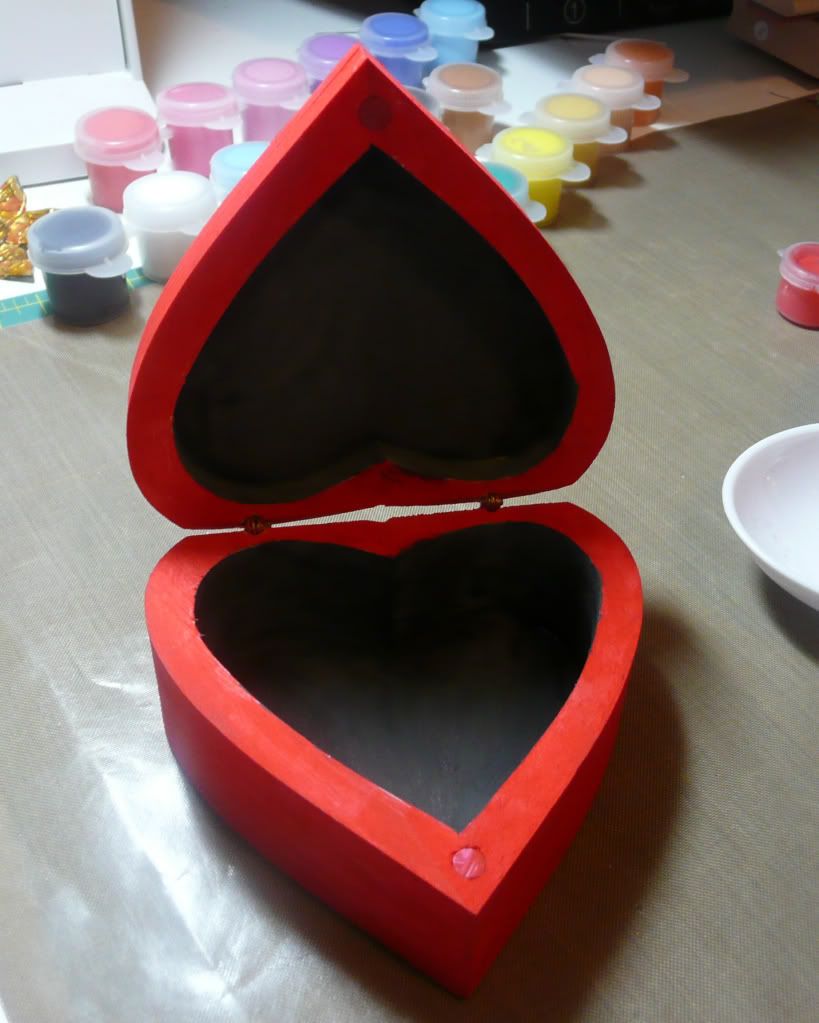
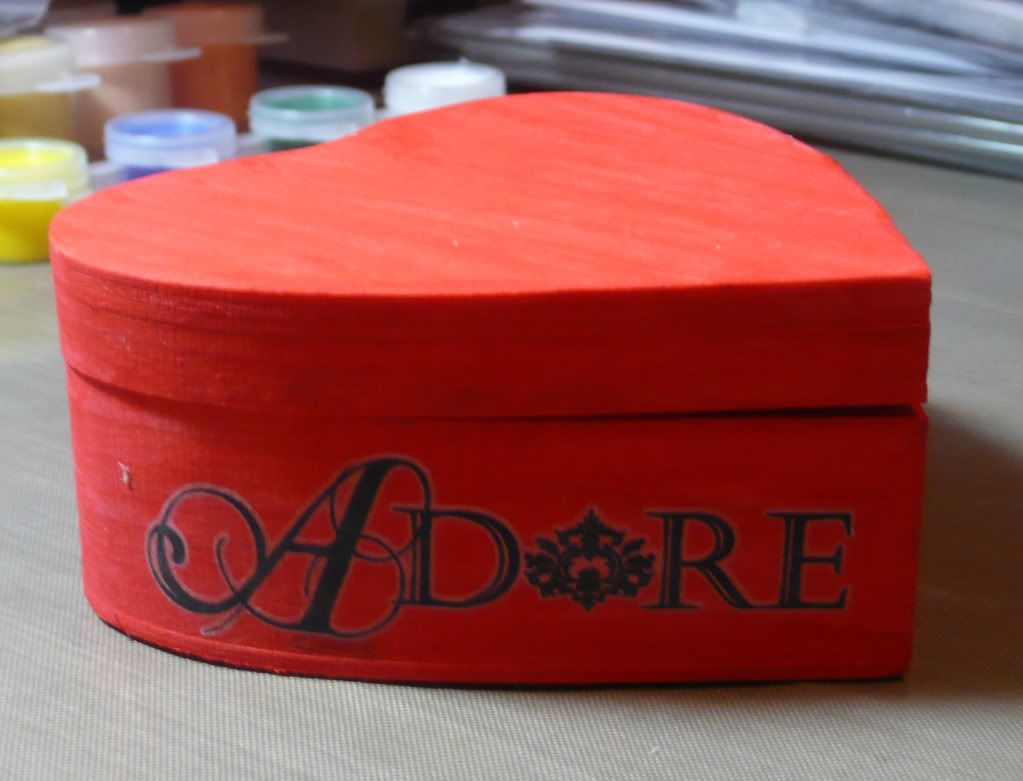
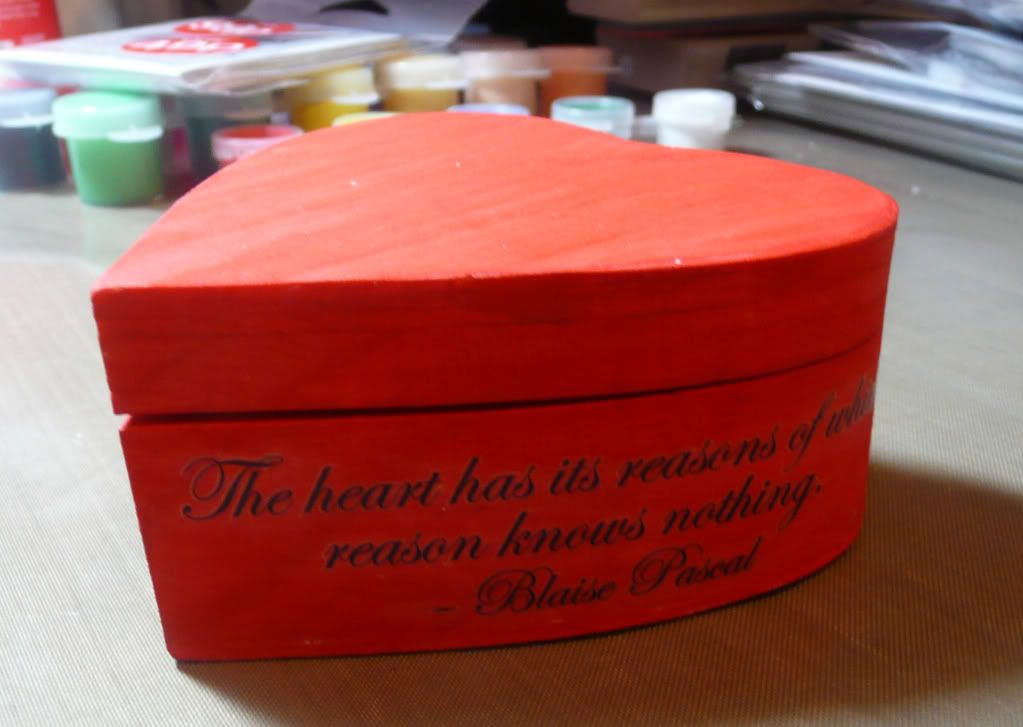
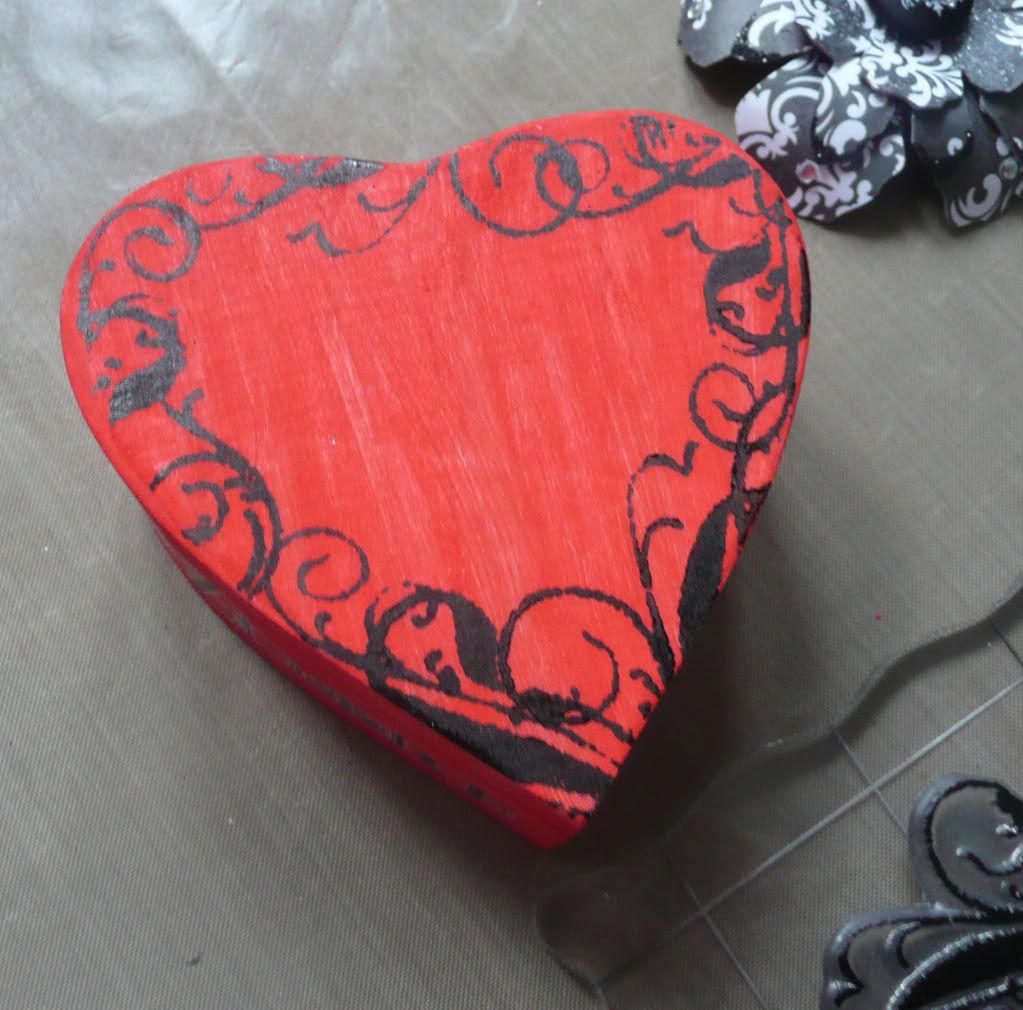
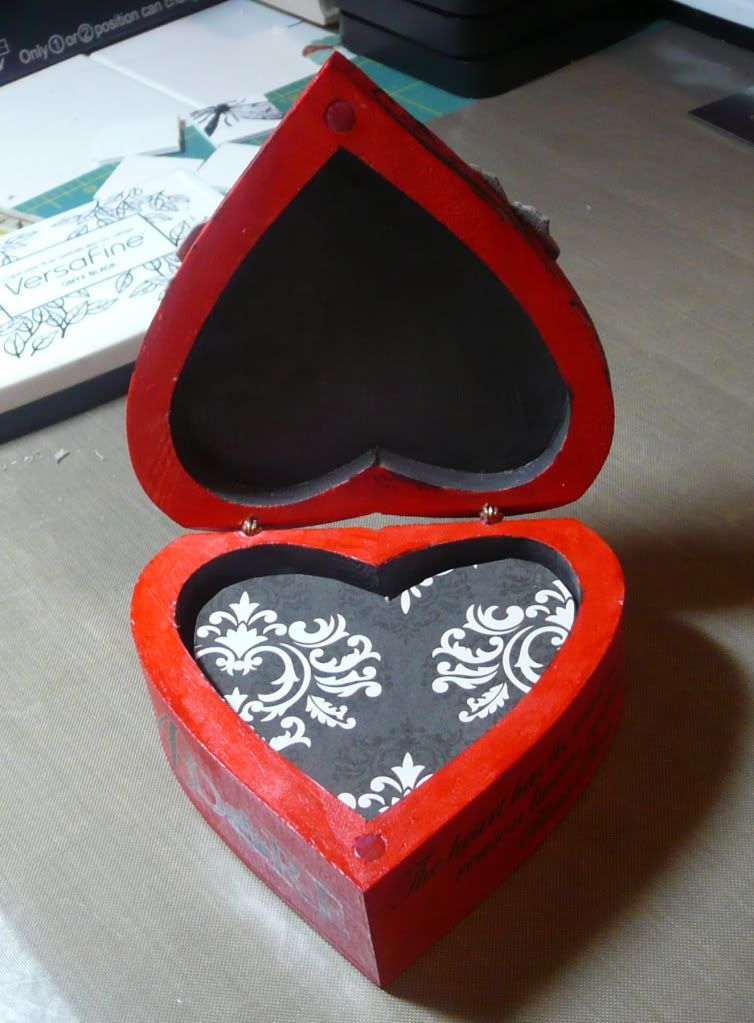
The first step was to paint the box. I used the paints that came in the little kit and painted the outside of the box red and the inside a dark grey.


The next step was decoration. I started by adding some rub-ons around the sides:


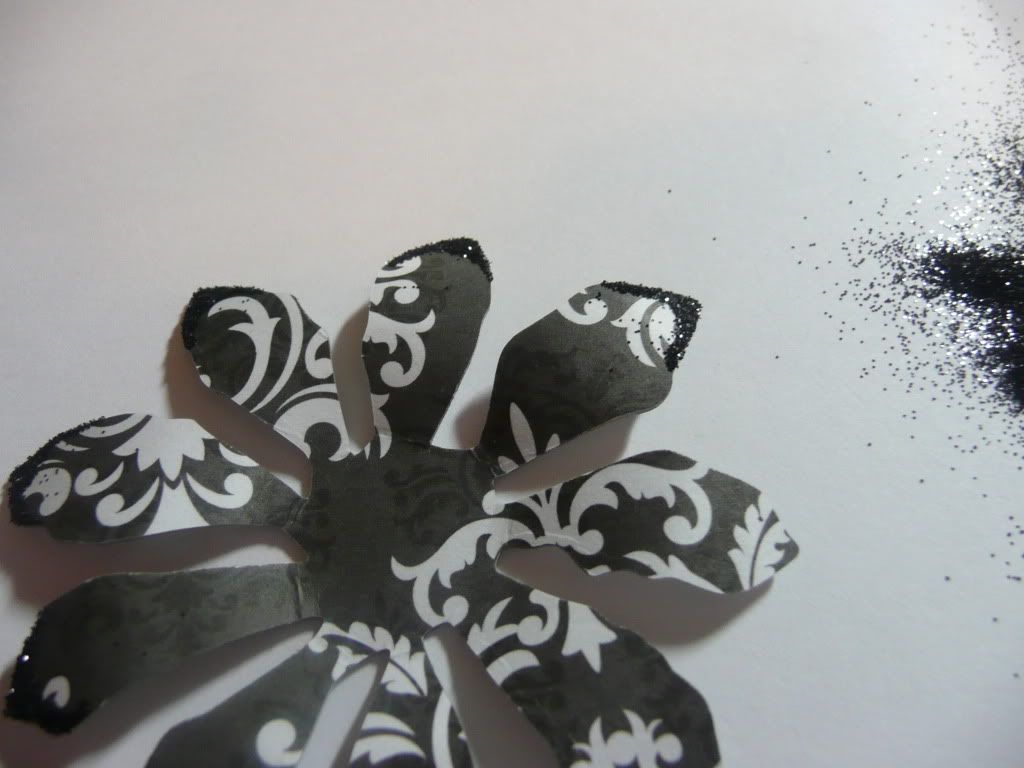
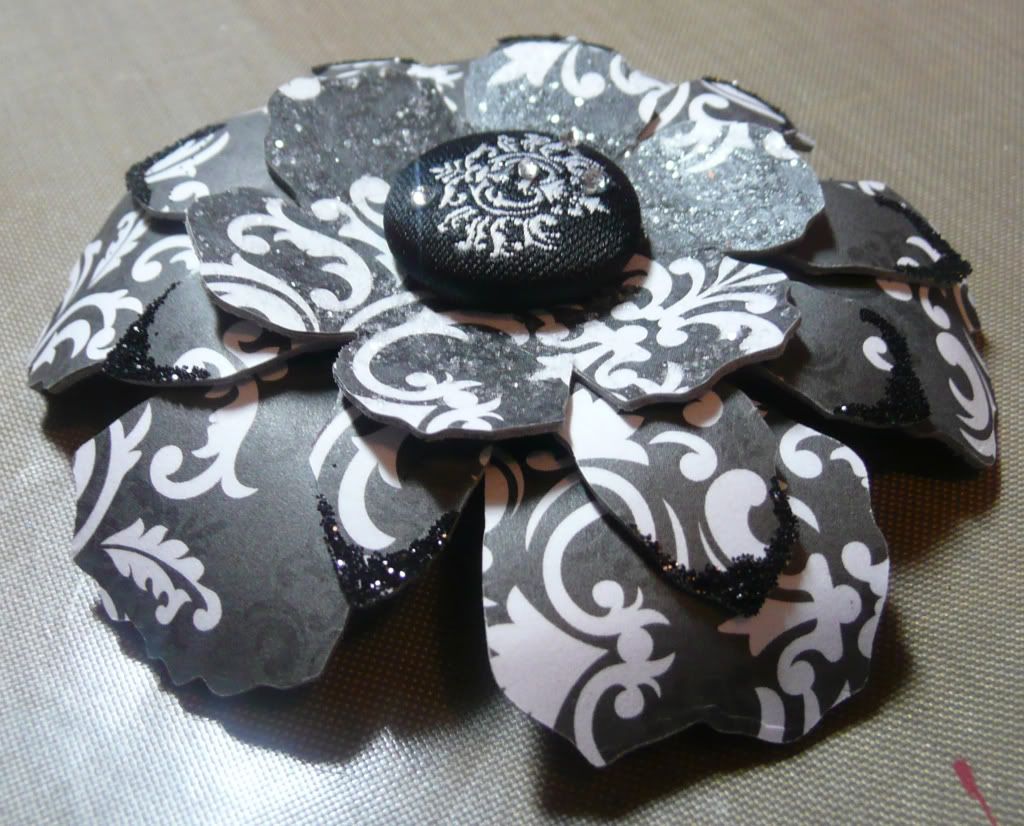
Then I made a flower to decorate the lid of the box. I glued grungeboard to patterned paper...


...and ran it through the BigShot with my Tim Holtz Tattered Florals die. I curled the petals of the flowers into shape and then added decoration... I covered the smaller flower layer with Rock Candy Stickles, used a glue pen to add black glitter to the edges of the middle layer and attached self-adhesive gems to the bottom layer. I fastened the layers together using a decorative fabric-covered brad.


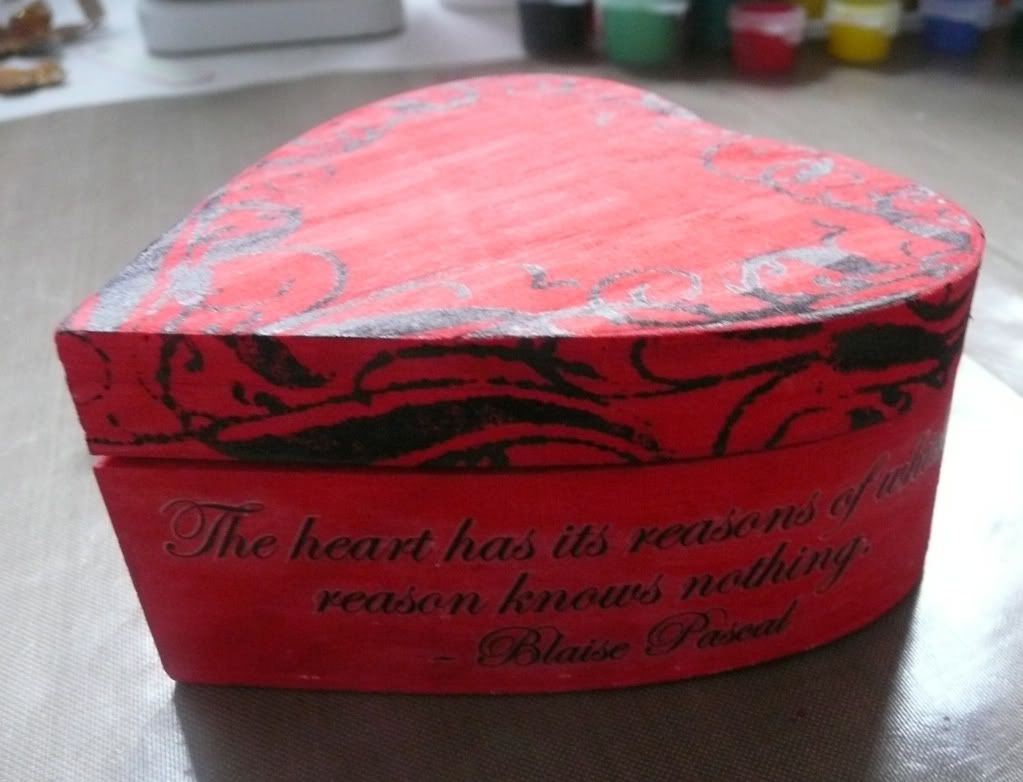
Next up I used a flourish stamp to stamp a border around the edges of the lid.


I then gave the box a couple of coats of clear varnish, inside and out, and attached the flower to the lid using a hot glue gun.

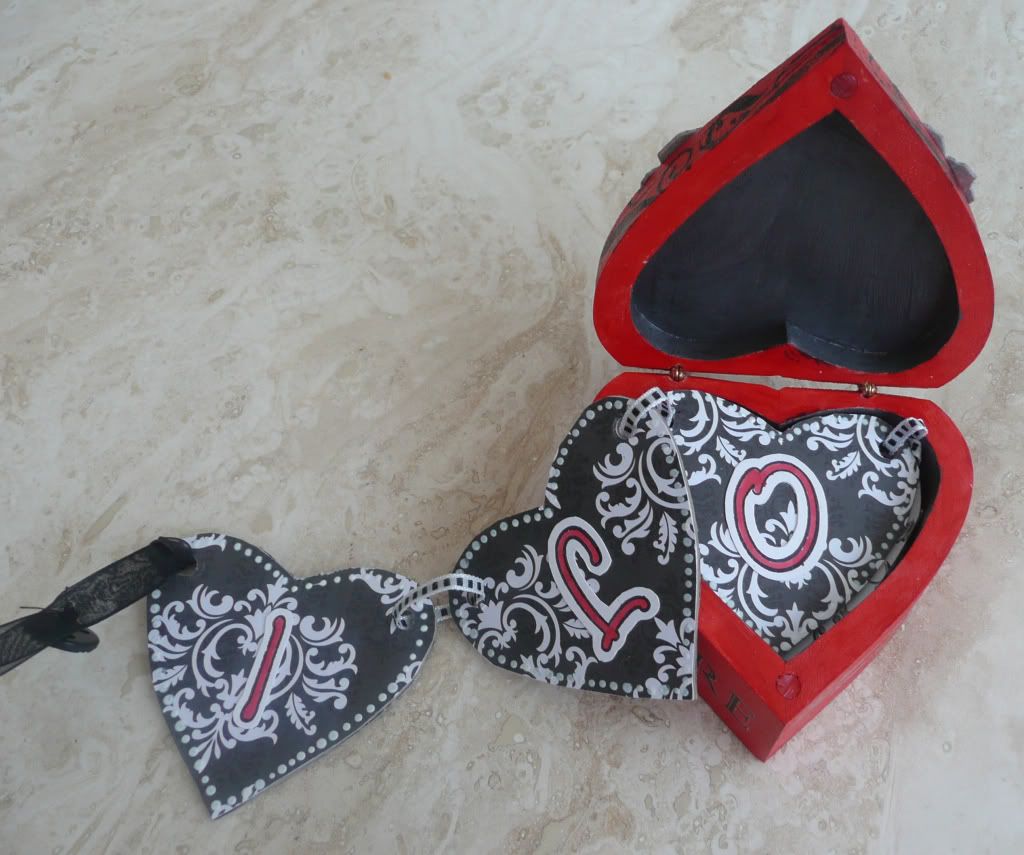
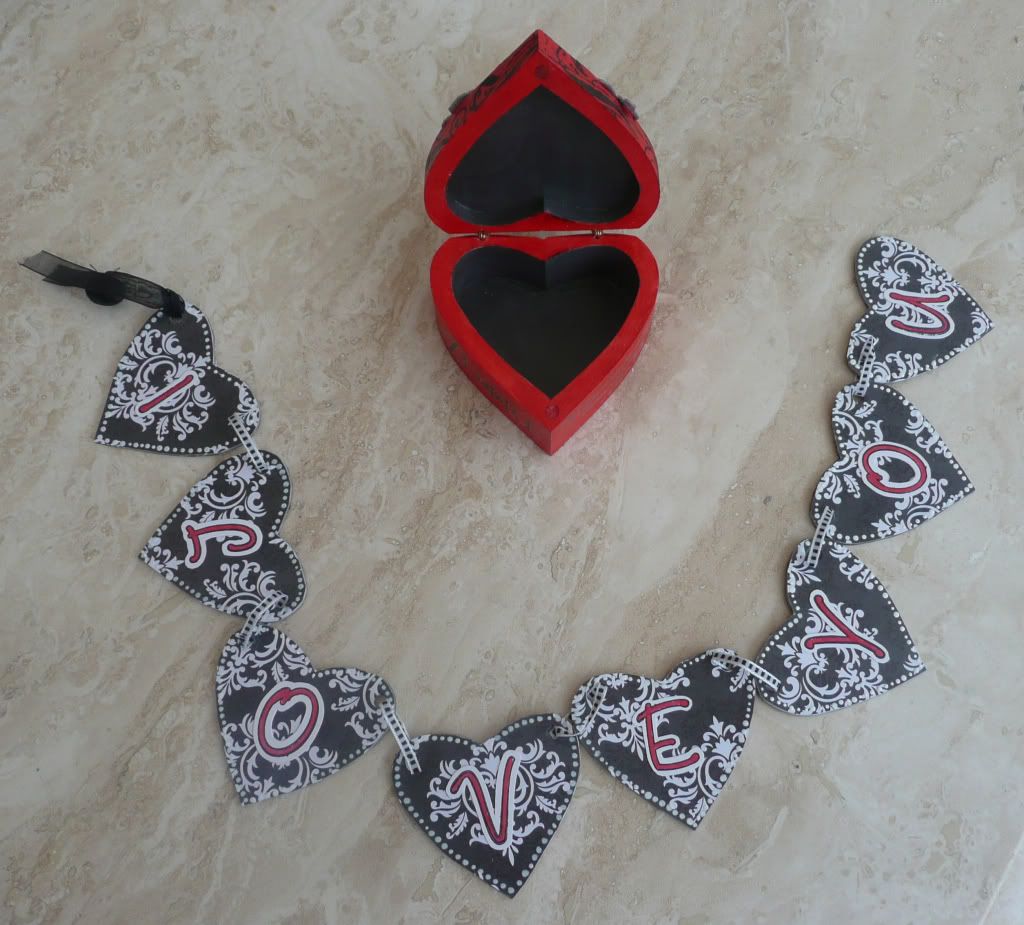
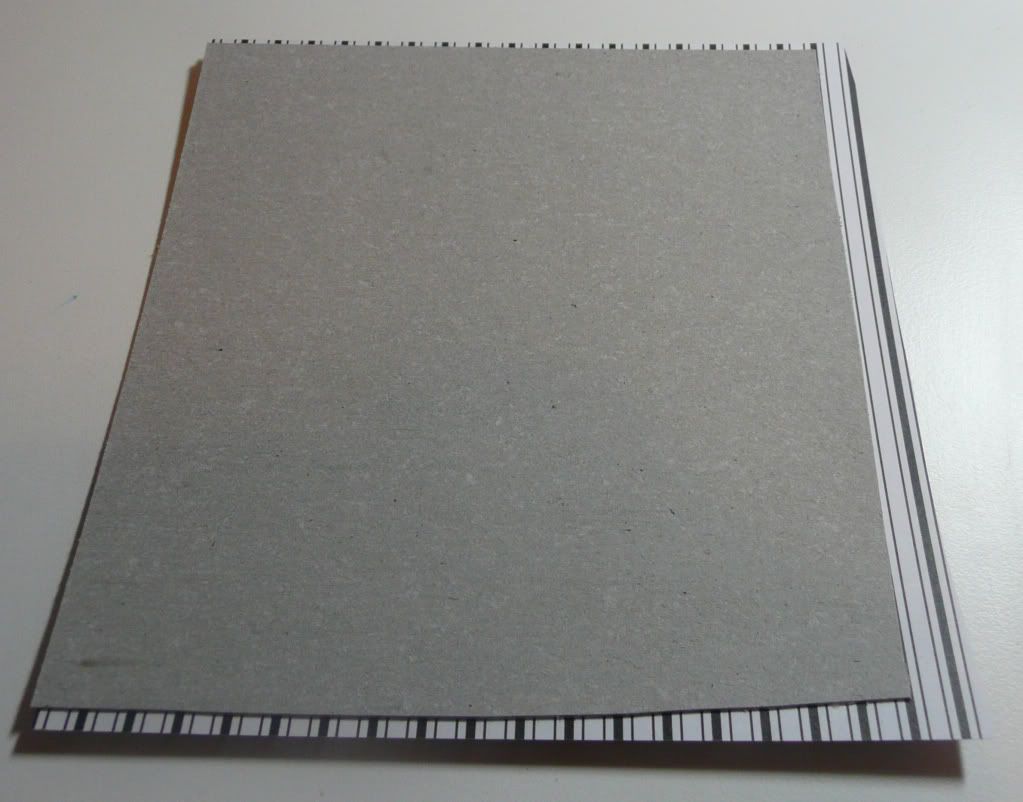
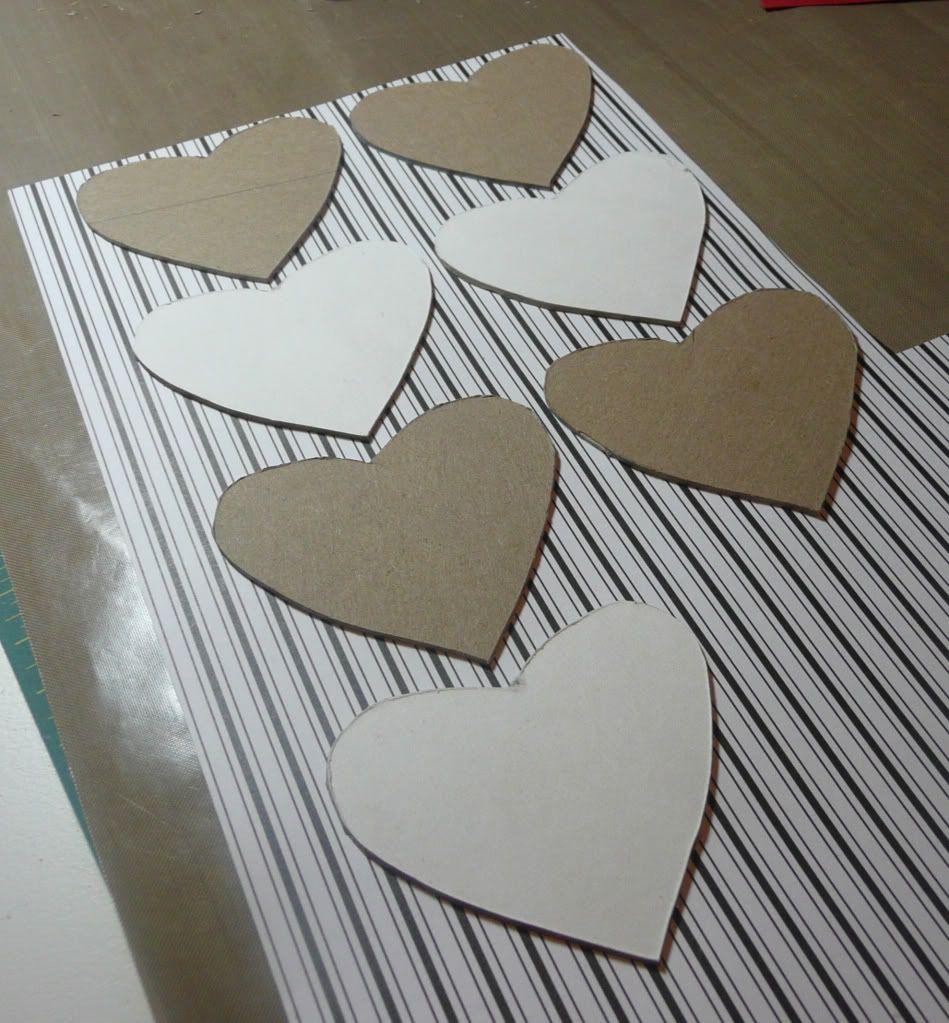
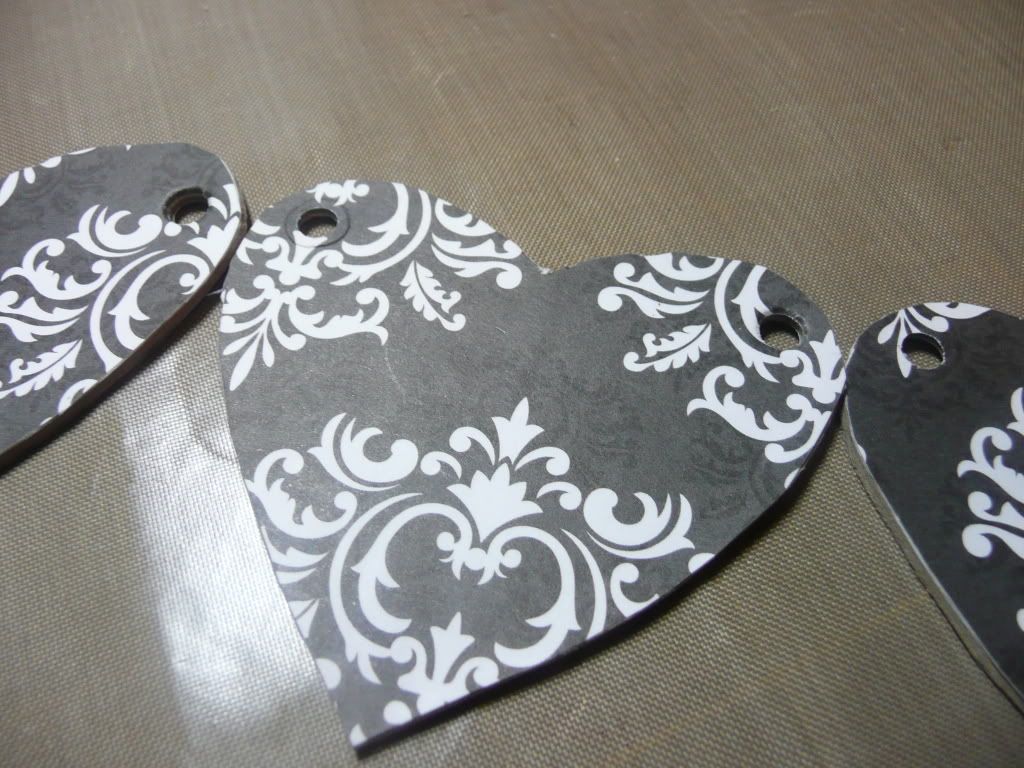
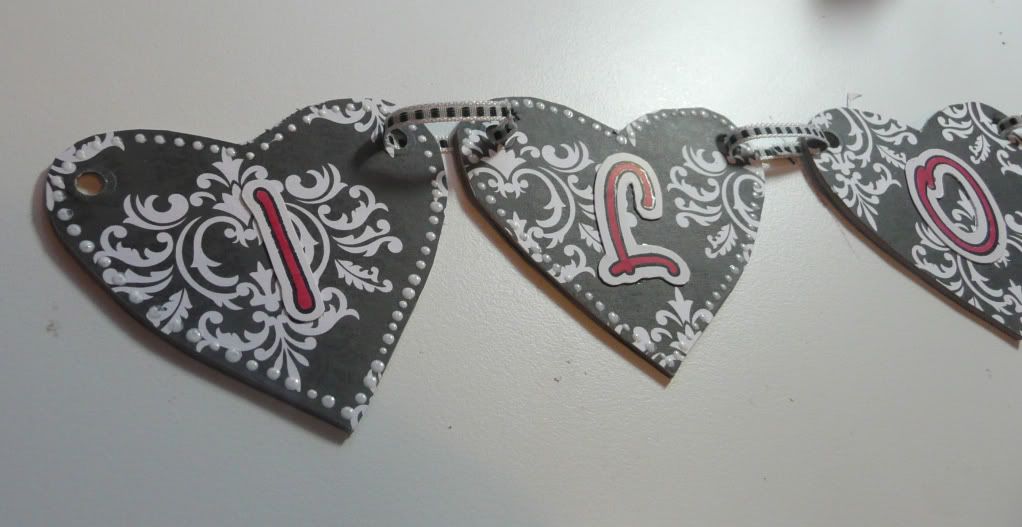
Next I needed to make the contents of the box. I used a piece of scrap paper to make a rough template of the inside of the box and cut out a heart shape that would fit inside. I used the template to cut out several heart shapes from chipboard.


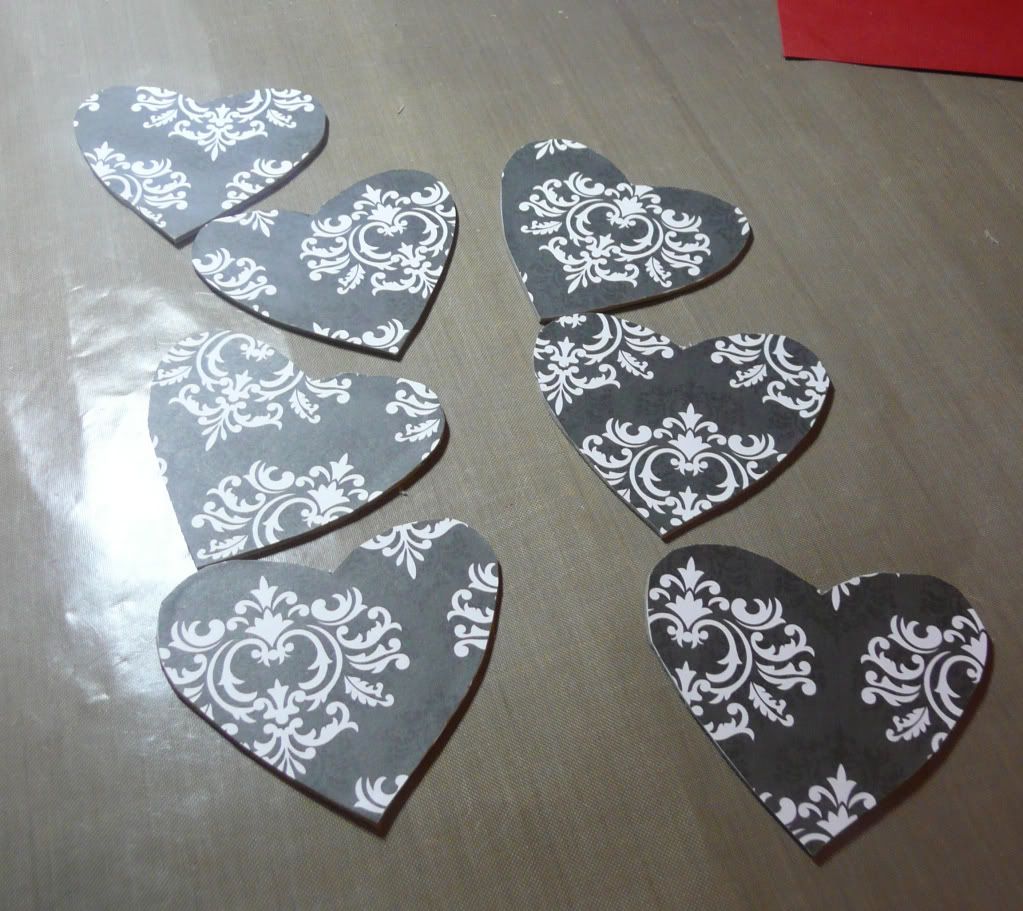
I then glued the chipboard hearts onto patterned paper and trimmed around the edges and repeated with a different patterned paper on the other side.


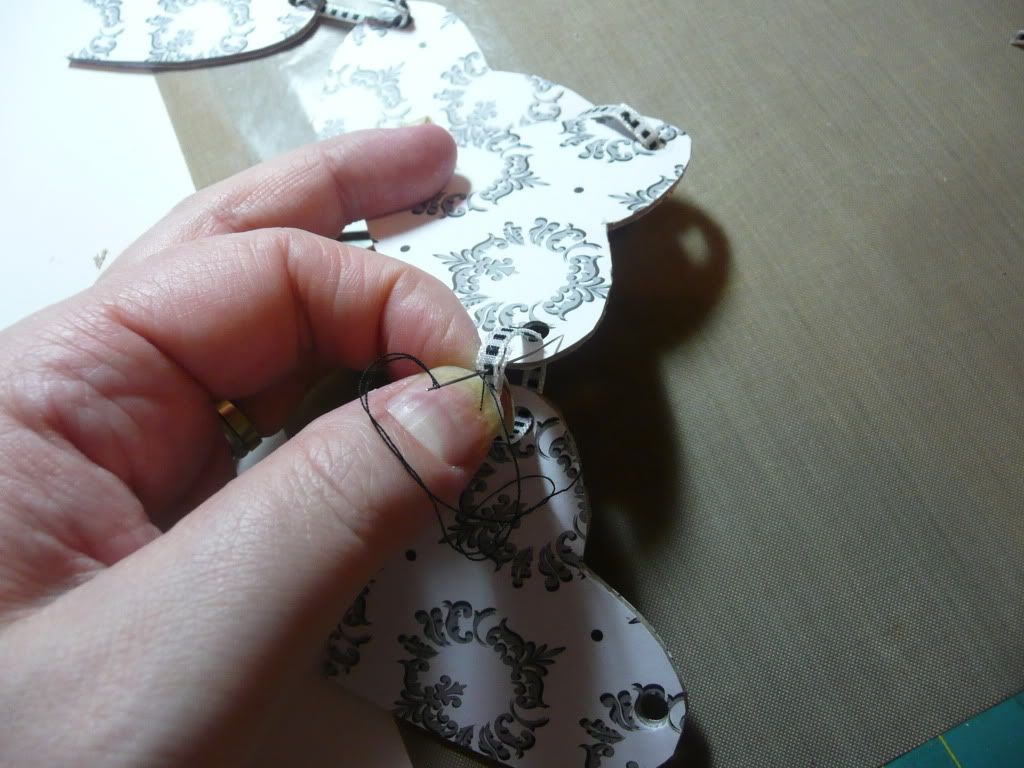
I punched holes in the chipboard hearts and threaded ribbon through the holes punched in the hearts to string them together. To prevent the string of hearts from getting too bulky, instead of tying/knotting the ribbon through the holes, I stitched the ribbon into loops.


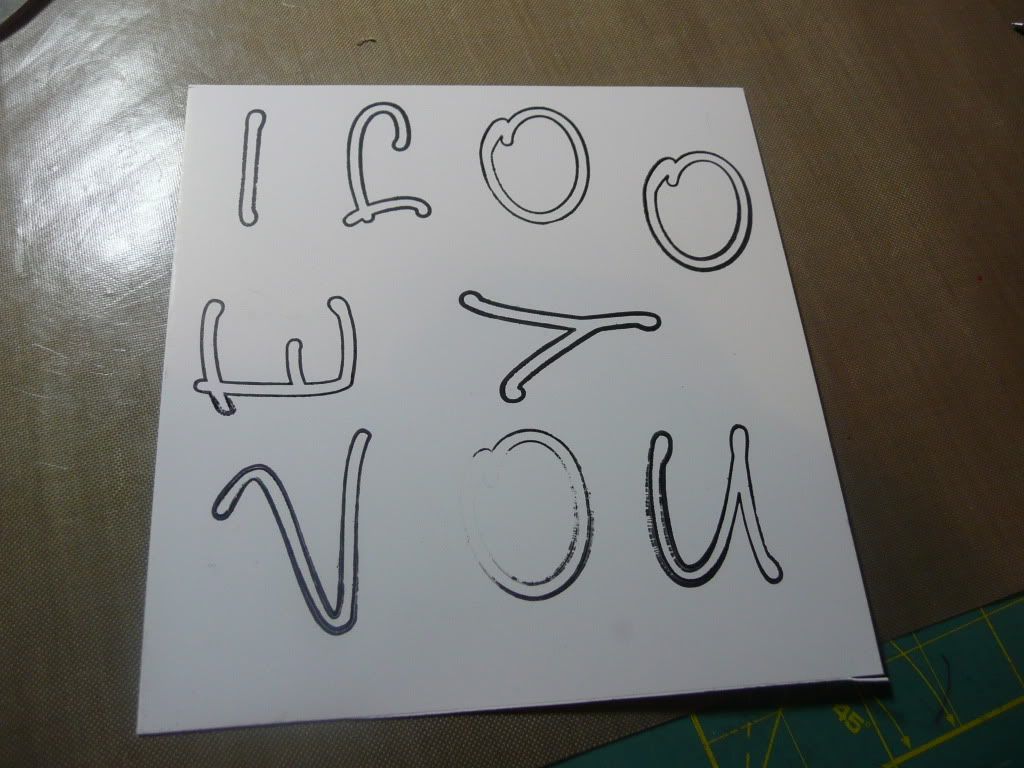
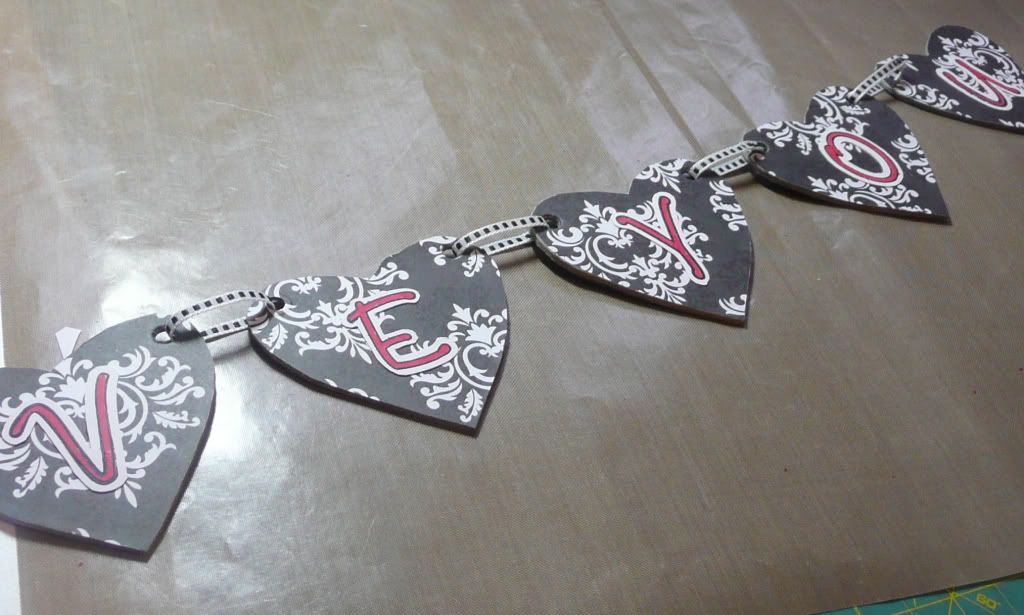
I then stamped letters onto white card to make the greeting. I coloured the letters in with a red ProMarker, cut them out and glued them onto the chipboard hearts.


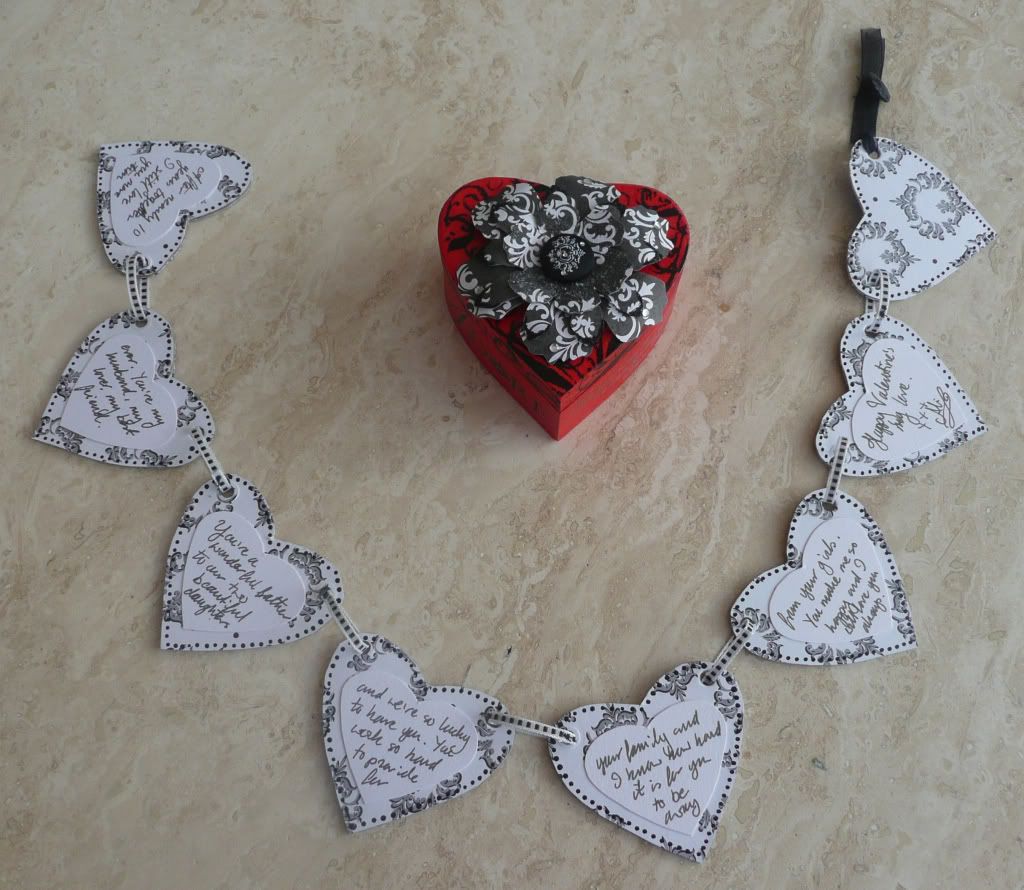
I then cut out from white shimmer card some heart shapes a little smaller than the chipboard hearts and wrote my message on these hearts before gluing them onto the reverse side of the chipboard hearts.


To finish, I dotted black and white Enamel Accents around the edges of all of the chipboard hearts to form a decorative border.


The string of hearts was then folded up and placed inside the decorated box and I tied black chiffon ribbon through the remaining hole in the topmost chipboard heart and stitched on a decorative button to make it easier to pull the string out of the box.

All in all, I'm very pleased with how this turned out... and I think hubby really liked it! :)

Thursday, 10 February 2011

Masculine Valentine's Card

My mum asked me yesterday to make a Valentine's card for her partner.

I asked her what kind of thing she wanted and she said "Football!" (her partner is a big football fan) and then laughed and said, "But you want have anything like that, will you?"

At that moment, inspiration struck and I reached into my drawer of clear stamps.... a few months ago I bought a collection of 6 or so Kanban stamp sets... and one of them was football themed!! Never really thought I'd have much use for those ones - funny how things turn out! :lol: Mum loved the look of the football stamps so I set to making this card:


Mum's partner is a big fan of Burnley, so naturally the footballer's kit had to be coloured in claret and blue... I even went online to find out exactly what pattern the colours are arranged in on the shirt and socks so I could colour it in accurately!

I stamped the footballer twice onto shimmer card and matted one image onto red Bazzill cardstock and outlined the image with a pale blue ProMarker. The second image I coloured in with the ProMarkers, cut out and attached over the base image using foam pads. The patterned paper is Basic Grey Boxer - nice masculine colours - and I stamped the football stamp repeatedly onto the top half of the base card to make a pattern. Mum wrote a poem to go in the card and I printed on vellum to form an insert.

How's that for a really individual, personalised Valentine's card? It's not often I get to do masculine cards so it was an interesting experience and Mum loved the results. :)

Friday, 4 February 2011

Valentines Cards

Some sample ideas for St Valentine's Day cards:

Card 1 : Variation 1
Card 1 : Variation 1 - Close-Up
Card 1 : Variation 2
Card 1 : Variation 2 - Close-Up
Card 2
Card 2 - Close-Up
Card 3
Card 3 - Close-Up
Card 4
Card 4 - Close-Up

Card 5
Card 5 - Close-Up
Card 6
Card 6 - Close-Up
Related Posts Plugin for WordPress, Blogger...