Wednesday 29 February 2012

Monstrously cute

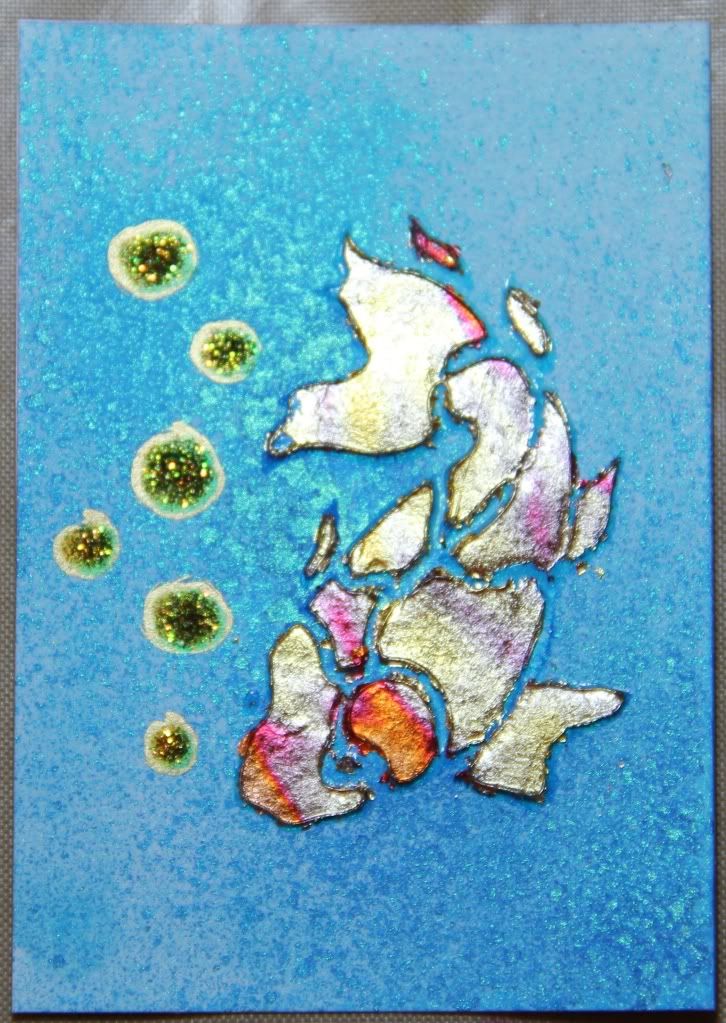
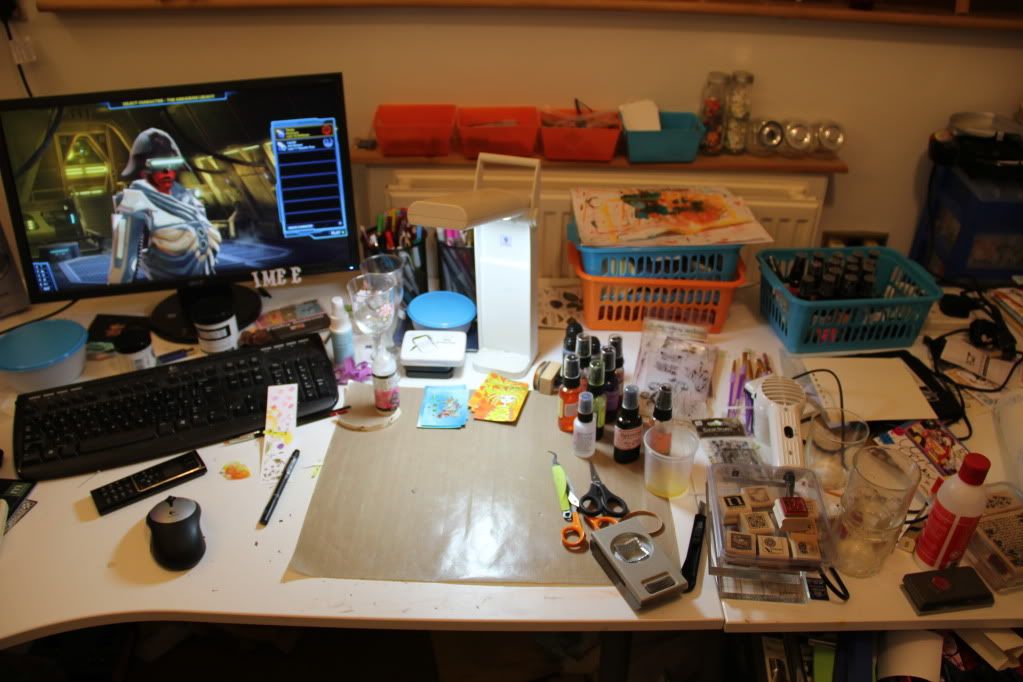
I just luuurve this cute little monster stamps from Stampotique!! They were featured in Craft Stamper Magazine a couple of months ago and since then I've been dying to get my hands on them! And now I finally have:

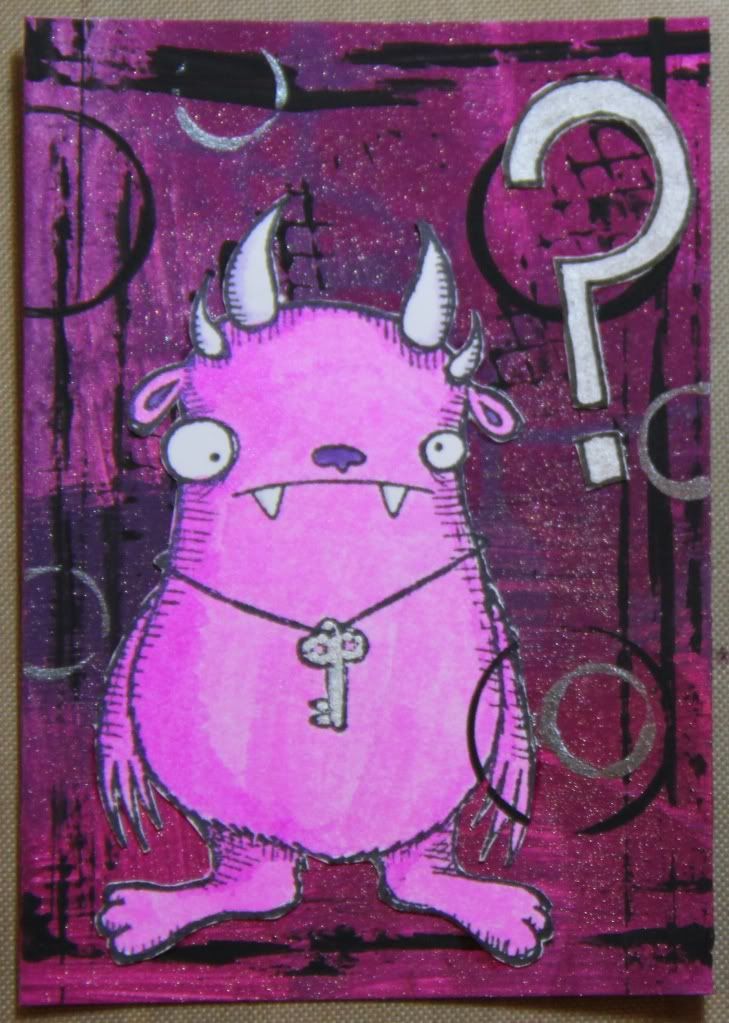
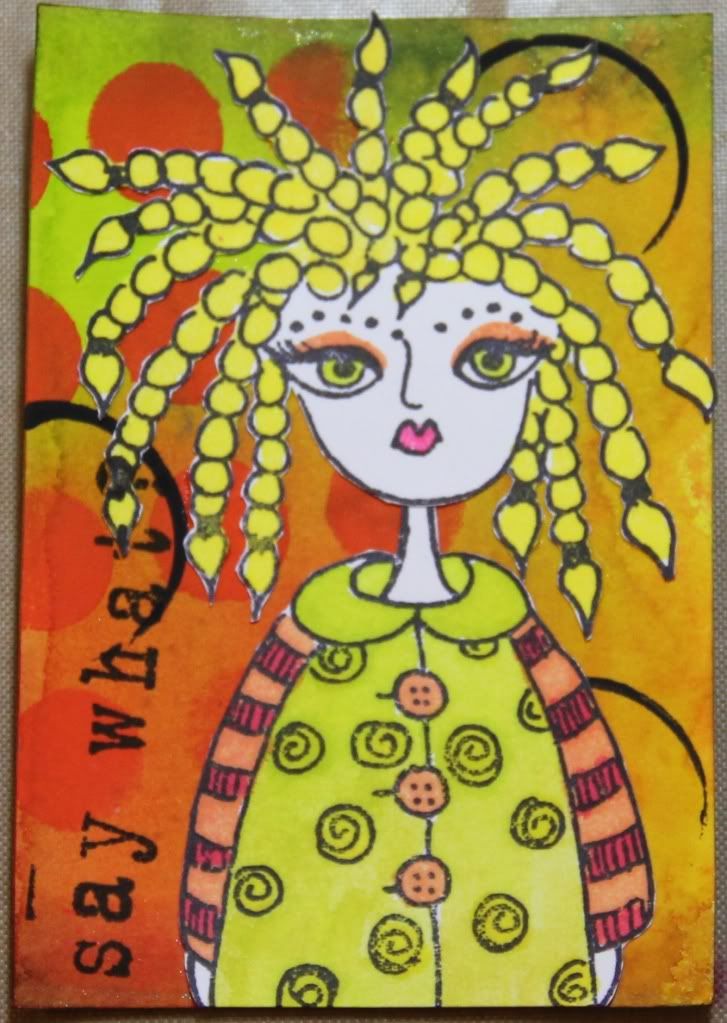
For my first play with the key monster, I decided to make ATCs - he's just a nice size for an ATC. I used Dylusions paints and a spritz of Glimmer Mist to make a nice colourful background and added some black paint with a credit card and some netting. I stamped the monster onto white card and coloured him in with Cosmic Shimmer Acrylic Drawing Inks and a silver pen, cut him out and glued him onto the ATC. He has such an adorable bemused expression on his face that I decided to finish the card off with a question mark, drawn onto card and coloured in with silver pen before being cut out and stuck onto the ATC. :)

I'm entering this ATC into the current "Purple/Pink with Black" challenge over at the Stampotique Designers Challenge blog.

WOYWW - 29 February 2012

Oohoo, here's we are on leap day Wednesday! So folks, what's gracing your workdesks on this special, extra day?

Here's what's on mine:


I've been a busy little bee tonight (technically, to my mind, it's still Tuesday night cos I've not gone to bed yet(!!) but as it's (well) after midnight, it is in fact Wednesday right now!). I've finished up two little ATCs (seen lurking around at the base of the daylight lamp - more on those in a future post) and I've finally found time to do Shimelle's February "& Now For Something Completely Different" class. The result is the LO you see sitting on my desk. I'm SO pleased with it! :D


The papers are Basic Grey Lemonade and the photos are of DD2. I've followed Shimelle's step by step instructions fairly closely this time around, just making substitutions where I didn't have the stash she'd used. Oooh and I finally got the use some of the washi tape I bought recently! :)

I've got several other projects on the go atm (an in-progress art journal page, a digi CJ page, a mother's day card - ooh it's all go you know!) but for now my next - urgent - project really must be... to go to bed!

So thanks for stopping by and g'night all! :D

Tuesday 28 February 2012

Spring is in the air...

Yeah. I wish. It's still cold and grey and miserable here.

But... to counteract the gloom, here's a pretty, shimmery card in bright, spring colours. :)

I spritzed and splattered a background with Dylusions spray inks in bright, cheerful shades of yellow, pink and green and stamped over it with a Crafty Individuals stamp. I then stamped the flower parts of the stamp again onto off-cuts of the spritzed background card, cut them out and painted some extra detail (and added a bit more glitz and shimmer) with Dylusions mica sprays.

I matted Basic Grey Stella Ruby paper onto vibrant green Basic Grey cardstock and attached to a white card blank. I cut a strip of the Basic Grey cardstock and punched along one edge with a Martha Stewart edge punch and layered this across the card and added a piece of Making Memories crocheted flower ribbon on top. The stamped image was matted onto more Basic Grey cardstock and attached to the card with foam pads and the flower sections were laid over the main image again with foam pads. To finish I stamped a couple of cute little bees (from an Artemio stamp set) onto more spritzed card off-cuts, cut them out and attached.

And there you have it, a pretty floral card in fresh, spring colours. I'm entering this card into blog challenges at the Crafty Individuals blog (theme: Spring) and the Stampalot Challenge blog (theme: In The Garden.

Sunday 26 February 2012

Serendipity

That's the word for it.

The fortunate and perfect concurrence of this thread over at UKS and this week's "London, Paris or New York" theme at the Simon Says Stamp and Show challenge blog.

I just HAD to have a play with my new City in a Box items from Muji for this challenge... and I could have done any of the three cities in question, as I had a City in a Box for each of them! :)

But my immediate instinct, as soon as I even laid eyes on these cute little models, was to have a play with the iconic Eiffel Tower. And so I did. :)

From this:


To this: :)


I cut sections of Basic Grey Alyssa patterned paper to fit each side of the tower and then inked the edges with Tea Dye Distress Ink. I used the same ink to stamp each piece with the text stamp from Tim Holtz's Papillon stamp set and also stamped some butterflies from the same stamp set onto the Basic Grey paper. I cut the butterflies out and gave them a coat of Rock Candy Distress Crackle Paint.

I glued the stamped papers onto the tower and added the butterflies. I made a little pennant by stamping Amour (from a Stampin' Up! stamp set) onto more of the same paper and inking the edges I wrapped it around a piece of bronzey-coloured wire, finishing it off with a heart-shaped bead and crimp beads. I hot glued it to the top of the tower along with a TH Idea-ology flower. Et voila! Le Tour Eiffel, gone vintage and shabby-chic. :)

Saturday 25 February 2012

Black and White

Two of the challenge blogs I like to follow have complimentary themes this week... the theme at Passion for ProMarkers is "black and white" and the theme at Sweet Pea Stampers is "white". So I thought it'd be fun to a) colour in a Sweet Pea image in black and white, instead of colour, and b) make a monochrome white on white card. This is the result:


I'm really pleased with this. The gorgeous Ching Chou Kuik image looks fantastic coloured in black and white and it was really interesting making a white on white card and creating interest through texture rather than pattern and colour. All in all, I think it makes for a really striking card.

Cards, Cards and more Cards

I've made a few cards lately that haven't made it onto the blog as yet, some quite quick and simple, others a bit more intricate, so I thought I'd do a bit of a round-up and post 'em all here.

First up.. regular readers may remember this rather sultry lady from my my WOYWW post in early February, in which I mentioned I was thinking of using her for a Valentine's card for my DH... and indeed I did:


I loved this image (a Barbara Jensen digi image from Stitchy Bear Stamps) and thought she looked so great coloured in that I wanted to keep the card fairly simple so I simply added some patterned paper that reminded me of ornate wallpaper and I attached the image to the edge of the card, overlapping the edge slightly, and trimmed to card edge to the shape of the image. I'm pleased to say that DH liked it. :)

I also made a quick "Thinking of You" card a couple of weeks back for a family friend who's elderly mum sadly passed away:


I used K&Co patterned paper and SU Everything Eleanor stamps and a piece of cream lace ribbon.

I used my SU stash recently for another, very quick and simple, card to pop through the letterbox of my neighbours to check they were okay (I was a bit worried as had seen an ambulance stopped outside their house and then had no answer when I knocked on the door later in the day - turns out the ambulance had stopped to ask them for directions to a nearby address! So they were both fine! :lol:):


I raided my SU scraps box for this and simply layered torn patterned paper and trimmed cardstock and then used my Stampin' Markers to colour a little stamp from the Cute by the Inch set and stamp the design and then punched it out using my new SU postage stamp punch. :)

I've also made several little notecards for sending out with swaps - mostly ATCs etc:

A couple using pretty Kate Knight papers that came free with a craft magazine (including one where I was trying out the SU pennant punch):


One using Distress Stains and then black ink sponged over a mask:


More Distress Stains, stamps that came free with a magazine and some glitter pens to highlight:


And one with Dylusions paint dry-brushed across the card and Tim Holtz stamps stamped over the top:


And I think that's me about caught up... Oh, except for the card I've just made tonight. But I think I'll give that one a post all its own. :)

Friday 24 February 2012

Creativity

I am still slowly catching up on the weekly Art Journey prompts over at UKS... and may I just say that I am *loving* this journey and the art journal I am creating with it... it's looking fantastic and I am learning so much during this process. :)

I've made it as far as Week 5's doodling prompt, which I really enjoyed cos I used to doodle a LOT and it was great getting back into some creative drawing.

The detailed prompting for this week had me doodling a face with some flowers around it (I often tend to doodle faces) and it really got me thinking about creativity and the enjoyment of drawing and creating something from scratch and how freeing it is so that's where my page led me...

I wanted my page to be really vibrant and warm and flourishing, because that's how creativity feels to me. So I started off my doodling a big flower and added a striped border (filling in the white spaces with white pen). I then wrote my "title" wording around the flower:


I wanted more of a border and, following with the blossoming/growth theme, I doodled some leaves around the edges. And then it came to colouring. I decided to use my Promarkers for this page as I really wanted depth and vibrancy of colour. I've never actually used my Promarkers in my art journalling before but I love seeing Rosie's Promarker pages so I took some inspiration from her. :) I started by colouring in the flower in bright, warm shades of orange and yellow and the title in red:


I then coloured in the leaves, and the leafy border:


I wanted a warm coloured background too so I went with a slightly muted mustard shade of yellow:


To add to the warm, bright, vibrant feeling, I coloured in the edges with shades of red and blended it in a little with the blender pen:


And to finish, I added my journalling:


I'm really really pleased with how this page turned out. It's everything I want it to be and just looking at the big, beautiful flower and the warm, bright colours makes me feel happy and creative.. and I love that this page came entirely from me... all the images here are 100% created by me; there's no stamping, no clipped out images, no use of anyone else's images at all. And that's creativity. :)

Thursday 23 February 2012

Sooo cute!

I've picked up some really cute new toys to play with recently...

My Stampin' Up! order arrived this week and I am already in love with this awesome pennant builder punch:


I had to have a quick play with it and I literally grabbed the nearest two pieces of scrap paper on my desk and punched em and just look how fab it looks! Expect to see a lot more bunting on my cards/pages in the near future! :lol:

And thanks to this thread over at UKS, I've ended up making a special trip into Leeds today to visit the Muji store and pick up some of these adorable little items which are just perfect for altering!!

This is the Paris City in a Box set:


And I also picked up the London and New York ones:


And then there's the pen organisers... I got New York:


And Paris and Tokyo:


That's what I went there intending to buy... I also somehow managed to come away with a couple of kraft notebooks, this cute 3D postcard (I'm going to alter the butterfly and then use the card it comes in as a stencil to make more of the same! :D):


And this cute little set of "build a face" stamps which I think will be great fun for art journal pages. :)


Now all I need is a few more hours in the day so I can have time to play with all my new goodies! :lol:

ATCs-a-go-go

I've been playing with ATCs again. I do love 'em! They are such a fab and fun way to try out new ideas and techniques.

For example, (as seen briefly in my WOYWW post yesterday) I have *finally* gotten around to trying out the Dreamweaver embossing paste and gilding foils that I bought at Ally Pally in erm... summer of 2010! :lol:

This was the result:

I made the background with Dylusions spray ink and Cosmic Shimmer Mists, the koi was done with a Dreamweaver stencil, embossing paste and gilding foil and I drew bubbles with gold pen and filled in with Stickles.

I also had a play with my Dylusions inks and paints and also with the Dylusions stamps that I bought erm... last November! :lol: (Seriously, I think it's very very likely that I actually own more stamps that I haven't used yet than stamps that I have!! ;D)

Here was my Dylusional ATC:

I sprayed the background with the Dylusions spray inks and then sponged Dylusions paint through a stencil and stamped some circles with a bottle top. The figure was stamped onto card and then painted with the Dylusions sprays and cut out (and boy, was the hair fiddly to cut! :lol:). Isn't she cute? :)

Wednesday 22 February 2012

WOYWW - 22 February 2012

Flipping heck.  How is it nearly March already? Seriously?! I had a physio appt this morning and she booked me in to come back in 3 weeks and the appt is for the middle of March! Ack!

So here we are facing another Wednesday, another middle of the week, another gay frolic around the workdesks of crafters the world over.

Various things happening on my desk this week:


The mess is slowly returning once again... not anywhere near as bad as it had gotten but I've been letting my good habits of clearing stuff away as soon as I'm done with it slip a bit. Also, the wine/whiskey glasses seem to have been breeding... Tsk tsk! *wags chiding finger at self* Must do better.

Some crafting has been happening though... hanging around at the back of the desk are some recently completed ATCs. There's also a fair few new purchases loitering with intent, waiting to be played with/found a permanent home...

Some yummy Sweet Pea stamps:


And some more Stampin' Up! goodies:


Oh and for those who were interested to see how last week's experiment, as mentioned it my WOYWW post, turned out.... well, it didn't:


I tried doing the gilding with gilding flakes and, as you can see, it really didn't work too well at all. Still, it was an experiment worth doing as it meant that when I went ahead and used the embossing paste and gilding on the actual project I'd had in mind, I used proper sheets of gilding, instead of flakes, and that *did* work. :)


And now I really must to bed as, once again, it's silly o'clock in the morning (and I was going to have an early night tonight, dammit!) and I have a busy day tomorrow!

P.S. In case you're interested, also visible in this week's desk photo is the reason why I've a) been staying up too late and b) not gotten as much crafting done as I'd like - flipping DH got me hooked on the Star Wars MMORPG he's been playing! Ooops! :D


Related Posts Plugin for WordPress, Blogger...