Thursday 28 April 2011

I'm famous!! :D

Ooooh I'm so giddy! I've been published! :)

My subscription issue of Simply Cards & Papercraft came in the post today and I sat idly leafing through it while my daughter ate her lunch... I got to the Reader's Gallery page and immediately thought that one of the cards looked familiar... and then realised it was because it was one of mine! :D

I took a closer look and, sure enough, there was my name under the card and the details of the products I used to make it:


I submitted some cards for one of their competitions last year and although I didn't win the competition, the submission rules did state that they would keep all the cards submitted and may choose to feature them in future issues. I'd had no expectation of that happening and this was such a lovely - and unexpected - surprise! It's the first time any of my crafting work has been published in print. :)

And, even better, it says in the mag that all the readers whose work was featured on the page will receive £10 worth of stash from sponsor Abi's Crafts. Something else to look forward to.

But honestly, that's just an added bonus.... I am just mega giddy at seeing my work in print in a craft magazine! :D

Wednesday 27 April 2011

A new addiction?

I've done it. I've made my first foray into the world of art journalling. :)

I've had a nice journal sitting around for months, since I came across it in a sale bin at Staples, waiting for me to make a start on it. This page is actually my second attempt at starting the journal... I had had a go at creating a background some months ago but it looked awful so I've painted over it with gesso and started again! This is the result:


I really enjoyed making this. I especially found painting on the page very calming... just sitting taking my time adding layers of paint into the doodled designs. I'm really quite pleased with how this turned out... especially as, as mentioned in the journalling, it turned out nothing like how I expected (not least because the spray inks I used for the background turned out a much paler colour when used on top of gesso). I should also point out that, as a newbie to the world of art journalling, I have been reading around for ideas etc and I have taken some inspiration for my page from the quite frankly stunning work of Rosie (check it out at her Rosie's Arty Stuff blog).

I think I am rather hooked on art journalling now and you may be seeing lots more art journal pages on this blog! :)

WOYWW - 27 April 2011

Another week, another Wednesday, another peek at the chaos that is my craft room!

On the desk this week, various bits and bobs of ongoing projects, debris of completed projects and, front and centre, the journal in which I have just completed my first ever art journal page (closed for the moment to help flatten out the page but fear not, inquisitive reader, photos to folllow shortly):


The craft room is once again in dire need of tidying...


And when I say dire... I mean DIRE!! The desk area is bad enough but if I turn to the right... or even worse to the area behind me..... Eeep!


It's never a good sign when you can't close drawers in your storage unit because you're actually using them as a further surface on which to pile things! :lol:

I just seem to have so many ideas at the moment and so many things that I want to work on (and limited time for crafting) that tidying/putting away (and, more pressingly, the need to reorganise to find space to put stuff away properly) is an unwanted distraction from actual crafting so I just keep shoving stuff to one side and moving onto the next project. But it's pretty much reaching critical mass now... plus I want DH to install some wall racks/noticeboard etc for me and he's not going to be willing to do so unless I actually clear some space for him to work in! :lol:

Thanks for stopping by my desk this week. Hope you're having a great WOYWW! :)

Friday 22 April 2011

Handmade gift and card

I'm still hooked on these little mini trays from Craft Individuals and I wanted to make a birthday present for a friend... so I made a decorated tray and matching birthday card using my yummy SU stash:


For the decorated tray I used Newsprint patterned paper, Greenhouse Garden stamps and Bashful Blue and Crumb Cake inks. I curled the flowers for a bit of dimension and added pearls to the centres. The sentiment stamp is from the Cute by the Inch stamp set and I cut it out and matted it onto Bashful Blue card.

For the card I again used Bashful Blue and Crumb Cake inks but I used the Vintage Vogue stamp set this time. I curled the flowers again and added pearls and I repeatedly stamped the little border stamp to give a nice long floral border across the bottom part of this easel card. The patterned paper toned really well with the Bashful Blue and Very Vanilla cardstock.

I also made a little gift box from matching cardstock and patterned paper. :)

Thursday 21 April 2011

The search for the perfect paper trimmer...

I now have a grand total of three - count em, three! - paper trimmers!

Waaaaay back when I first started crafting I got this Fiskars one...


...and it has served me faithfully for many a year. But lately it has rather lost its edge - literally! It no longer cuts cleanly, leaving a raggedy fringe of fluffy fibres that I have to trim off with scissors. Even changing the blade hasn't helped.

So some time back I invested in a super-duper, bells and whistles, does-it-all Clevercuts 5 way trimmer - it cuts, it scores, it perforates, it even has a corner puncher!


...and that's pretty much all I use it for - the corner puncher. It's a great big piece of kit but I find it useless for cutting paper/card. It's hard to hold the paper firmly in place, it's hard to tell where the cut line is, it's hard to correctly gauge the measurements you are trying to cut (especially small ones) and, worst of all, it doesn't cut in a straight line! I find it always veers off slightly towards the end of the cut. So it sits on my desk, taking up space and only being used once in a blue moon when I want a rounded corner and I keep on using my knackered Fiskars trimmer and having to trim the edges with my scissors.

And so, working on the theory of third time lucky, I have now invested in a third (and hopefully final) paper trimmer:


I saw this Cricut trimmer on Create and Craft and decided it was worth a go, especially as they had free P&P at the time. It turned up yesterday and so far I have to say it's looking good! It nice and light and compact, it holds the paper firmly in place and, best of all, it cuts cleanly and in a straight line!

Could this be the end of my search? I hope so! :D

Cards and ATCs

I made a set of ATCs to swap recently... I was inspired by a recent demo on Create and Craft and dug out my brayer and Big n Juicy inkpad:


I kept the background simple, taping off the edges and using the brayer to build up a lovely intense colour. I then stamped over it with black Adirondack ink using the Flutterby stamp from Imagination Crafts.

I also made another ATC... this was something of an experiment for me in using masking and stamps to build up a scene:


I'd had these stamps as part of a set of Kanban stamps I got off C&C/QVC (can't remember which!) a while back. It was fun using them to build up a scene... and getting my head round the concept of having to "work backwards" and stamp the foreground images first. I coloured it in using my ProMarkers. The colouring's not perfect but hey... it's a learning process! :D

I also made a couple of cards recently.

A cute little card to send out with my ATC swap:


I got this funky little cat stamp from a sheet of freebie stamps that came with a craft magazine I bought last weekend. I stamped the cat in black Adirondack and coloured it in with my scrummy new Cosmic Shimmer Drawing Inks and also used the inks to doodle a border. I love the shimmery effect of these inks. The sentiment stamp is from Stampin' Up!

And while we're on the topic of Stampin' Up!, I had a good play with my SU stash to make this card to send to a new friend:


I used Greenhouse Garden, Baroque Motifs and Punch Pourri stamp sets, Crumb Cake and Pretty in Pink inkpads and cardstock and Newsprint patterned paper. I watermark stamped the Baroque Motifs flourish onto the pink card using Versmark ink and I cut into the stamped flowers and curled the petals for a bit of dimension and added adhesive pearls to the centres. I love the soft, warm colours of this card.

Wednesday 20 April 2011

WOYWW - 20 April 2011

This post is brought to you by the magic of mobile internet.

Because my landline, and hence my broadband, is dead as a dodo right now and BT says it's a local area fault at the exchange and they expect to have it fixed - hopefully - by 5pm Wednesday... but it could be as long as until 5pm Friday!! :(

So I've been having to make do with mobile internet on my phone most of the day... until this evening when DH informed me that the clever Samsung Galaxy Tab phone that he got me for Christmas can actually be used as a wireless router! So I can connect to my phone's mobile internet, through my laptop! Which means I can upload photos! Yay!

So here's my craft room as of c.1am this morning:


A positive chaos of ongoing experimentation/playing. Paints and Cosmic Shimmer drawing inks and ATCs and new stamps and another dinky little wooden tray in progress.

Oh and the keyboard is once again rapidly becoming inaccessible for typing purposes...


For the folks who were wondering last week what I was planning to do with the teeny tray, here's the finished product:


I gave it to my mum as a belated Mother's Day present. She was singularly unappreciative. *sigh* But I am loving these little trays which I've why I've bought a bunch more and already started altering a second one. :)

Thanks for stopping by my desk.:)

Monday 18 April 2011

Whole Lotta LOs!!

I've made a bunch of scrapbook pages in recent weeks that I wasn't able to share online, for various reasons. But now I can! :D

The first LO was done as part of a Chinese Whispers challenge on UKS. I was first in my group so I got sent a sketch to use as a basis for my LO and I then send a picture of my LO to the next person for them to use as a basis for their page and so on and so on. I made my page weeks ago but we weren't allowed to upload the pages anywhere until the entire whisper was finished. It was really interesting to see the completed whisper and how the pages had gradually changed along the way and moved away from the original sketch.

This was my LO:


I used some yummy new BoBunny papers and matching die-cut stickers that I had recently bought. You can see the rest of the whisper, including the original sketch, here.

The other LOs which I'd made, but couldn't share at first, were audition LOs for the Scrap Factor contest at UKS. We were allowed to upload them anywhere else online until the auditions had closed and the contestants chosen. I didn't get through but it was fun entering and I made some LOs that I am really pleased with. :)

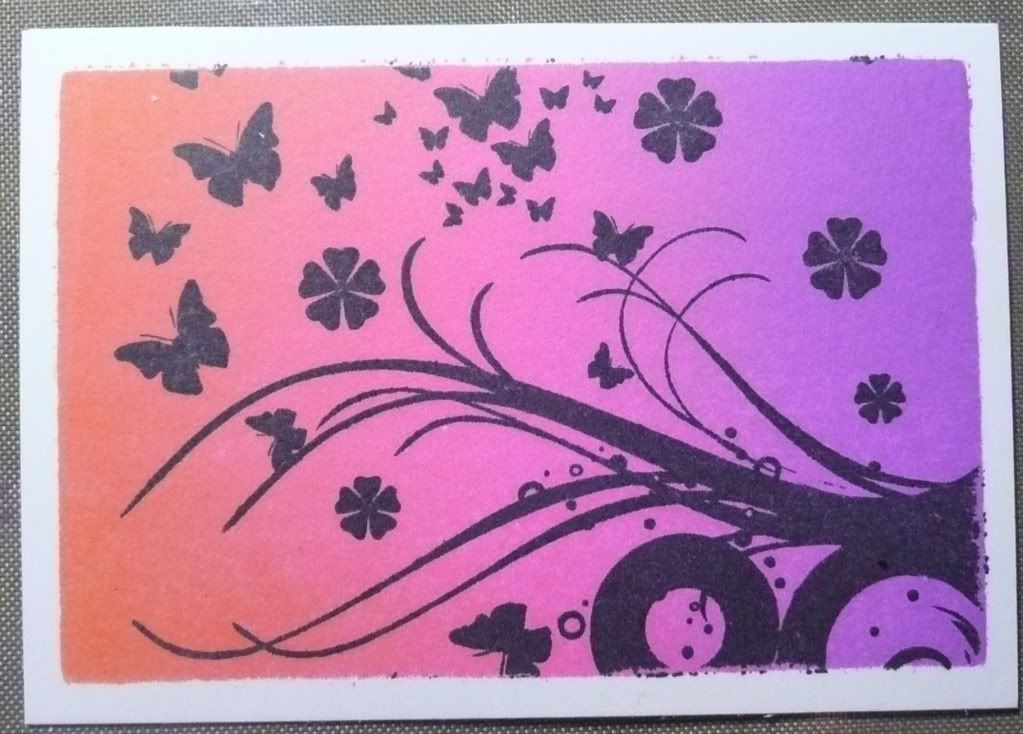
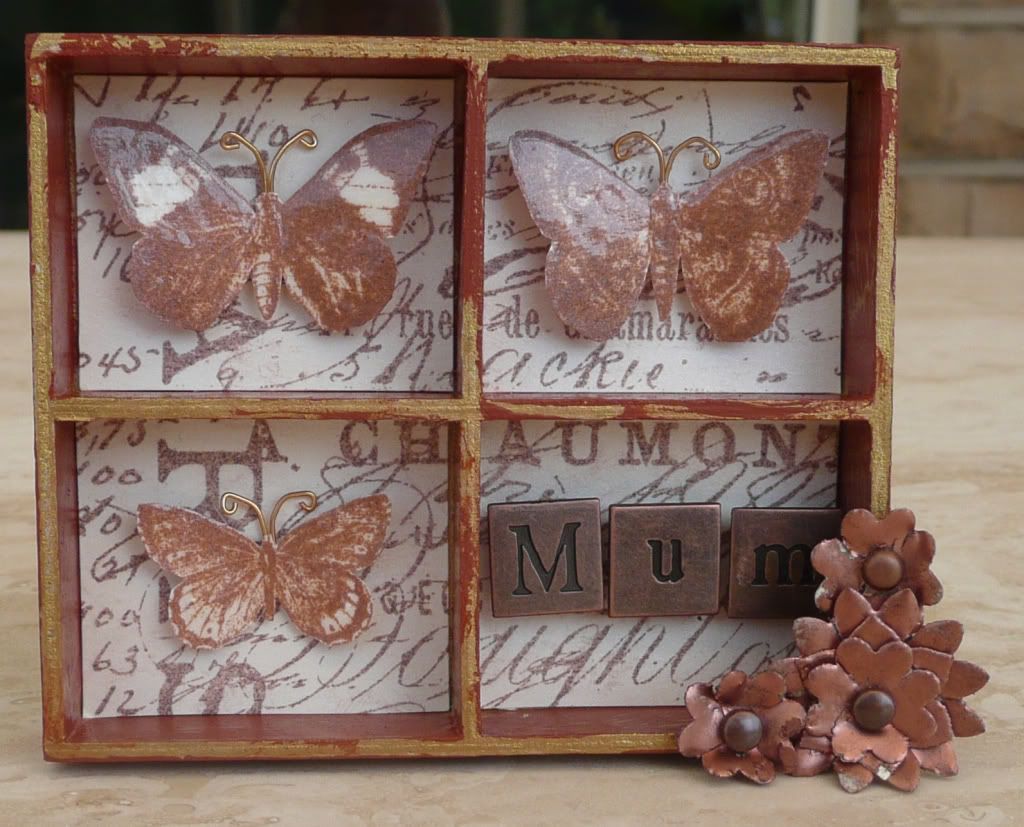
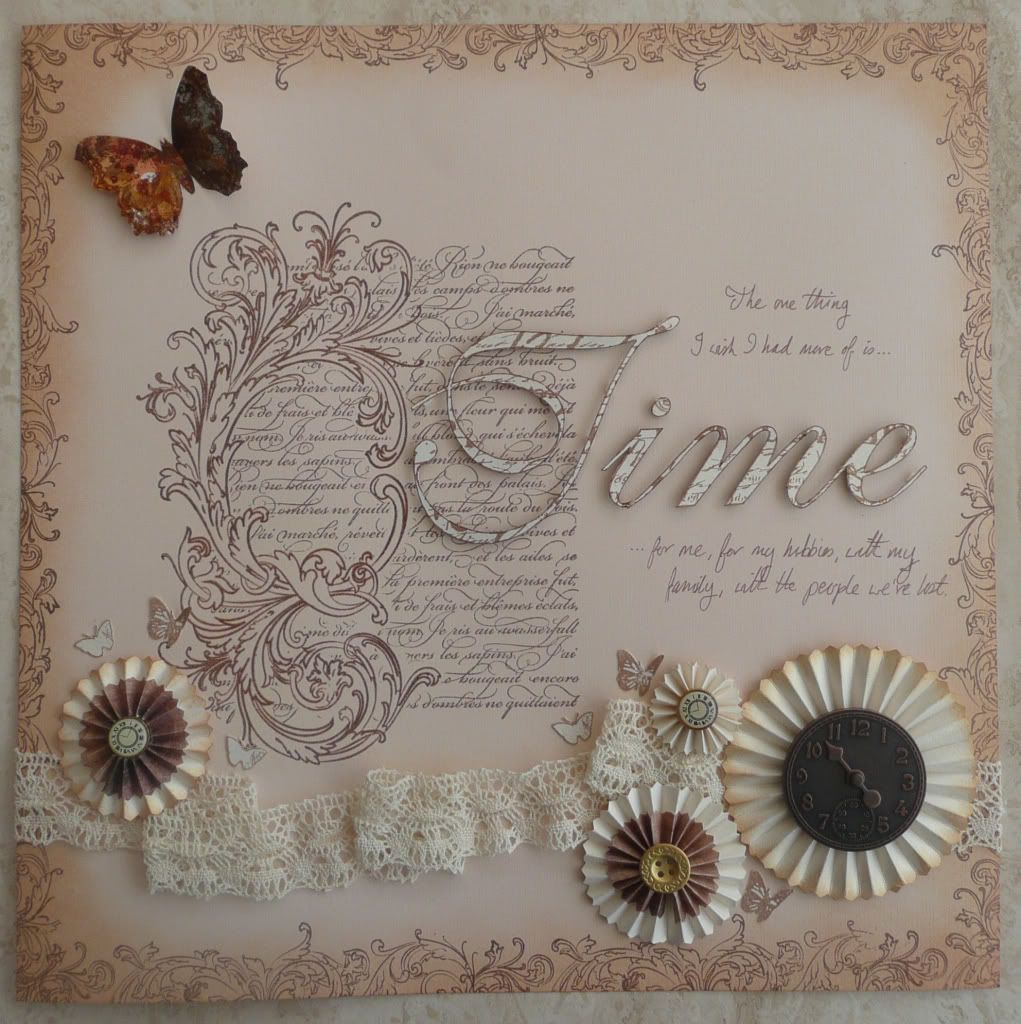
The first of my LOs was for the "no photos LO" requirement:


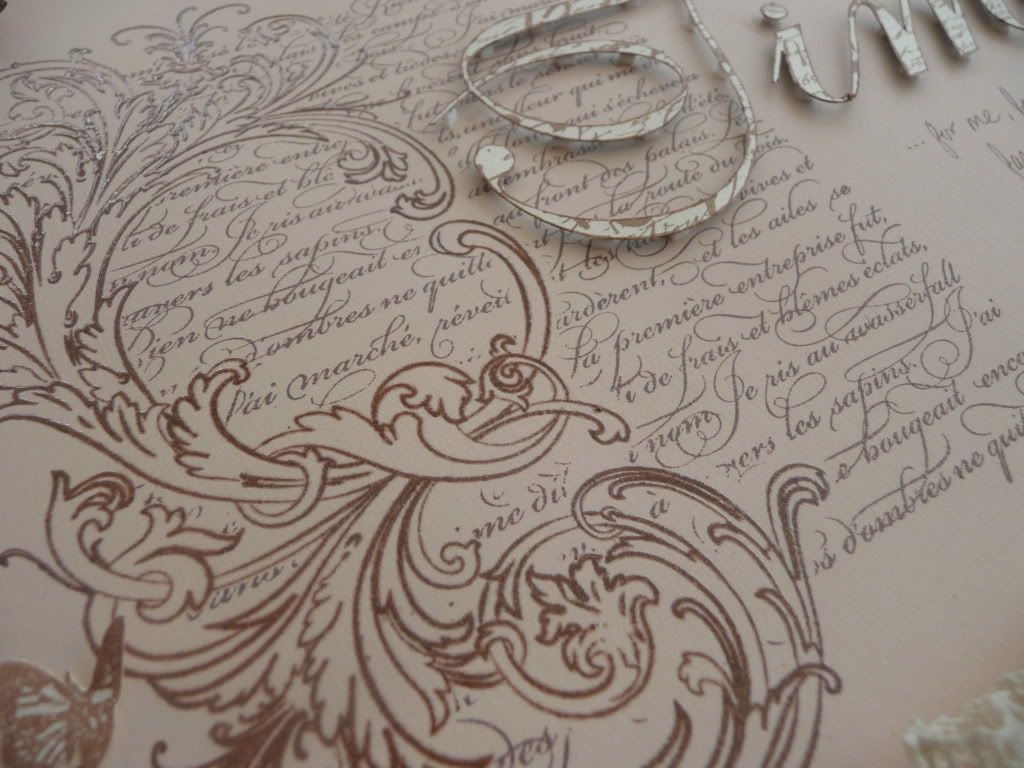
This one was fiddly in the extreme... I stamped and embossed the yummy flourish (a Tim Holtz stamp) and wanted to stamp the text behind it... which meant stamping and cutting out a mask for the flourish! Which took ages! Worth it though for the scrummy effect that resulted. :) I inked around the edges of the page with Tea Dye Distress Ink and stamped over it with another TH flourish stamp. I added a scrap of lace ribbon and made the rosette flowers myself by edging strips of card with zigzag scissors and then pleating the strips and gluing the ends together. I added a TH Idea-ology clock face and some buttons from my "never throw anything away" button and bead jar as the flower centres. I printed out the title in reverse onto cardstock and hand-cut it out before stamping over it with another TH stamp and attaching using foam pads. I added a butterfly made by stamping onto acetate with StazOn and glueing gilding flakes to the back and also stamped and cut out some tiny butterflies and added them here and there.

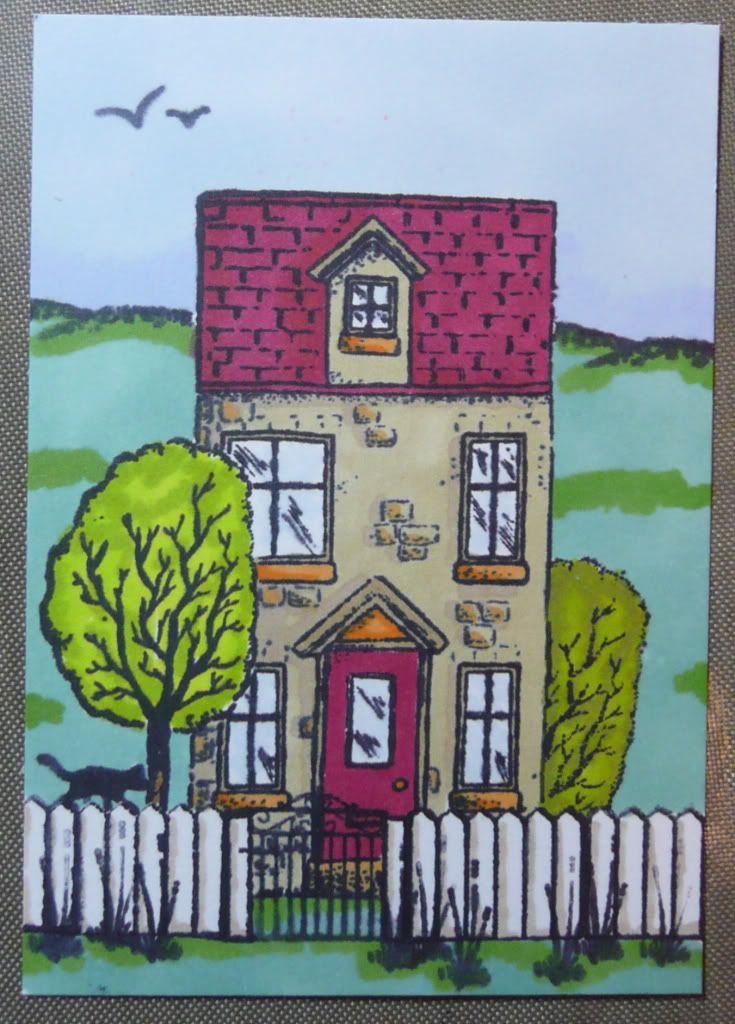
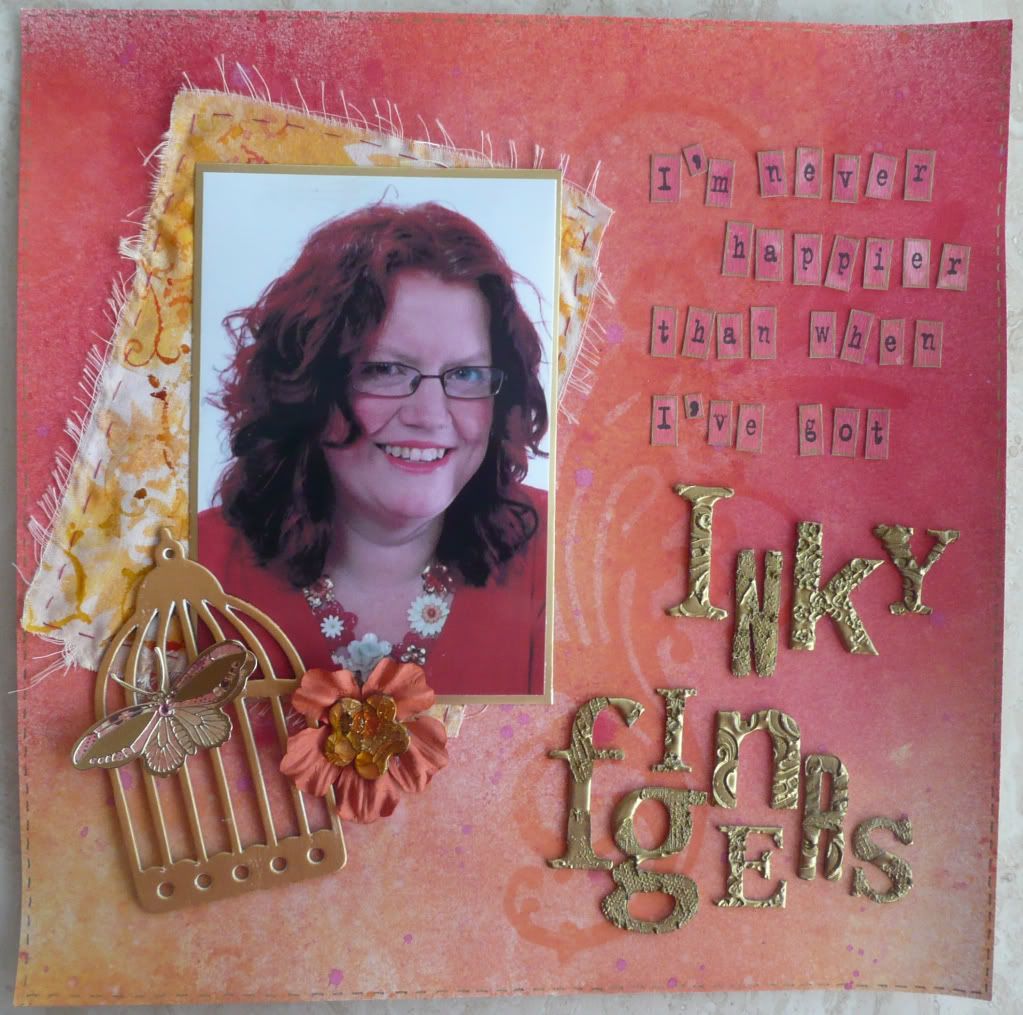
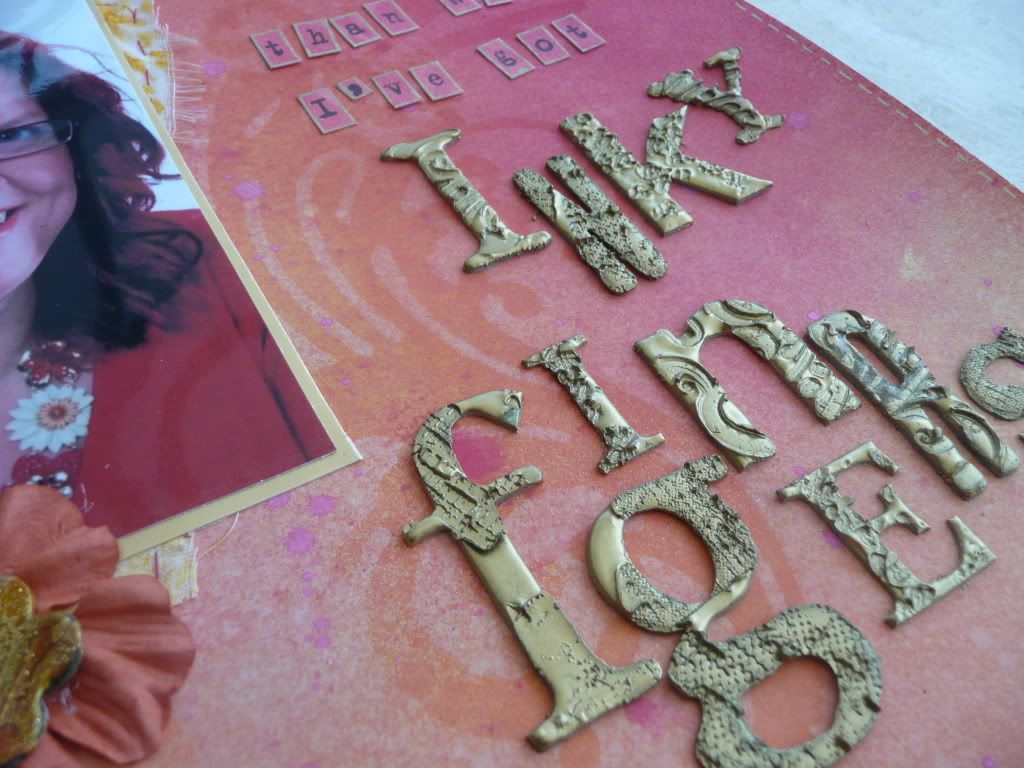
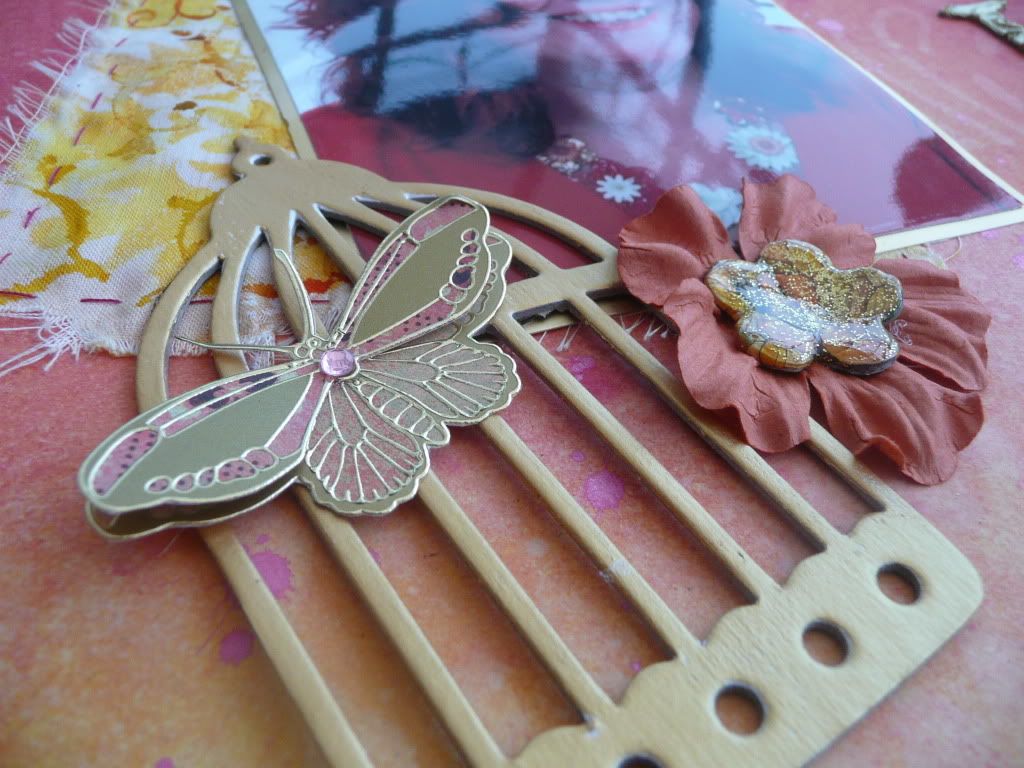
The next LO I made was for the "About me LO" requirement:


I had fun with this one. I played with my spray inks again and a TH flourish mask to make the yummy background and I experimented with watermark stamping onto calico for the piece of fabric stitched behind the photo. I made the large title letters using a mix of 3 different styles of chipboard letters and double-embossed them with Metal Magic, stamping into the top layer with Kaisercraft background stamps. I cut out the birdcage with my BigShot using the TH die and painted it with Inka Gold paint. The buttterfly was made using the peel-offs paper piecing technique and I added Prima paper flowers and one of the faux dichroic glass flowers that I made ages ago! The smaller journalling text was stamped onto spare inked background card using Making Memories magnetic stamp alphabet and the letters cut out and edged with gold pen.

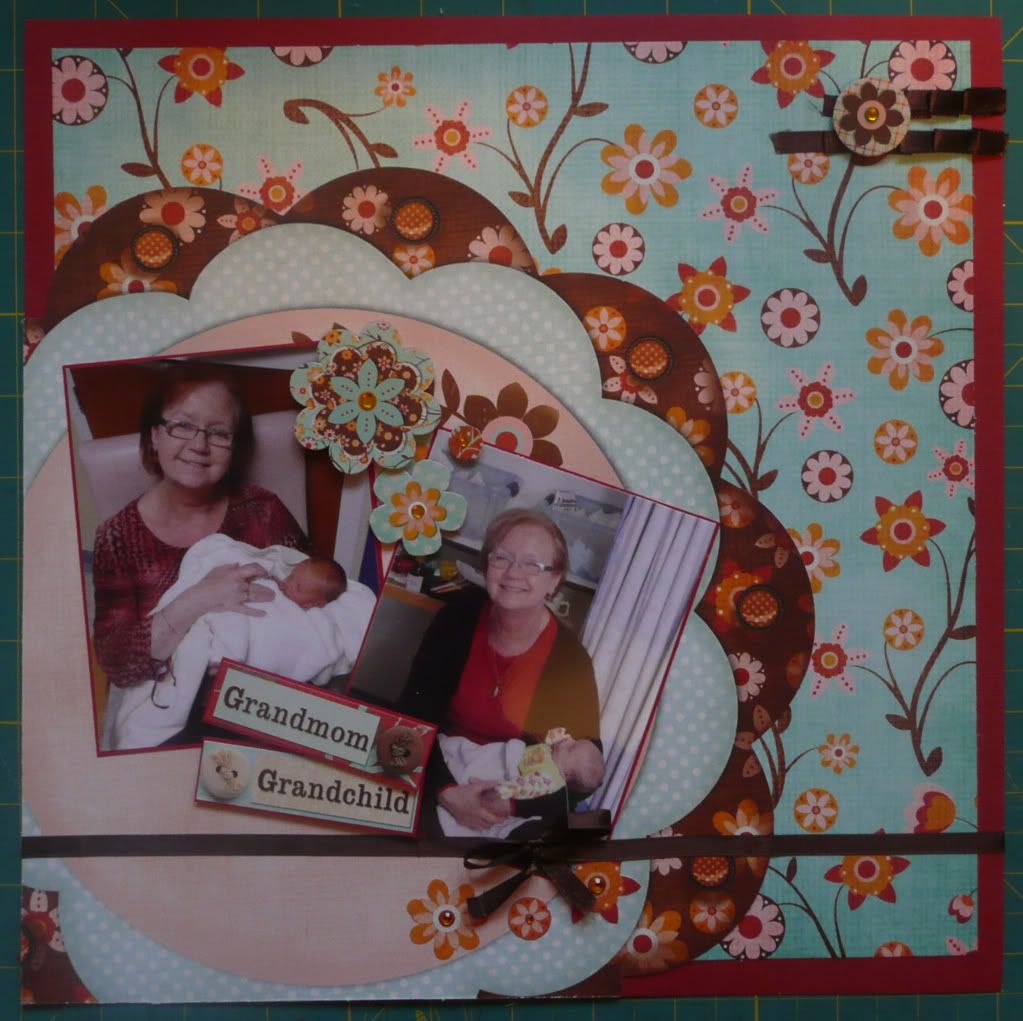
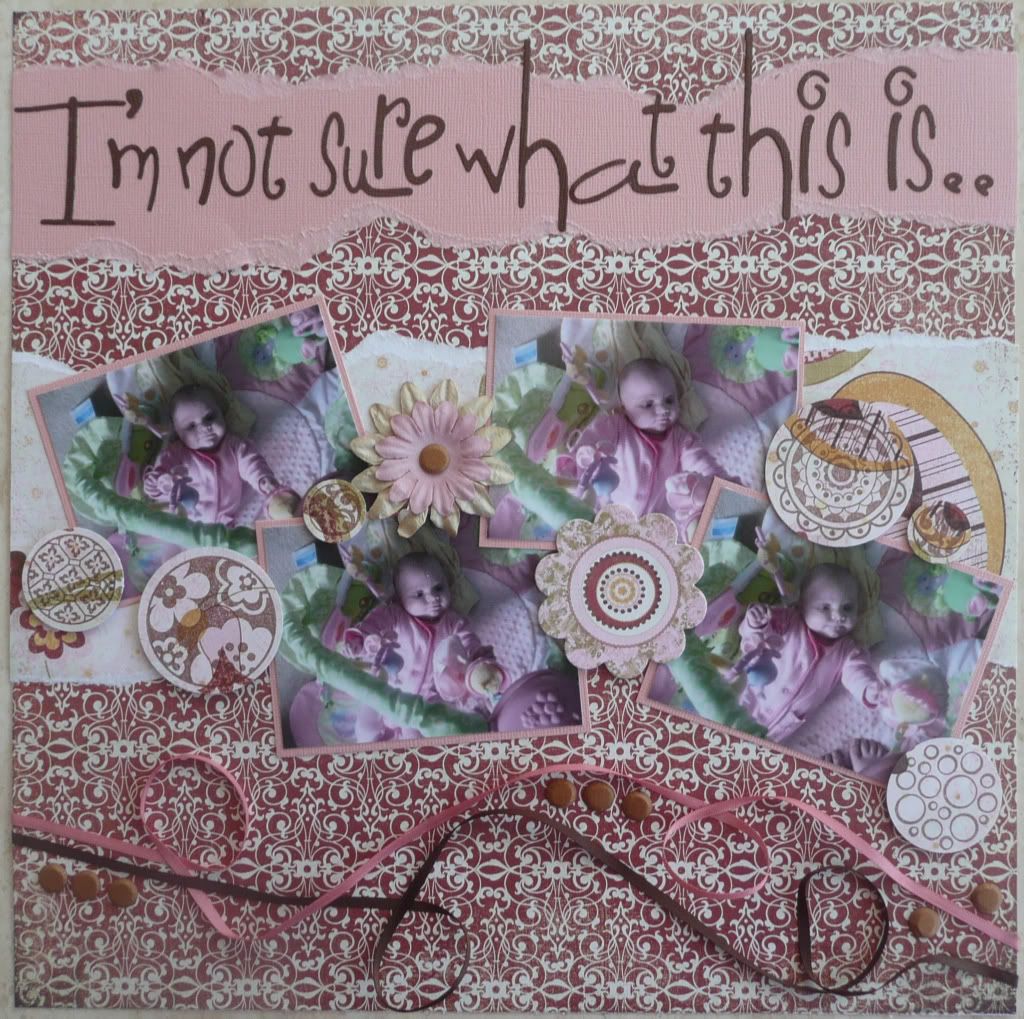
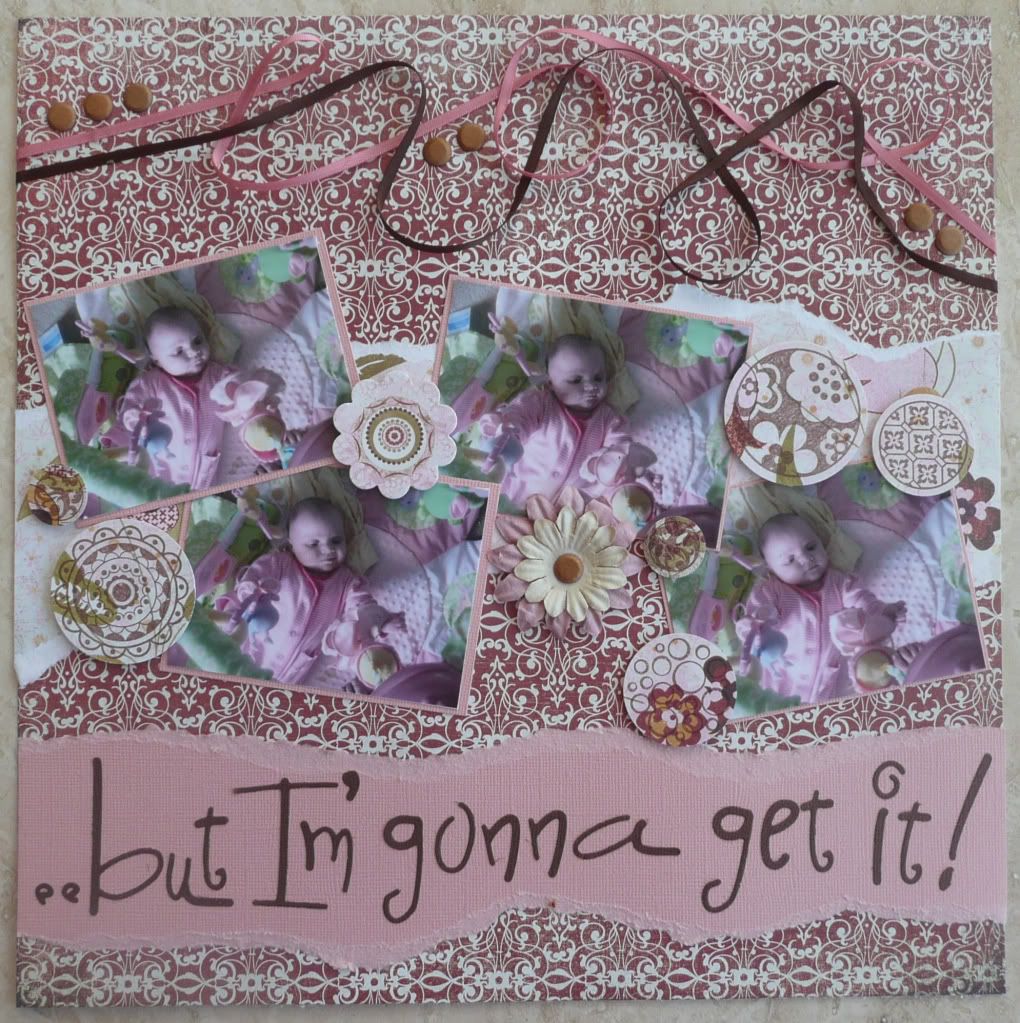
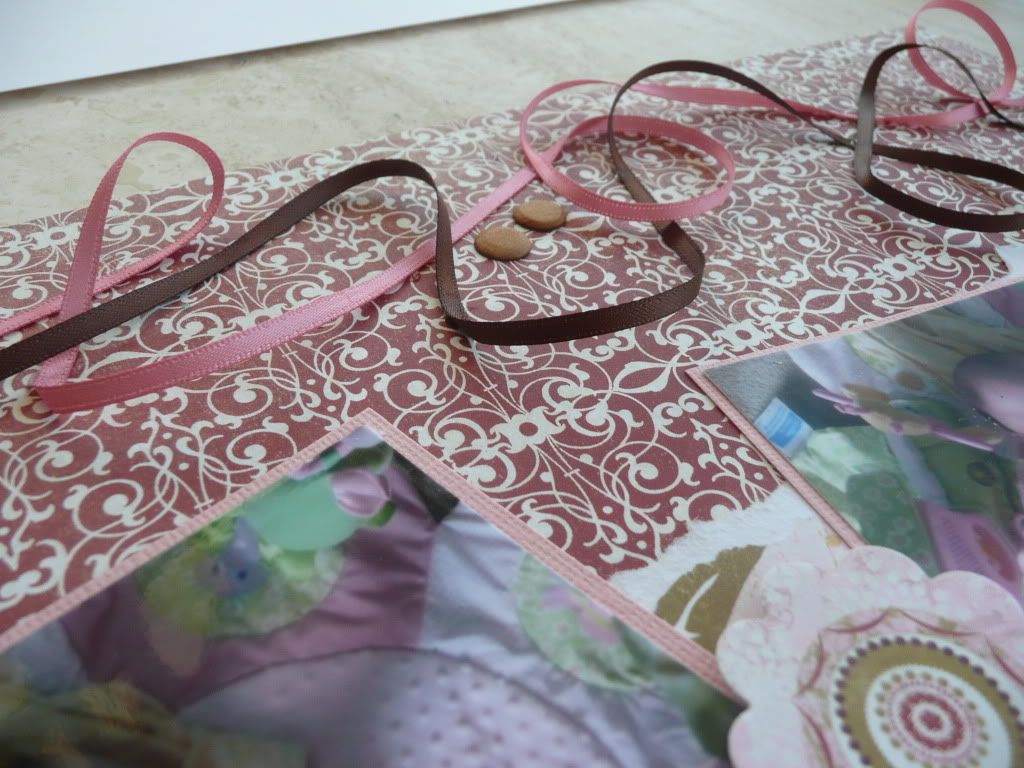
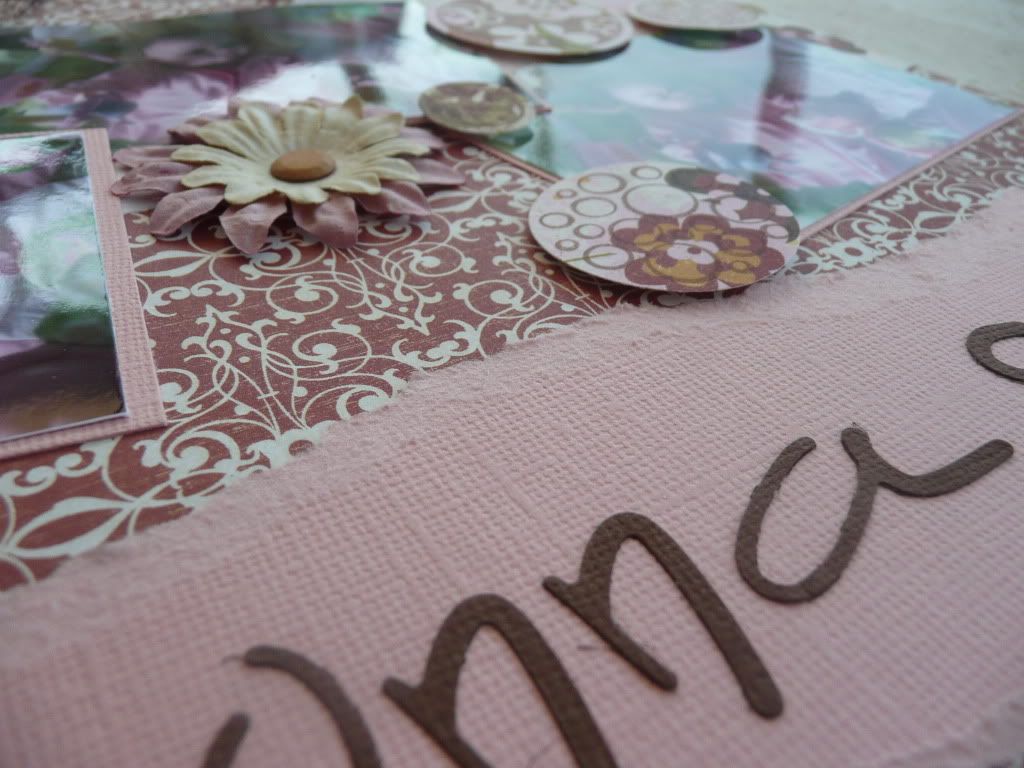
The next LO was for the "double LO" requirement:


I knew immediately that I wanted to use this serious of photos of DD2 having a wriggle on the playmat and trying very seriously to grab hold of the dangling fairy toy! :lol: I used Basic Grey Sugared papers, pink and brown Bazzill textured card and Stampin' Up! Circle Circus stamps. I matted the photos onto pink card and arranged them across the pages and stamped the circle designs onto patterned paper, punched them out and attached them around the photos with foam pads. I also added some Prima flowerrs and a couple of die-cut stickers from the Sugared range. I die-cut the title using Spazghetti sizzlets alphabet and then added some swirls of narrow ribbon and a few Card Candy to finish.

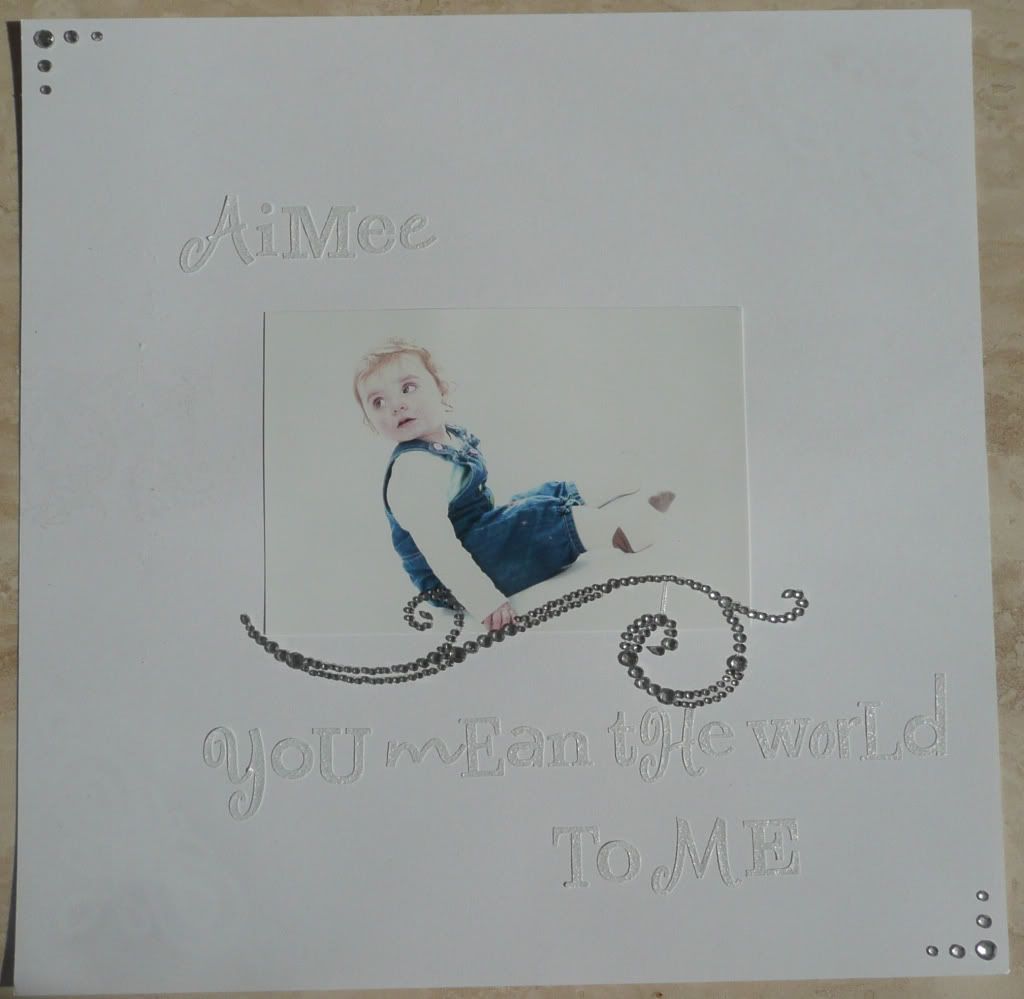
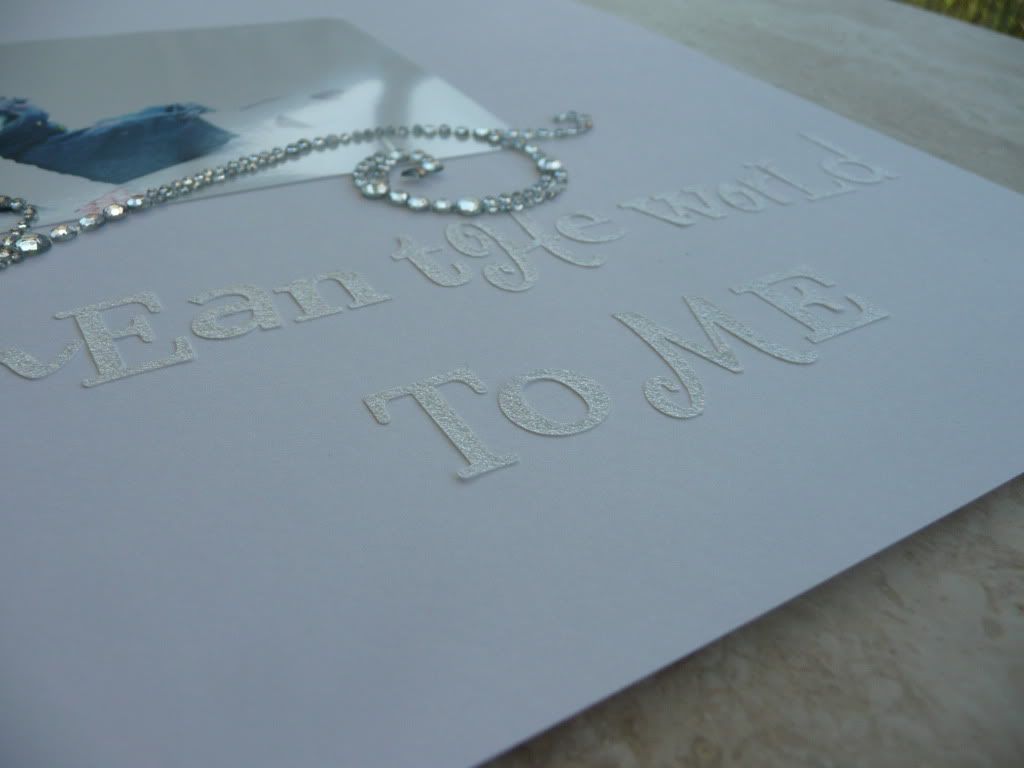
The final LO that I did for the Scrap Factor audition was a general one (no specific requirements) and was inspired by necessity... my printer ran out of cyan ink the evening before the deadline for submitting the LOs, meaning I couldn't print any more photos out! Disaster!! So I had a rummage and found this photo of DD1 taken at the portrait session we had done back in November... this was a spare print that I'd had left over from printing photos off the CD before Christmas, intending to put one of them in a frame for DH as a present:


I was inspired by the simplicity of this photo and the white background and so decided to keep my LO simple and white too. I added a yummy diamante swirl under the photo and used glittery white alpha stickers by Making Memories for my title. I added more gems in opposite corners of the LO and, although it doesn't show up very well in the photos, I also used a flourish mask and some sparkly Versamark in the opposite corners for a bit of subtle sparkle.

I'm quite pleased with how these turned out. :)

Wednesday 13 April 2011

WOYWW - 13 April 2011

It's Wednesday again and time for another peek at the workdesks of crafters all over the world! :)

Am pleased to say I've finally found time to have a blitz in my craft room and not only is the desk much tidier, the floor is too! Of course, it won't stay that way for long... but it's nice while it lasts! :)


On the desk today I've been playing around with acrylic paints - using them to paint ATC backgrounds, using them on stamps to stamp onto ATCs and using them with PVA glue for a crackle effect on this cute little wooden tray (I've got plans for this tray... the crackle effect paint is only the first step :D).


Other than playing with paints I've spent most of my last crafting session mounting a whole heap of unmounted stamps - I'd accumulated a few over the past few weeks but needed a fresh supply of U-Mount before I could mount them. So now they're all done... and I get to play... :)

Thanks for stopping by and taking a peek at my desk. Don't forget to head on over to Julia's Stamping Ground blog for the full list of WOYWW desks this week.

Related Posts Plugin for WordPress, Blogger...