Friday 30 November 2012

It's the Final Countdown!

Da-da-daaa-dah, dada-da-da-daaaah!
 
Heee! Couldn't resist! :)
 
But today is indeed the last day of Creative Craft World's Christmas Countdown.... and you know what that means, don't you? Yup, tomorrow's December. Christmas is almost here folks! :D
 
So we have one more project to share with you and it's a beauty... Melissa has made these stunning Christmas decorations (click on the link to see more about how to make these):
 
Aren't they gorgeous?
 
I hope you've enjoyed all the varied creations the Design Team have shared with you over the course of November. Don't forget, if you've been inspired to have a go at one of the projects featured, please do post a link on the Creative Craft World blog and let us see it.
 
And above all, have a very Merry Christmas! :)
 

Pretty in Pink.... and Blue!

Quick post cos it's waaaaay late and I really must go to bed!
 
Here's a sweet card I made for the Anything Goes challenge at the Dilly Beans Designers and Friday Challenges blog.
 
 
I used this gorgeous Dilly Beans image called Emily Framed and coloured her with my Promarkers in shades of pink and blue and added highlights with a white gel pen.
 
 
I covered my card with pale pink paper matted onto blue card, added a couple of lengths of ribbon and finished things off with a gorgeous intricate flourish - cut with my new Cameo! :D
 
 
Isn't she pretty? I love the contrast of the pastel blues and pinks.


Thursday 29 November 2012

It's a Gift!

Sue has a fantastic project to share today for Creative Craft World's Christmas Countdown... check out these adorable little gift boxes, each made from one sheet of A4 card! Click the link above for details of how Sue made them.


Our final Countdown project will be posted tomorrow. :)

Wednesday 28 November 2012

Sassy Suki

Today is Digi Wednesday at the Sweet Pea Stamps blog, with members of the Digi Design Team sharing creations made using some of Sweet Pea's gorgeous digital stamps.
 
For my card, I used this gorgeous image by Joanne Schempp called Suki:
 
 
I love this image... with her long flowing locks and the sassy/sultry way she's looking over her shoulder. She's fabulous! :)
 
I decided to give her flame red hair to go with the twinkle in her eye. I coloured her with Promarkers and painted the background with Distress Inks.
 
 
I framed her with a an embossed frame (a Marianne Creatables die) in blue cardstock to match her blue eyes and her tattoo and made an easel card, decorating the panels with white cardstock which I ran through an embossing folder before inking the edges with Distress Ink.
 
I finished things off with leaf sprays die-cut from blue card, paper flowers (edged with Distress Ink), a crystal stem and a length of blue chiffon ribbon.
 
 
And just to highlight the sassy sparkle in Suki's eyes, I gave her a touch of sparkly eye shadow. :)
 
 
This stamp is available in digi format from the Sweet Pea Stamps store... and don't forget there's still some fantastic sale offers on! :)


Gifts Galore...

Today's Christmas Countdown project at Creative Craft World is a lovely gift set courtesy of Lou... a bottle tag and a gift box. Click on the link above to go to Lou's blog and see more details*.
 
 
The Countdown will be back tomorrow with more festive inspiration.


*Apols, I've tried multiple times to rotate this photo and it just won't let me!


WOYWW 182

Another week has passed and I'm pleased to report that not only has the desk remained reasonably tidy but the Cameo is now established on the desk, fully installed and up and running! Hurrah! :)
 
Darling hubby did a lot of crawling around under the desk shifting stuff about with the result that the computer tower has been moved to the other side of the desk, meaning the monitors could be moved further along and extended USB cables could be run to the (also slightly relocated) printer and Cameo.
 
So here's my desk this morning:
 
 
No crafty projects to share (sorry, it's been all DT work lately!) but a bunch of digi stamps in the process of being coloured in (I've been sat on the sofa watching TV and colouring) and, on the computer monitors, much browsing of the Silhouette online store! :lol:
 
 
That's it for my contribution to WOYWW this week. Thanks for stopping by. Busy day ahead so I'm heading to bed! :D
 

Tuesday 27 November 2012

A warming thought

If you're feeling the chill at this time of year then you'll love Susi's latest project for the Creative Craft World Christmas Countdown - some fabulous hand-made pocket warmers!
 
 
Check back tomorrow for another inspiring project.

Monday 26 November 2012

Sweet Pea Super Sale!

Today is the last day of the awesome Black Friday sale at Sweet Pea Stamps - a whopping 45% off red rubber stamps and also a special offer on digi stamps (spend $30 and get a $9 gift voucher for your next purchase).
 
Sweet Pea make stunning stamps from the artwork of incredibly talented artists such as Renee Biertempfel, Anna Marine, Rebecca Sinz, Ching Chou Kuik etc. 
 
Here's a project I made recently using a beautiful image from Ching Chou Kuik:
 
 
This image is called Silent Woods and it's one of the new releases from Ching Chou Kuik. I fell in love with it as soon as I saw it and just had to have it! It's available to pre-order in red rubber format (excluded from the sale offer as it's a brand new image) but you can buy it in digi format right now, which is what I did! :)
 
I went with a shabby chic colour scheme for this card, combining white, pink and brown. I coloured the digi stamp with a combination of Promarkers and Inktense pencils and added a touch of shabby chic glamour by edged the image with Stampendous Fran-tage embossing powder in Shabby Pink.
 
 
I used papers from Paper Artsy and dies by Memory Box and Cheery Lynn and finished things off with a paper flower with a centre made from melting more Shabby Pink embossing powder with some Fran-tage mica flakes.


To get yourself this stunning stamp, and others just as gorgeous, get yourself over to Sweet Pea Stamps today and take advantage of the sale before it ends! :)

I'm entering this card into the following challenges:
Challenges 4 Everybody - Anything Goes
Corrosive Challenges - Anything Goes
Glitter and Sparkle - Ribbon and/or Lace
Joanna Sheen Challenge - Anything Goes (Excluding Christmas)
Pile It On - Anything But a Christmas Card
The Squirrel and the Fox - Anything Goes
Drunken Stampers - Not Too Shabby
Sweet Stampin - Flowers

Minibook time...

We're nearing the end of the Christmas Countdown at Creative Craft World now with just a few more projects to share. Today is Sarah's turn and she has created this gorgeous envelope book:
 
 
Pop back for another festive project tomorrow!
 

Sunday 25 November 2012

Scrap that Xmas!

If you're anything like me you've got a bunch of photos from Christmases past still waiting to be scrapped. So to help inspire you, today's offering in the Christmas Countdown at Creative Craft World is a gorgeous Christmas-themed scrapbook page courtesy of Sarah:
 
 
Check back tomorrow for more festive inspiration.
 

Saturday 24 November 2012

Christmas Tags

For today's Christmas Countdown project at Creative Craft World, Sarah shares some beautiful festive tags:
 
 
Check back for another inspiring countdown project tomorrow.

Friday 23 November 2012

Black Friday!

Yup it's that day of the year where there are bargains to be had... and that's certainly the case at Sweet Pea Stamps.
 
The Black Friday sale is on from today until the end of next Monday and there is a whopping 45% off all red rubber stamps (with a couple of exceptions, which are listed on the Sweet Pea blog). There's also a fantastic offer on digi stamps - purchase $30 worth of digi stamps (10 stamps) and get a $9 gift voucher for your next order.. that's basically 3 free digi stamps! :)
 
So get shopping! :)
 

Rockin' Around the Christmas Tree..

...let the Christmas spirit ring...
 
I love Christmas songs. I have a double CD of em and hubby rolls his eyes when I dig it out but it always puts me in such a Christmassy mood! :) When I used to go out gigging as a singer many years ago, I loved doing December gigs as I'd always throw in a few Christmas hits. :D
 
Something else to put you in the Christmas mood is the Christmas Countdown at 
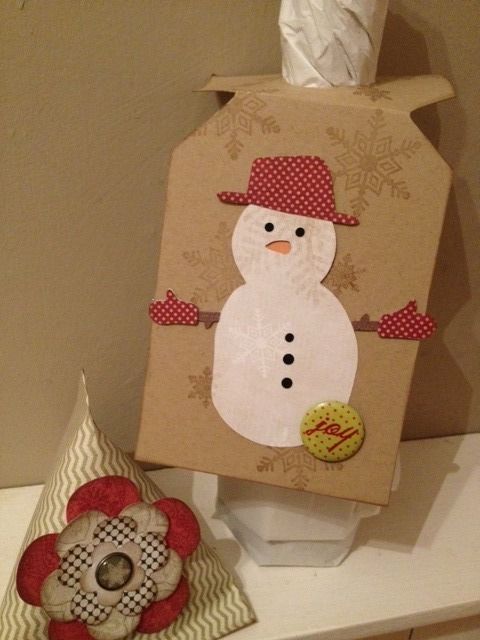
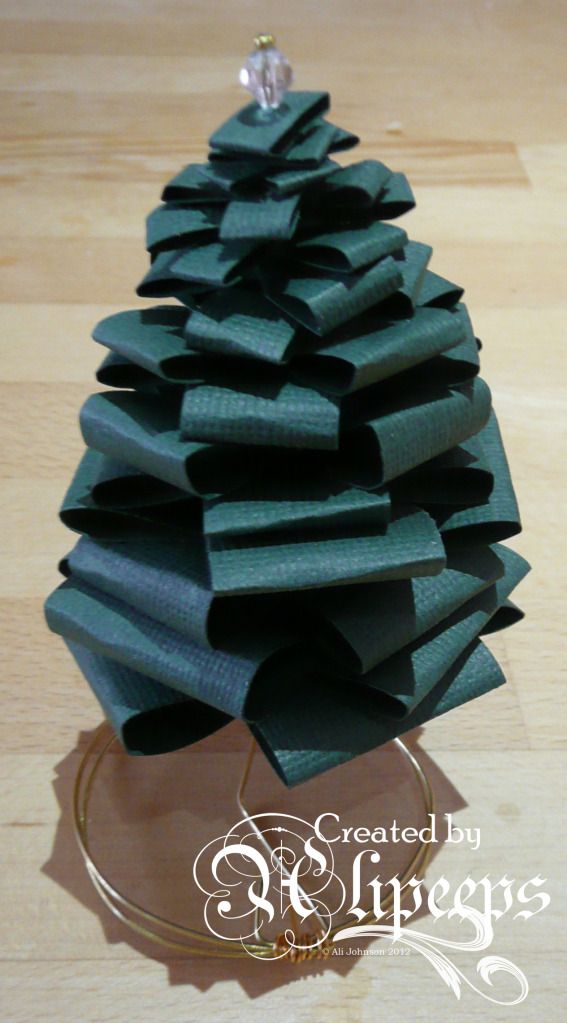
Creative Craft World. We're drawing to an end now (can you believe we're nearly in December already?!!) and today is my last project for the countdown so I thought I'd share a little idea that I came up with a while ago... mini Christmas trees made from card or paper. Cool, huh? They're so easy to make...
 
 
All you need is card or paper (you could use any colour or pattern you like, I went with Bazzill in a traditional green) and some sturdy wire (I used some nice thick wire that I had lying around from my jewellery-making days)....
 
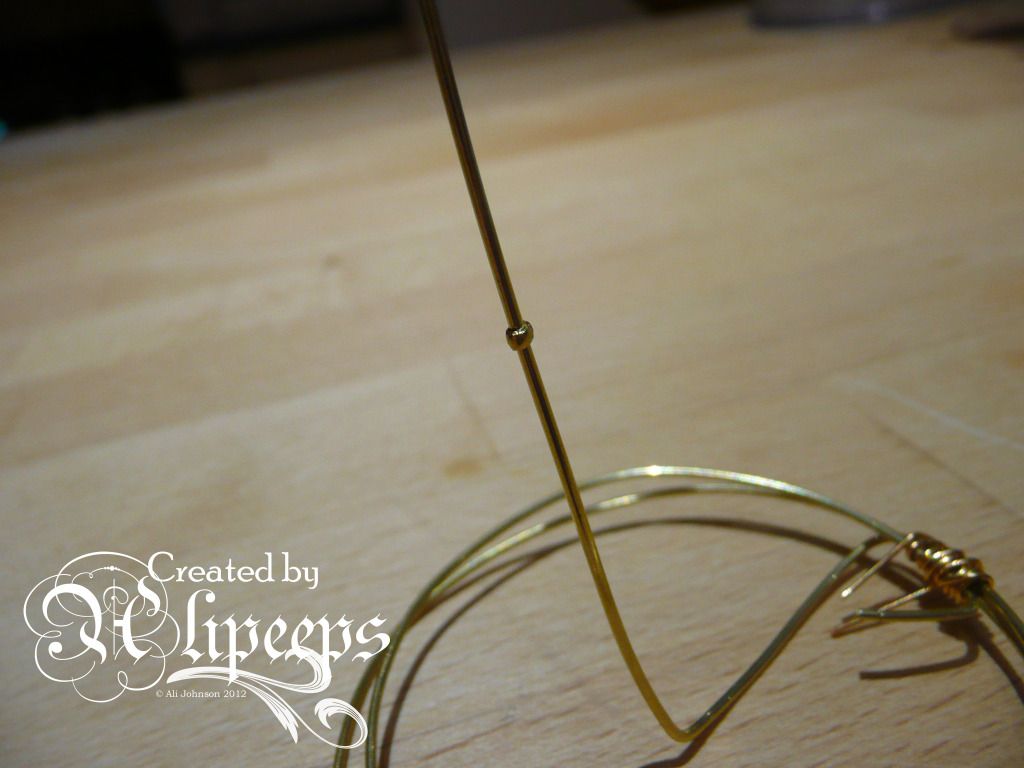
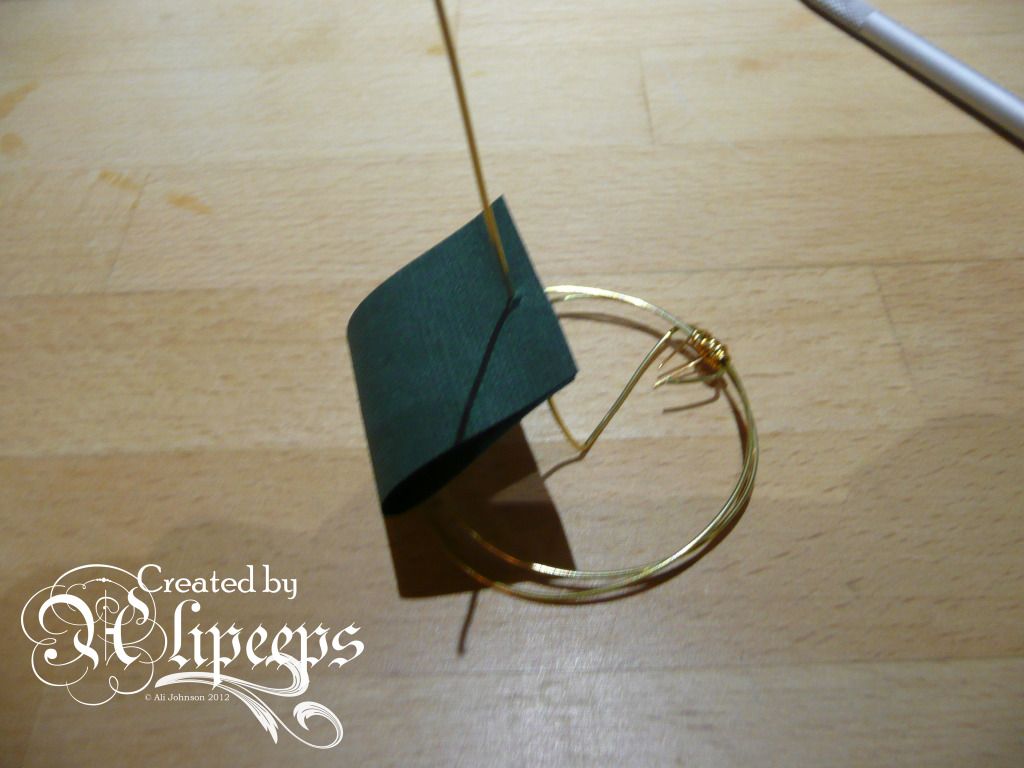
I started off by twisting my wire into a circular base with a vertical stem section in the centre. You don't have to do it this way, you could just as easily poke the wire into e.g. a lump of air drying clay to form the base, I just went for quick and easy! :)
 
 
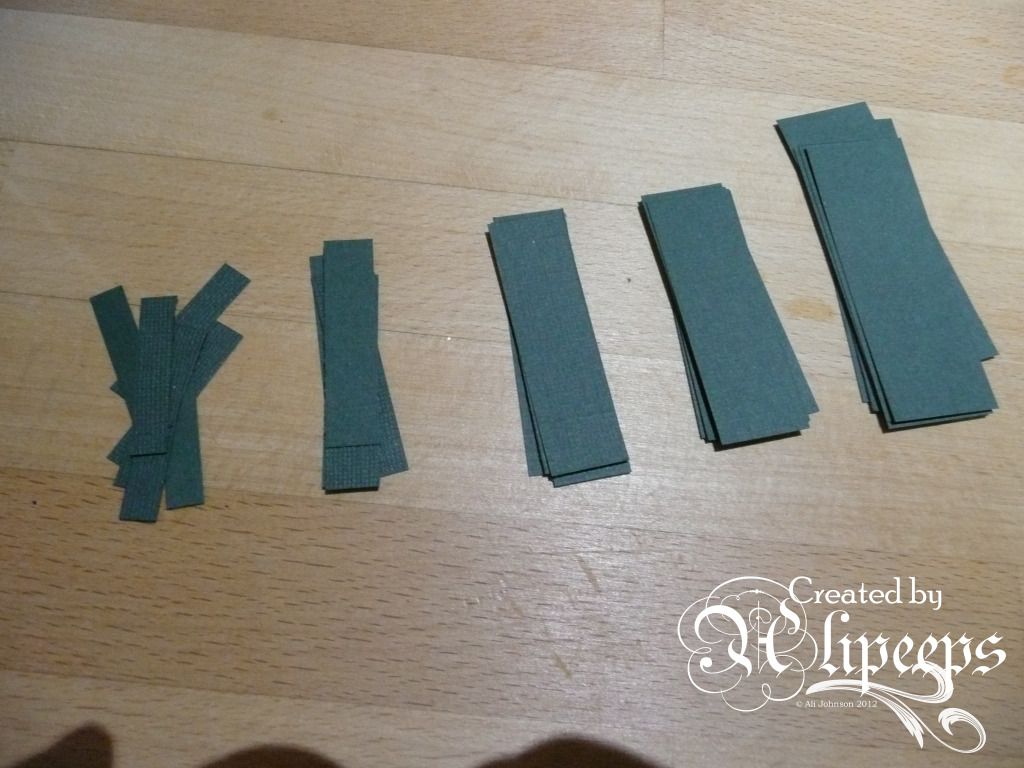
Next I cut my card into strips of gradually decreasing thickness and length.
 
 
To start building my tree I crimped a crimp bead around the stem where I wanted the base of the "leaves" to be. Crimp beads are readily available from hobby stores or jewellery supply stores or you could just blob a bit of hot glue or silicone glue onto the stem and leave it to dry.
 
 
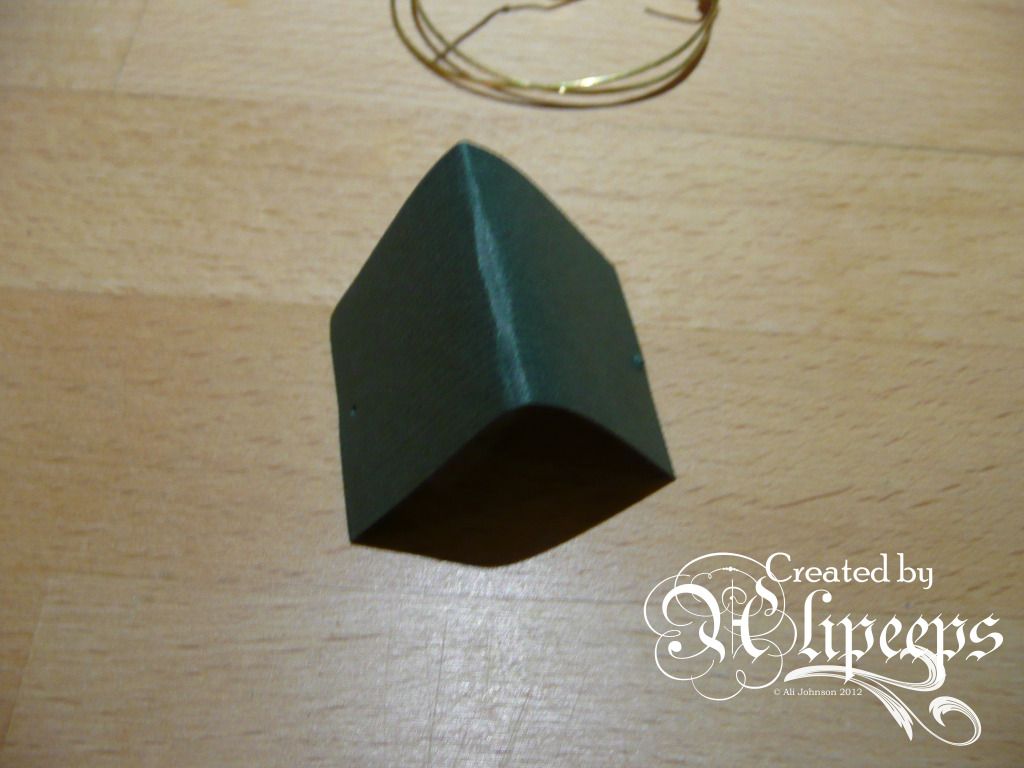
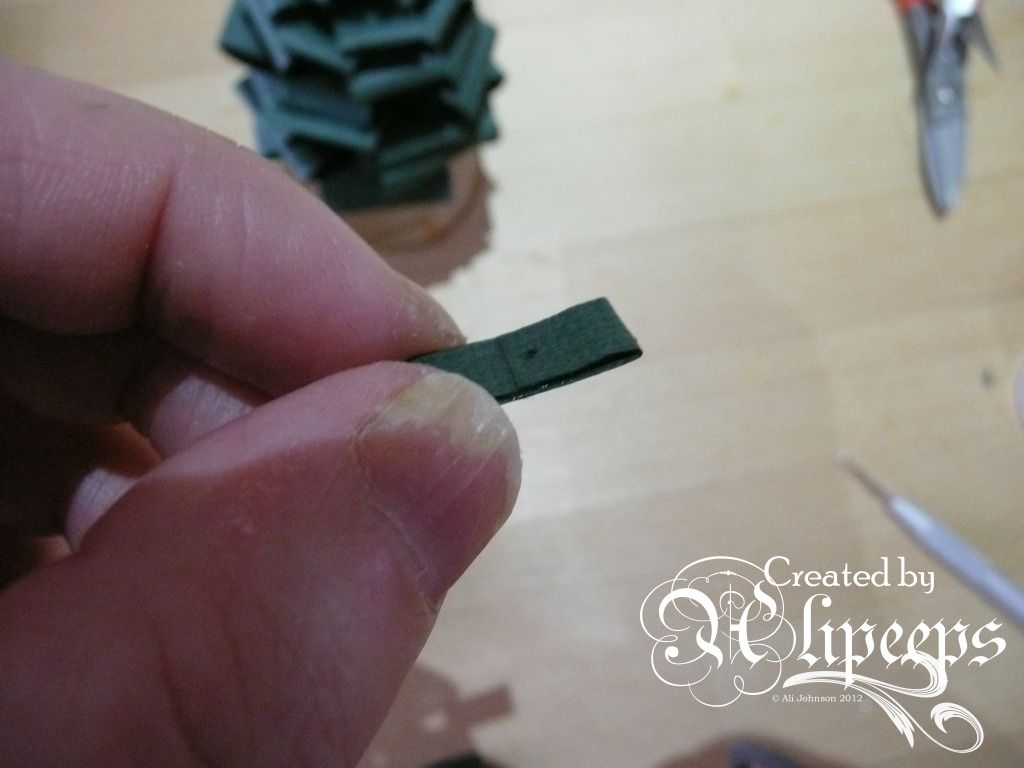
To make the leaves I started with the largest strips of card and folded one in half, not pressing the fold flat so it retained some curve, and used a paper piercing tool to poke a hole through it near the open end of the fold.


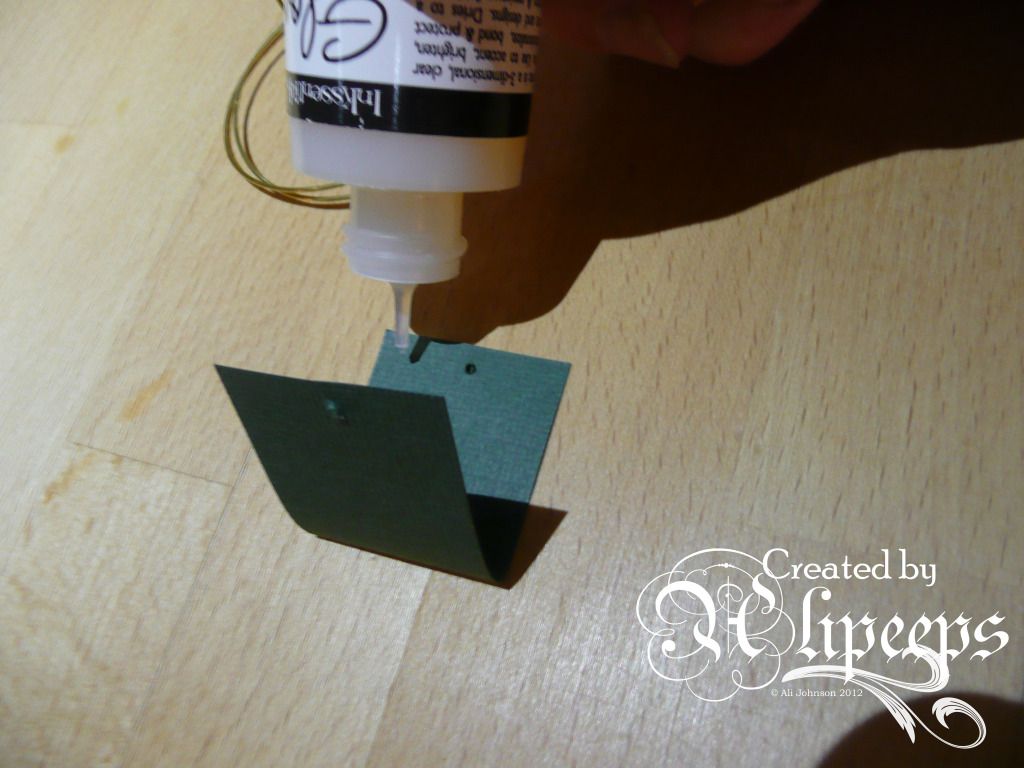
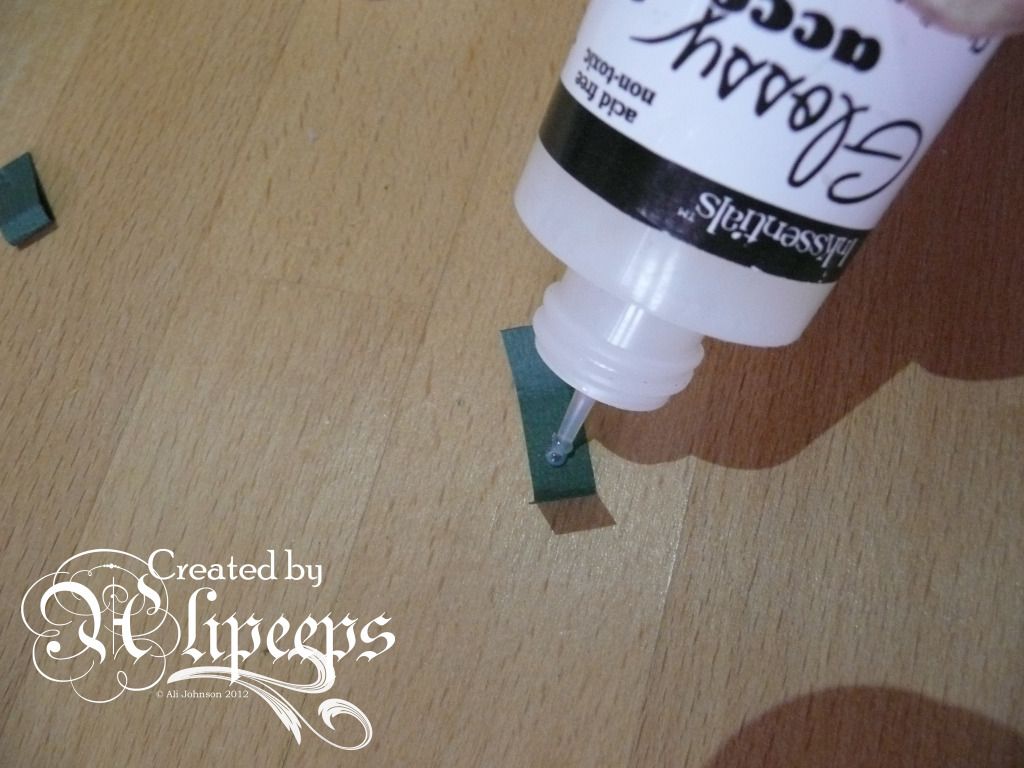
I then glued the open end shut (I used Glossy Accents for all my gluing on this but any other quick drying wet glue would work just as well)...
 
 
... and threaded the completed leaf section onto the stem, through the hole I'd poked through.
 
 
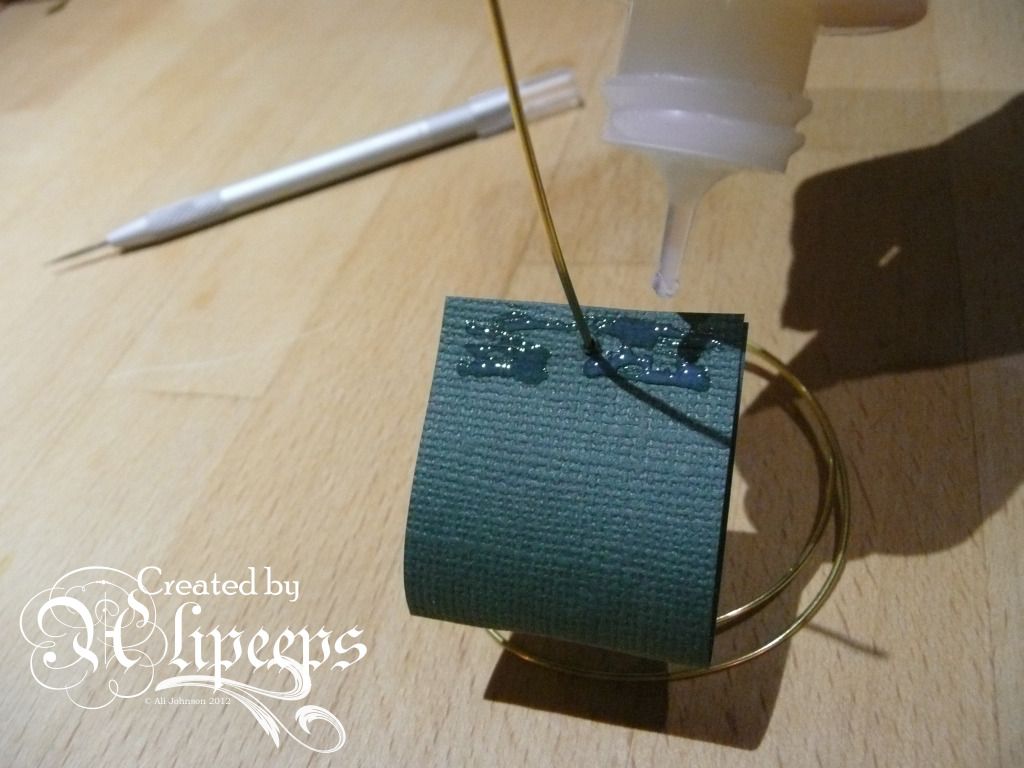
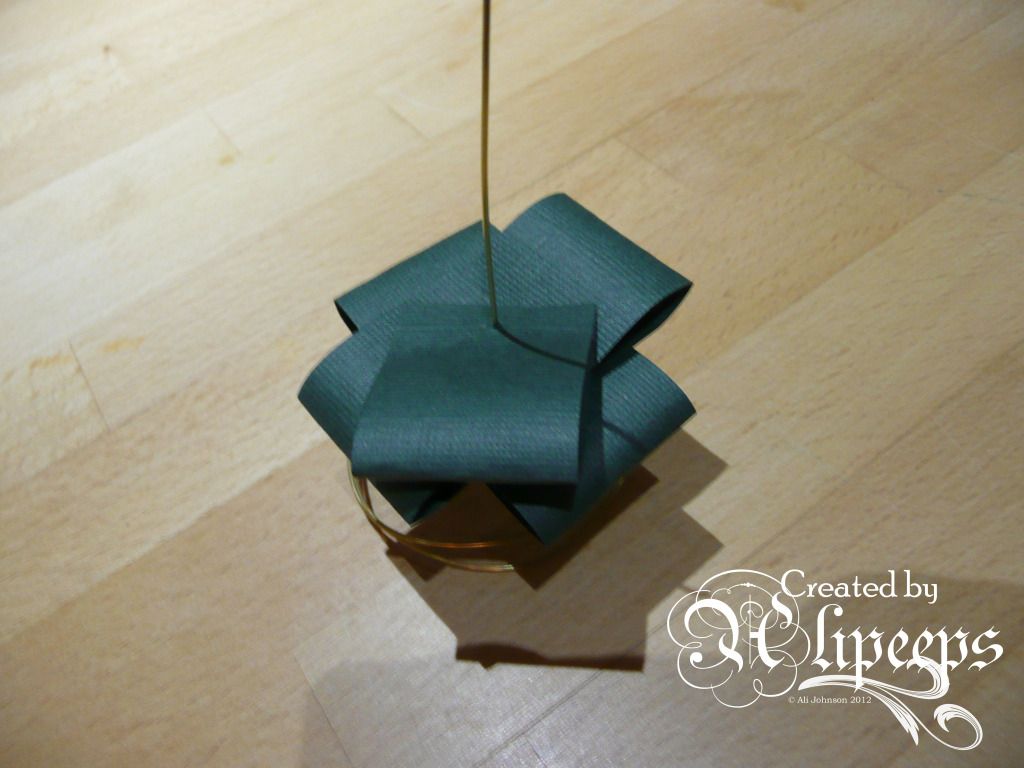
I then made another leaf section in the same way, using the same size strip of card, added a bit of glue onto the top of the leaf already on the tree, and threaded the next section onto the stem, sliding it down and pressing it down into postion directly across from the first section.
 
 
I then made another two leaf sections and added them onto the stem, glueing them in place at a right angle to the first two sections.
 
 
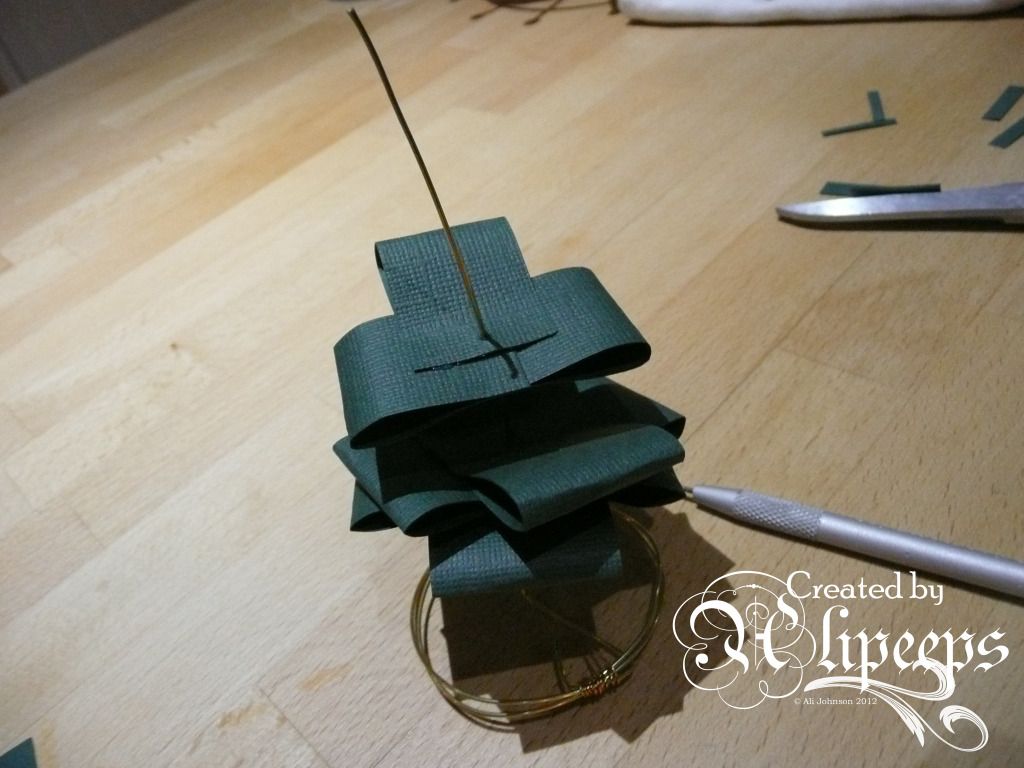
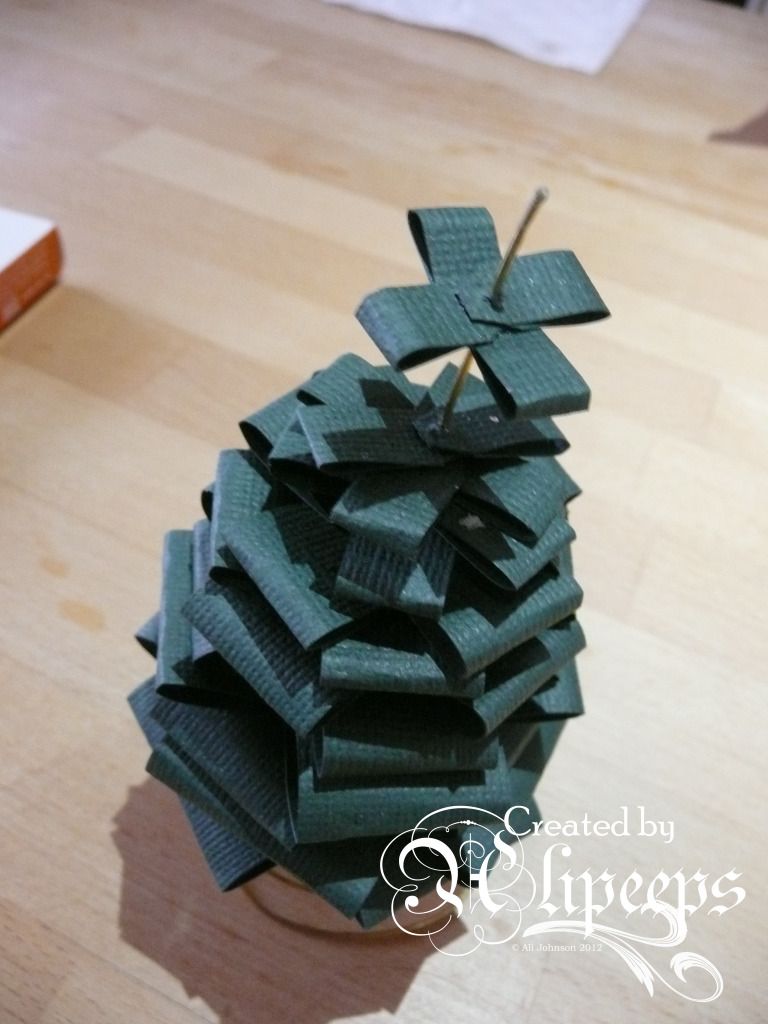
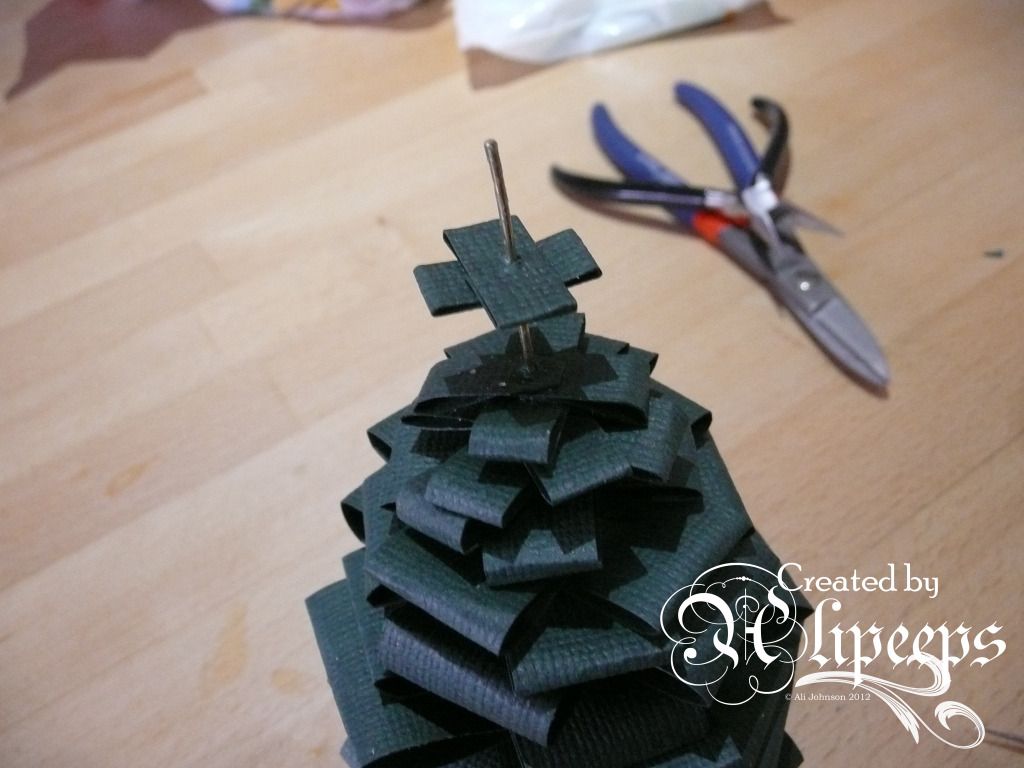
From there on it's just a case of adding more and more layers, 4 sections to each layer in pairs laid across each other at right angles... I also angled each layer so that each new section sat over the gaps between the sections in the previous layer (don't forget to glue each new section down onto the one beneath). As you build up the tree, start using smaller and smaller strips of card so that the tree narrows in shape.


As the tree narrows towards the top, you'll need to start to trim the corners off the folded strips of card:


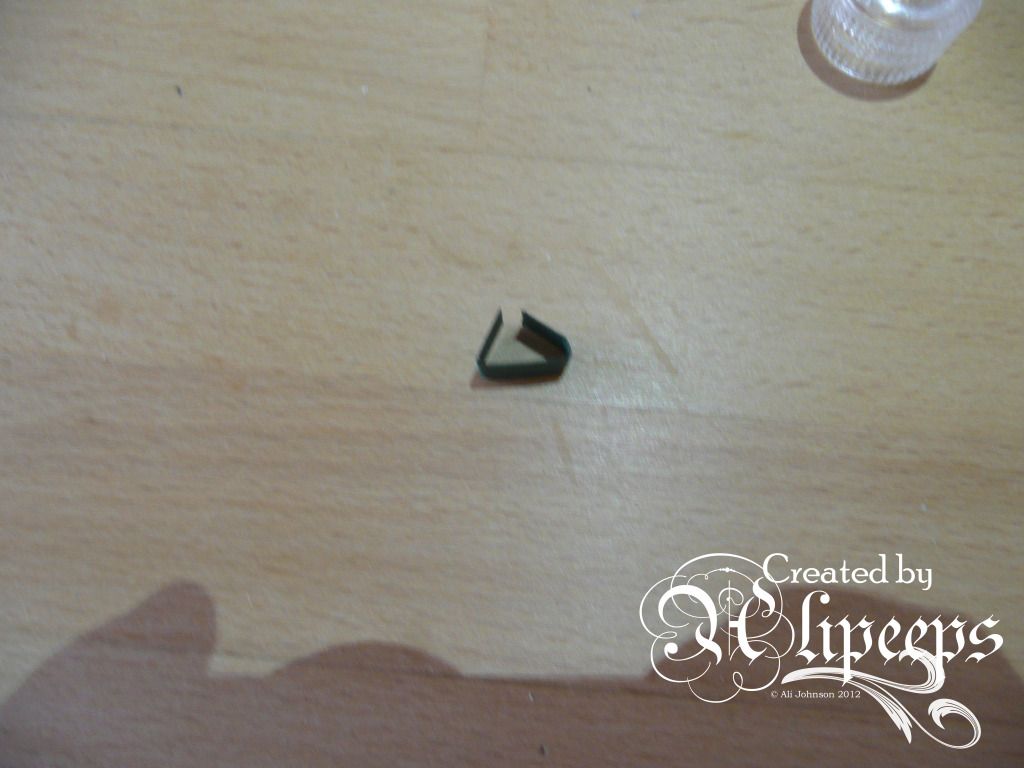
For the final few layers, take strips of card and fold both the ends over:
 
 
Glue them in place:
 
 
Punch a hole through:
 
 
And thread onto the tree:
 
 
Once all your layers are glued into place, finish the tree off with a crystal bead threaded onto the stem and a final crimp bead to hold it all in place:
 
 
Snip the wire off above the crimp bead and that's your tree finished!
 
 
Isn't it cute? They'd make lovely table decorations... or you could work the stem in reverse: put a bead on the bottom of the stem (maybe press it into soft modelling clay to hold it upright while you build the treee) and bend the top of the stem into a hook, thread ribbon or string through it and hang it from your Christmas tree as a decoration! :)
 
Hope you've enjoyed this and all my other Christmas Coundown creations and that you have a fabulous - and crafty - Christmas! :D
 
 
Related Posts Plugin for WordPress, Blogger...