Thursday 8 December 2011

Ali: 1 - PSE: 0!

I've dabbled in digi-scrapping for a while now. I still love to physically scrap but digi is fun too and has the major advantage that I can do it while lazing on the sofa watching TV! :D Plus it's good value for money as of course you only have to buy digi elements once and then can use them over and over and over (and, oh my, there are some gorgeous kits out there!).

However, I've found my digi-scrapping a bit limited by the software I was using. I've been using Scrapbook Factory and while it's a great basic program and very intuitive and easy to use, it simply can't do the more advanced functions like blending images into one another or using brushes. I did used to have Photoshop Elements some years ago but my computer has been reformatted/rebuilt several times since then and I've never been able to find the disc to reinstall it. And of course now it'll be several versions out of date anyway. So I've been seriously hankering to get PSE back on my computer for some time... so when I saw Amazon offering PSE 10 for £30 recently, I snapped it up!

It arrived and was installed yesterday and today I have begun experimenting. I have to say that I have never found PSE (whatever version I had) to be particularly easy to get on with - the controls are not intuitive and trying to work out how to achieve the result you want is often an exercise in frustration. However, knowing this in advance, I girded my loins and let battle commence!

It took a serious chunk of time, a lot of googling for info/tutorials - and quite a bit of swearing! - but in the end I prevailed... and so I can now proudly unveil my very first PSE-created digital scrapbook page:

I'm really rather pleased with this. I've managed to achieve the clever, "professional"-looking effect that I see in digi pages in the gallery on UKS and I feel like this is my first "proper" digi page. :)

Btw, all the gorgeous elements on this page are from the Inner Storm kit by Creative Victorian (check em out - they have some stunning kits!).

Thursday 1 December 2011

Stamper of the Year!

So I've been impatiently waiting for postie to bring me the new issue of Craft Stamper magazine... and there was a good reason for my impatience. I had entered Stamper of the Year competition and was fortunate enough to be shortlisted... so I was desperately waiting to find out if I had been chosen as a winner!

Well, the magazine arrived today.... and I am thrilled to bits to announce that I am a runner-up in the Stamper of the Year competition! I'm so excited to see my work in print and just amazed and grateful that the judges liked my projects! :)

The magazine actually arrived as I was on my way out of the house with the kids to run some errands so I quickly strapped the kids in their carseats and then sat in the car and ripped the bag open and scanned the pages for the competition results. I was so excited to see that I was a runner-up and have been pretty much on cloud nine ever since - I must have looked a right weirdo walking around Dewsbury town centre with a huge grin on my face! :lol:

Wednesday 30 November 2011

WOYWW - 30 November 2011

*Ahem* Remember how I was having a big tidy up and clear-out in my craft room?

Yeah. Not so much, as it happens. :/

I got part way through the process and then got derailed. Initially by interference from hubby who decided to have a bit of a tidy himself... unfortunately, his definition of "tidying" basically amounts to picking up everything that he thinks is where it shouldn't be... and dumping it in my craft room/office! I have tried to point out to him that this isn't actually tidying, it's just dumping stuff on me so that I have to tidy it, but he can't seem to see how this is an issue. :/

So I've had to hold off on the craft room tidy until I can clear away the extra layer of crap that hubby added to the chaos, and on top of that I've had to abandon tidying anyway in favour of prepping for a workshop tonight.

So this is what the craft pit looks like this morning. *sigh*

The floor space is mostly taken up by a giant bin bag of rubbish, various bits and bobs mid-sort out, and my artbin box being packed for the workshop. The usual work area of my desk is buried beneath crafty stuff and stuff that hubby dumped:

And I've had to do my crafting/prep at the other end of the desk, which I had previously cleared!

One nice feature of the newly-"recovered in crafting debris" desk though is that I finally got around to getting a fabby Color Caddy for my Stampin' Up! inkpads, rather than having them piled up loosely in a box on the Expedit. Now I just need to work on filling it! :lol:

Thanks for stopping by my desk - have a fun WOYWW and I'll hopefully have a tidier room to share next week! :lol: (I always seem to say that, don't it?)

Monday 28 November 2011

Butterfly card

Here's a little notecard I made:

And here's all the stuff I used to make it! :)

I ran a square of Whisper White cardstock through my BigShot with the Elegant Bouquet embossing folder and then used my Stampin' Pastels (whoops, forgot to include that in the above photo! :lol:) to highlight the embossed petals. I matted the embossed card onto Real Red cardstock and attached it to the front of my card blank. I cut butterlies from Real Red cardstock using the Beautiful Wings Embosslit die (I use this die SO much!) and stamped the pretty border frame from the Four Frames stamp set in Real Red ink onto Whisper White cardstock and punched it out with the co-ordinating punch. I stamped the greeting into the punched out frame using Basic Black ink. I attached the framed greeting to the card front using Stampin' Dimensionals and glued on a couple of butterflies and, to finish, added some pearl Jewels to the centres of the embossed flowers. :)

Wednesday 16 November 2011

WOYWW - 16 November 2011

Errrm. Remember how a few WOYWW's ago I said I'd taken a photo of the room in all its chaos but was too embarassed to show it to you? Well... this week I'm going to show you. Because right now there is nothing worth showing you on my actual workdesk but it's absolutely buried because...

I have finally reached the end of my tether and begun a full-scale clear-out/tidy-up/reorganise of the craft room! I'm not just surface tidying, I'm actually trying to clear space and to rearrange how my stash is stored. My ultimate goal is actually to try and get the desk completely cleared, or as near as, so that I can clear the windowsill and DH can finally install the blinds in the window, and to completely clear the floor so that DH can get down the end of the room and install the Ikea wall racks and noticeboard etc that I bought probably over a year ago!!

So brace yourselves... this is how the craft room is looking today:

Now, please bear in mind that, as bad as this looks, this is actually a massive improvement! :lol: Annoyingly, I can't find actually find the "before" photo that I took a couple of weeks ago for you to do your own comparison but suffice to say that a lot more floor is now visible (hubby nearly had a heart attack when he phoned and I told him you could now see floor in my craft room! :lol:) and two great big plastic tubs of stuff have been removed from the room. I've sorted through a lot of piles of stuff and made a start at putting some away, although a lot of it may still get moved around before it finds its final resting place. And look, you can actually see the bin... it hasn't got a box of stamps sitting on top of it! :D

There's lots more to do and am still chewing over ideas as to how best to reorganise my storage... I'm certainly going to have to remove my clear stamps from the craft unit and store them elsewhere as they are overflowing the drawers. I'd like to think that it might all be done and sorted by next week's WOYWW... but I wouldn't bet on it! :lol:

Thanks for stopping by on your trip around the WOYWW desks - hope you're having a fab Wednesday!

Tuesday 15 November 2011

New baby card

I spent last night packing up some of my DD1's tiny little "early baby" size clothes that she wore when she was born... DH's ex-boss, with whom he is good friends, became a father for the second time last week but the baby was a month early and when the staff on the neonatal ward changed her clothes, they sent the clothes her parents had bought for her to the general wash, from whence they never returned(apparently, the hospital policy is that they should have put name tags in the clothes (how bizarre!!) - at the hospital where I had both my girls, a sign was simply put on the cot to say that baby was wearing her own clothes so if the nurses etc changed their clothes, they would just put them in the cupboard under the bassinet for the parents to take home and wash).

So anyway, I'd offered to send them some of DD1's old clothes to tide them over and they accepted... so I had a rummage in the cellar and packed up some teeny tiny babygrows (so bizarre to look at them and think DD1 was tiny enough to wear them - in fact they were big on her at first!) and of course I had to make a card to send with them:

I love this Mo Manning stamp from Stampavie... it's soooo cute and just perfect for new baby cards. :) I coloured her in with ProMarkers and used some My Minds Eye papers that came free with a magazine and a K&Co flower brad. Just a quick and easy simple card but hopefully one that they'll like.

Wednesday 9 November 2011

WOYWW - 9 November 2011

Bit late to the WOYWW party this week as I've been out of the house all day. Was up and out early this morning to head over to Art From the Heart in Harrogate for an art journalling class with the very lovely and talented Kate Crane!

I had a fantastic time... not only a great class (and sooo many goodies to play with!) and good company but also it was so nice to have a few hours to myself sans kids! :lol: My mum had them for the day for me as an early birthday present. :)

So the workdesk I am sharing today is not my usual one.. technically, it's not mine at all, it's Dyan's, but hey, it was the workdesk I was using today so here it is in all its glory: :)

The work-in-progress shown above was the background for an art journal page. And here's how it ended up:

It still needs a bit more before it's finished I think. I also started the background for a second page during the class and we also made a set of tags each showcasing a different painting/inking technique which we can use for future reference/inspiration.

All in all, a fabulous, inky, painty, creative, fun day. :)

Wednesday 2 November 2011

Big Fat Catch-Up - Cards and ATCs!

I've gotten rather behind on posting up my projects to this blog so thought I'd get up to date in one humongous catch-up post! :lol:

I've been making a few ATCs lately and quite a few quick notecards to send out with ATCs/swaps and also a few occasion cards...

Let's start with the cards:

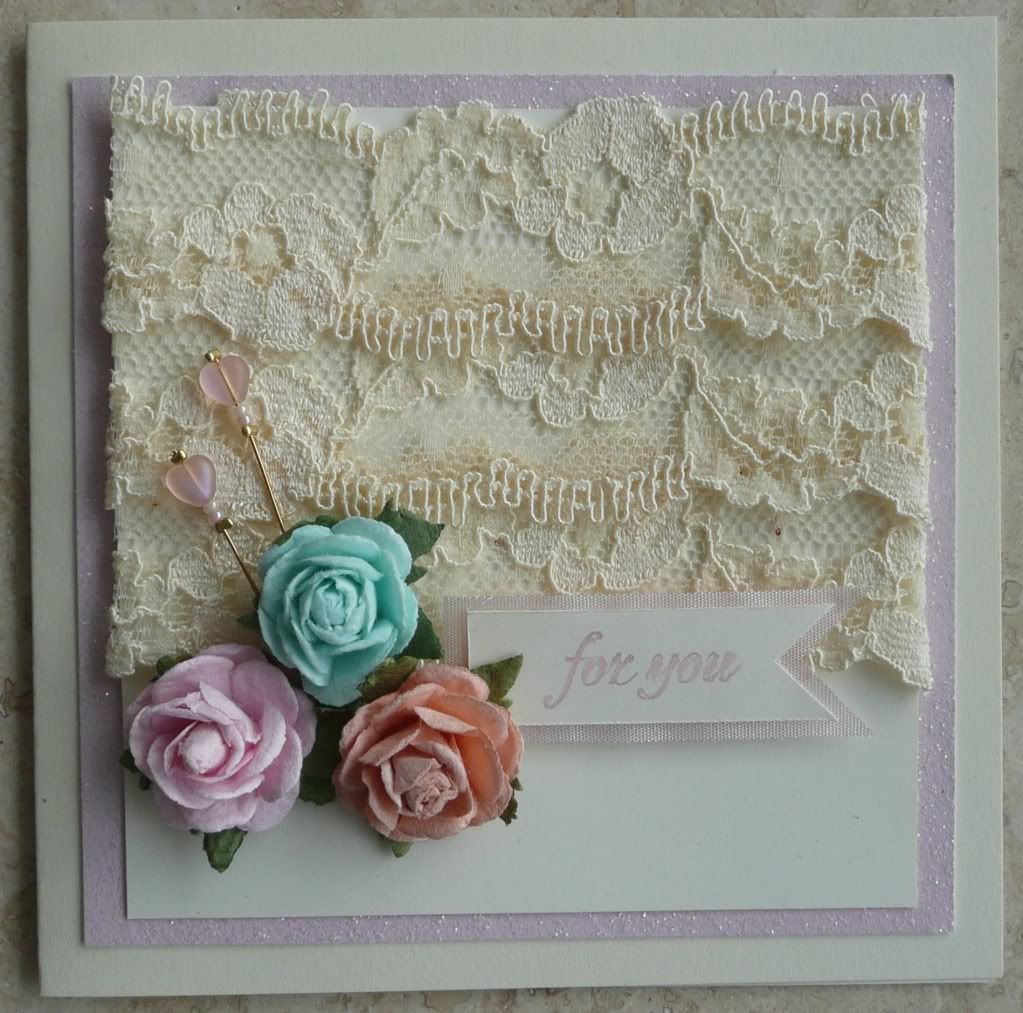
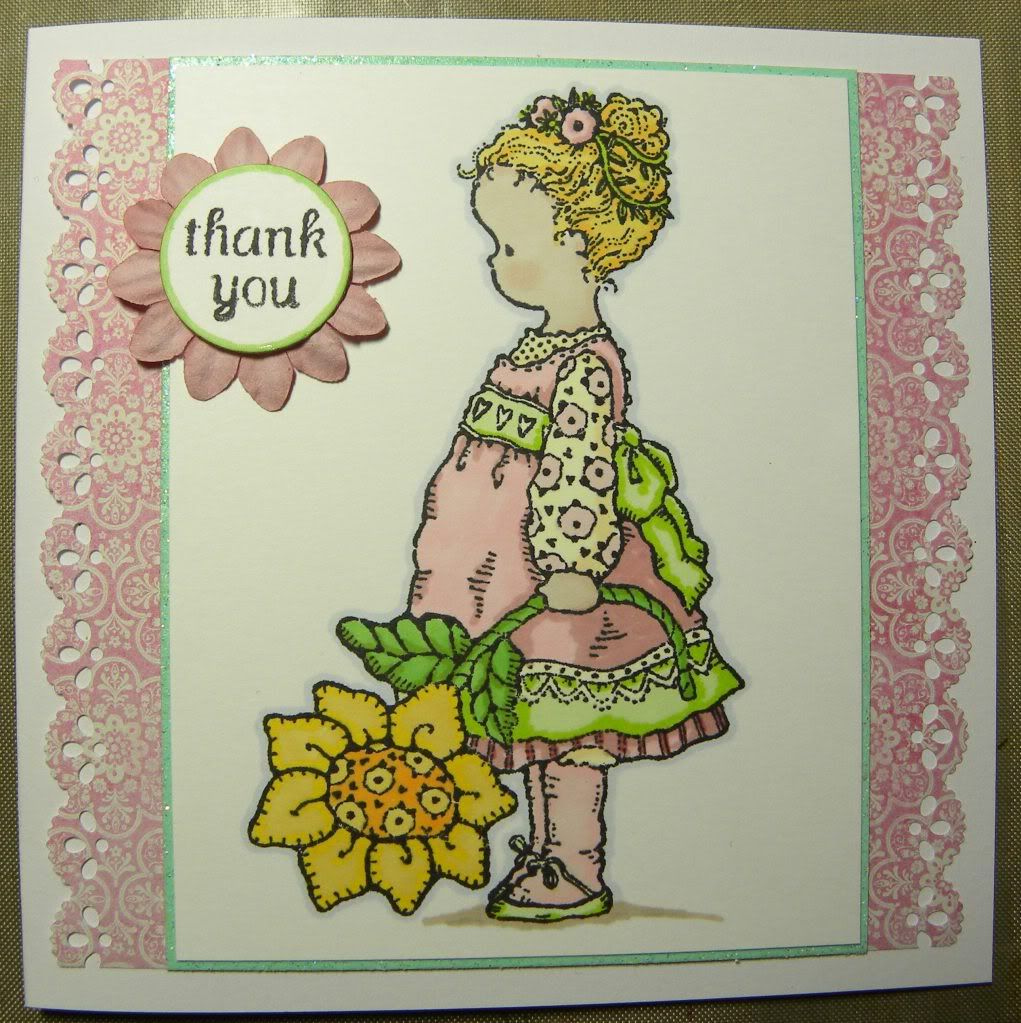
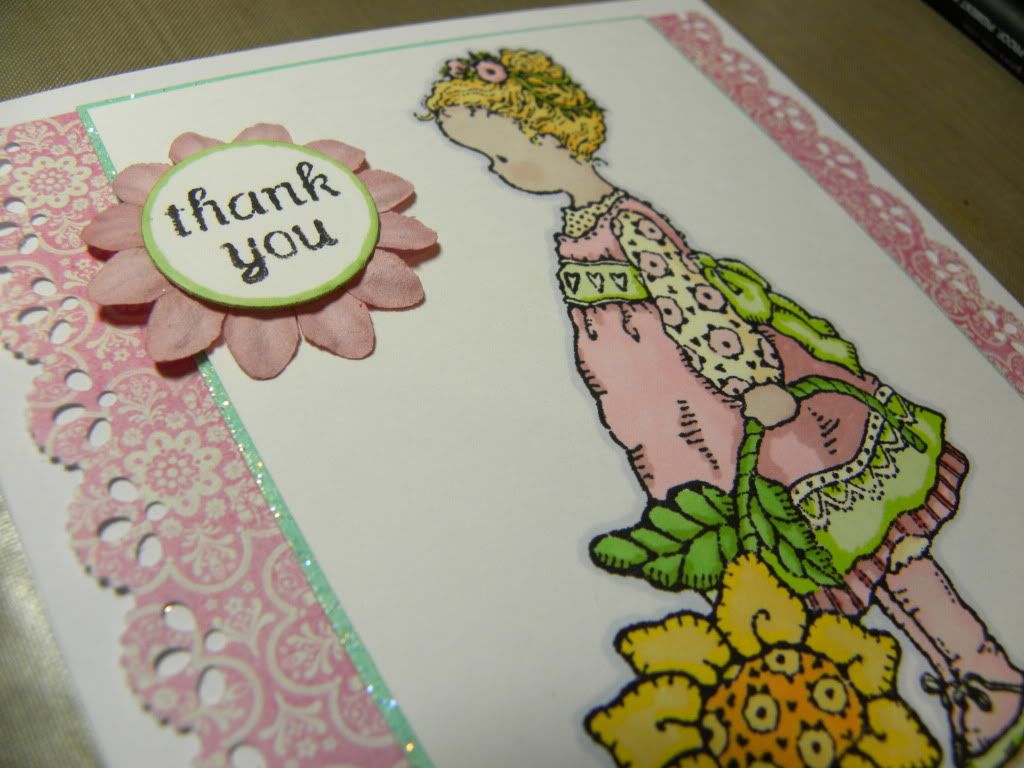
This was a card made for the DT call over at the Ribbon Reel blog. I didn't make the team (check out the cards of the lucky ladies selected - they're scrummy!!) but I was really pleased with my card. The photo inspiration provided was gorgeous - really delicate and vintage - and resulted in this pretty, lacy card. :)

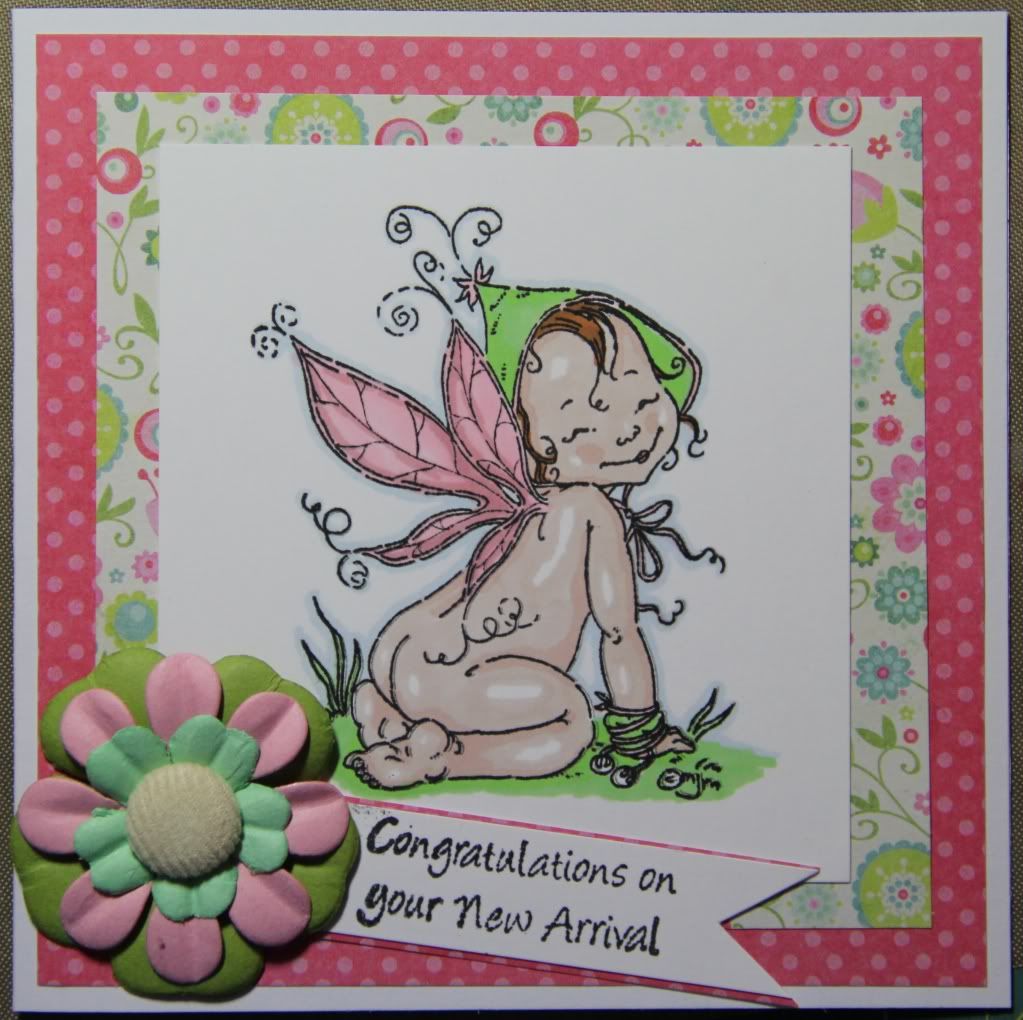
This next card was one I put together fairly quickly to give to my DD1's physiotherapist who was retiring. I love this cute stamp from Penny Black.

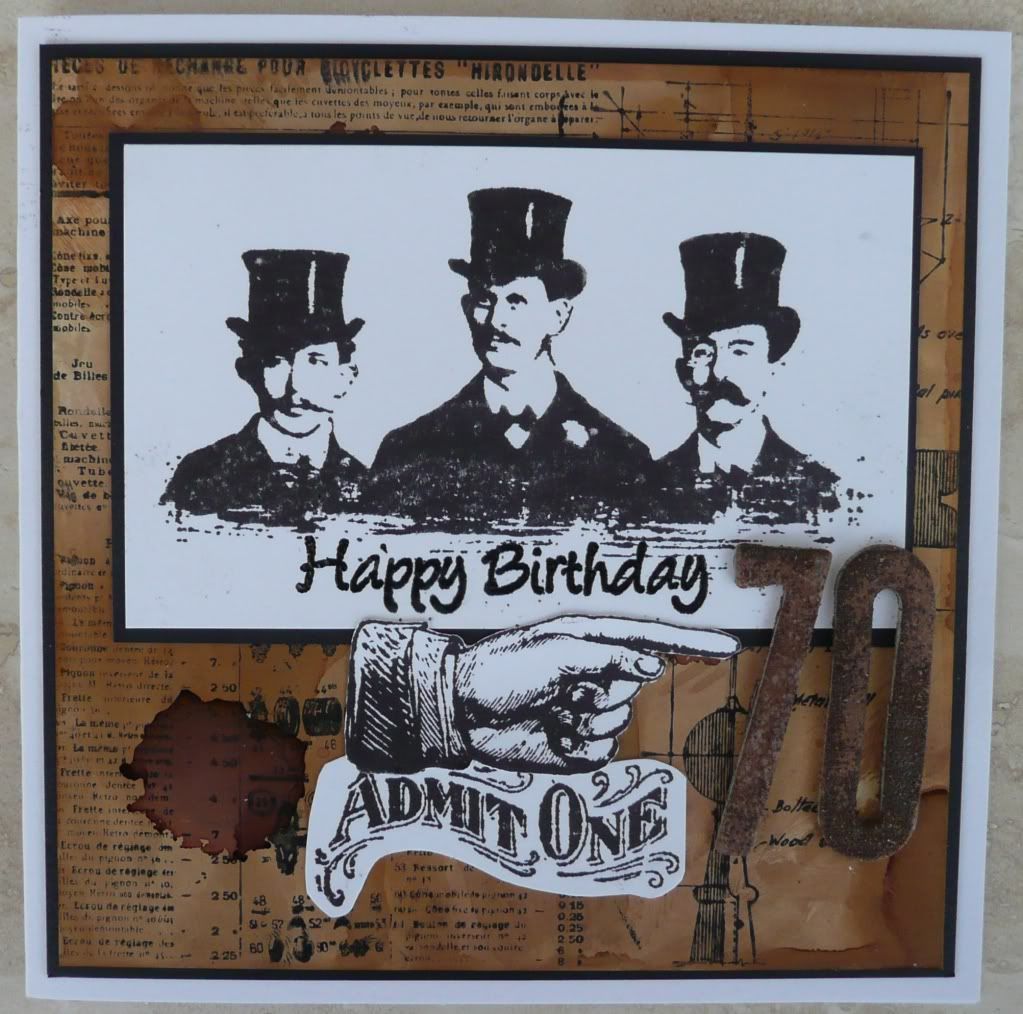
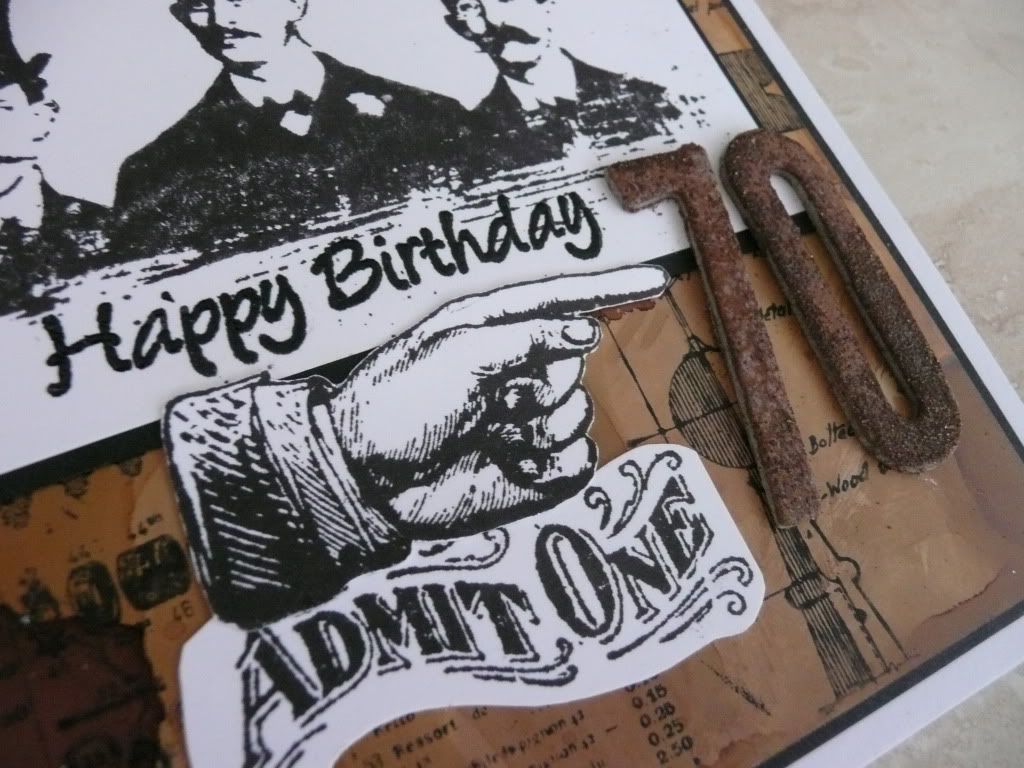
I made this steampunk-themed birthday card for my uncle's 70th birthday. :) The background is done with alcohol inks and stamped over with Tim Holtz steampunk stamps. The 70 is chipboard numbers heat embossed first with copper embossing powder and then unevenly embossed with Vintage Photo Distress Embossing Powder.

And now some notecards:

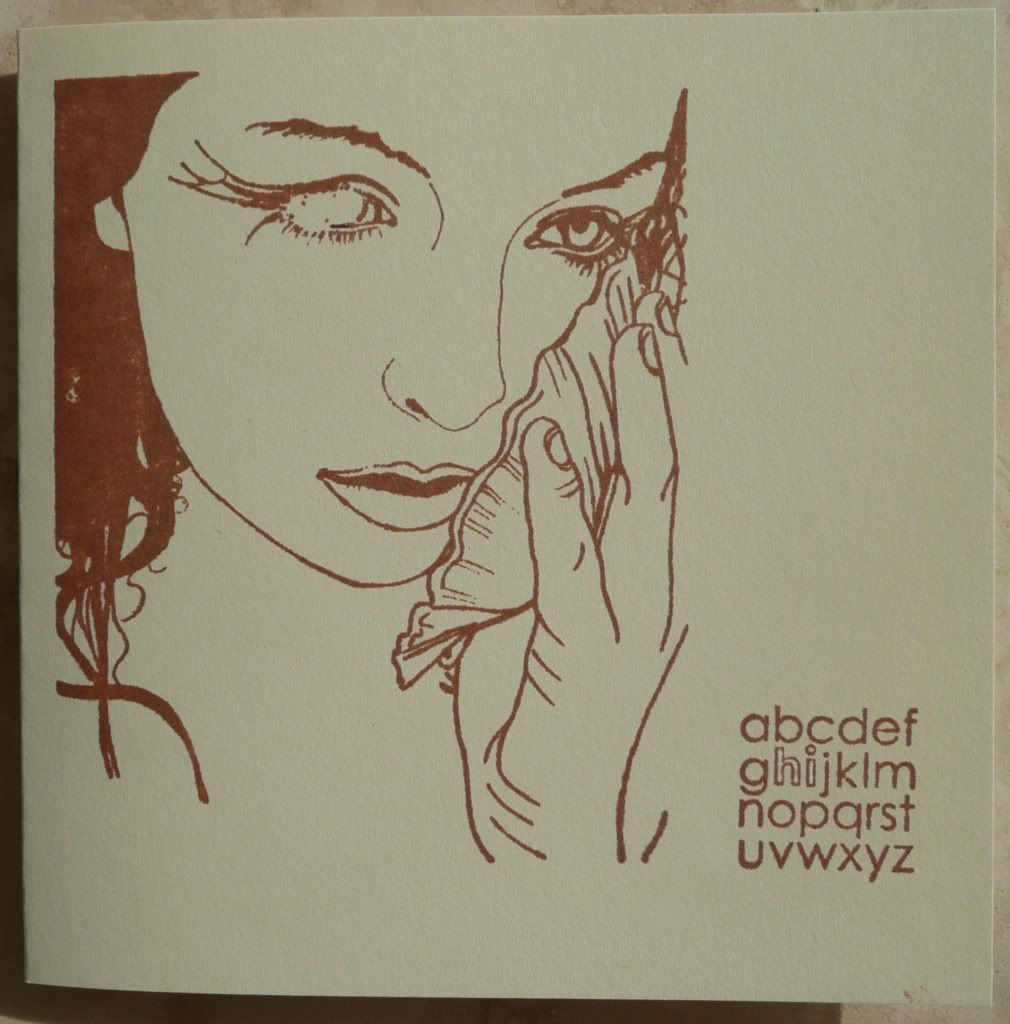
The image on this one (a scrummy Sweet Pea stamps one) stamped a little unevenly, unfortunately. The greeting stamp is a Stampin' Up! one and, although it doesn't show very well in the photo, the "hi" is filled in with white pen.

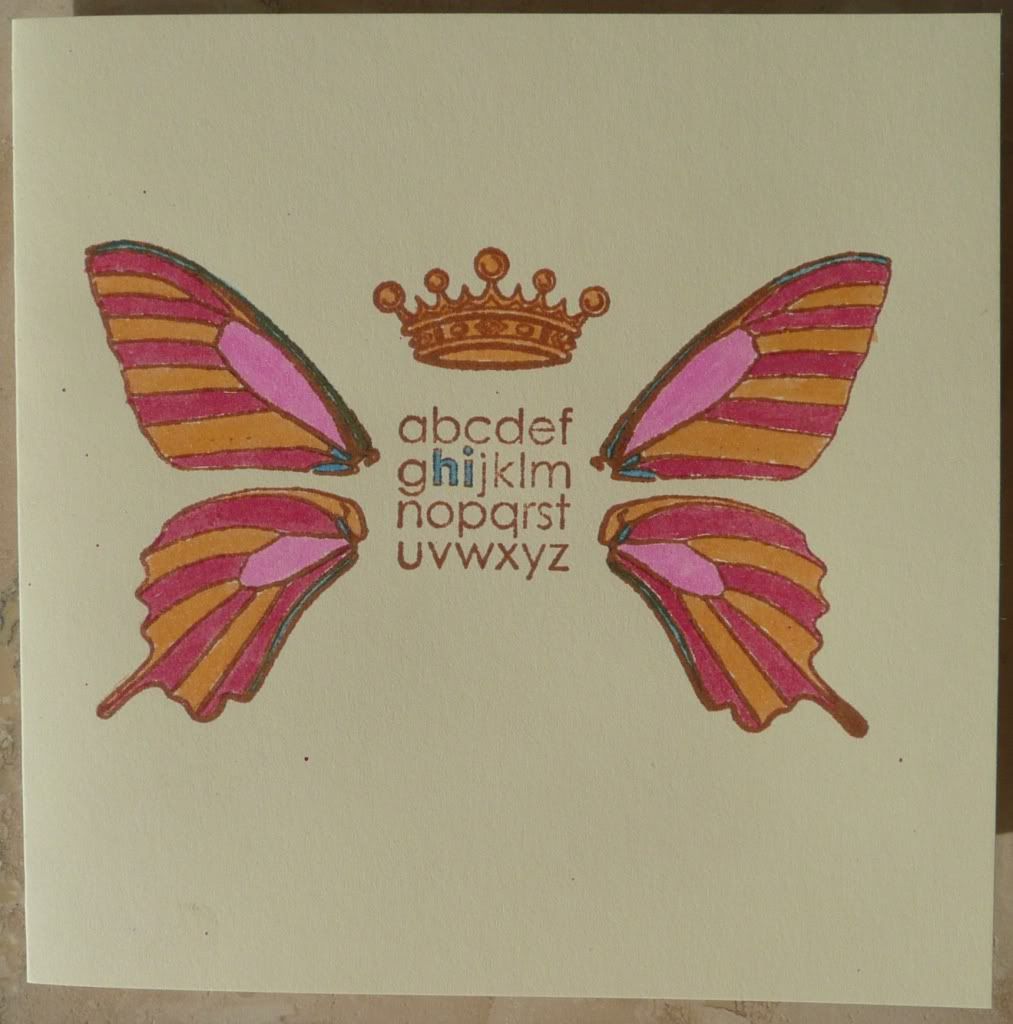
This uses the same Stampin' Up! greeting stamp as above and the crown and butterfly wings stamps are from a HOTP set. They are coloured in with Cosmic Shimmer Acrylic Drawing Inks.

This card uses stamps from the Stampin' Up! Fresh Cuts set and a doodled border. The flower is coloured with Cosmic Shimmer Acrylic Drawing Inks, as above.

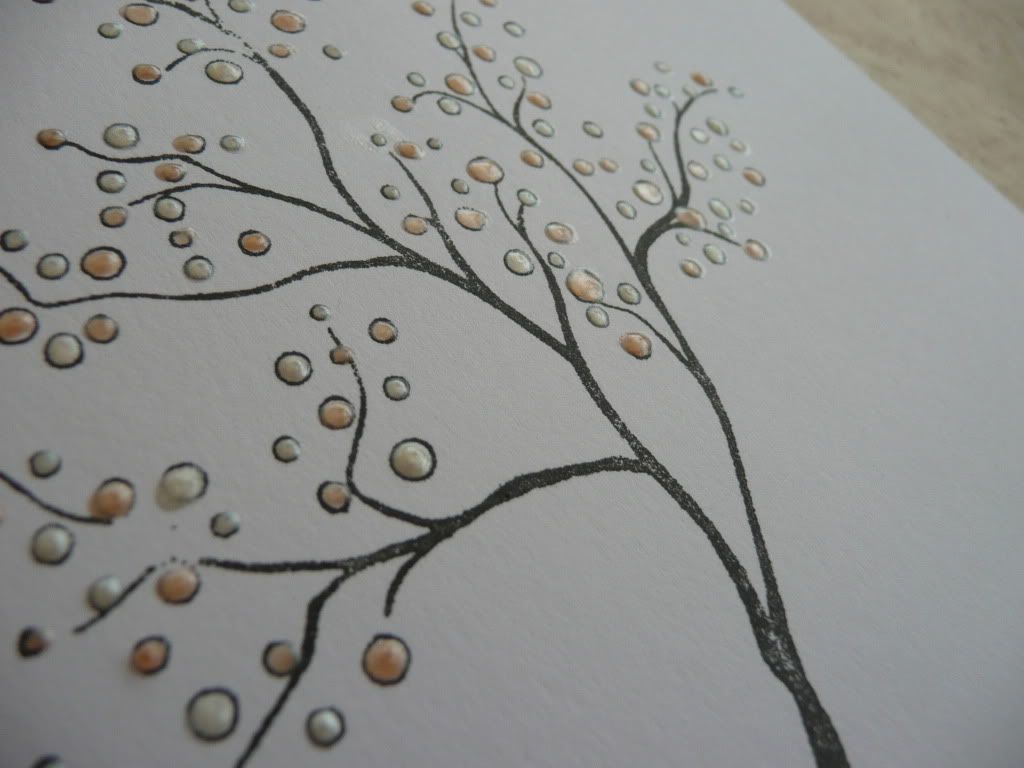
This card used a lovely Penny Black stamp and I filled in all the blossom circles with cream and pink Pearl Drops.

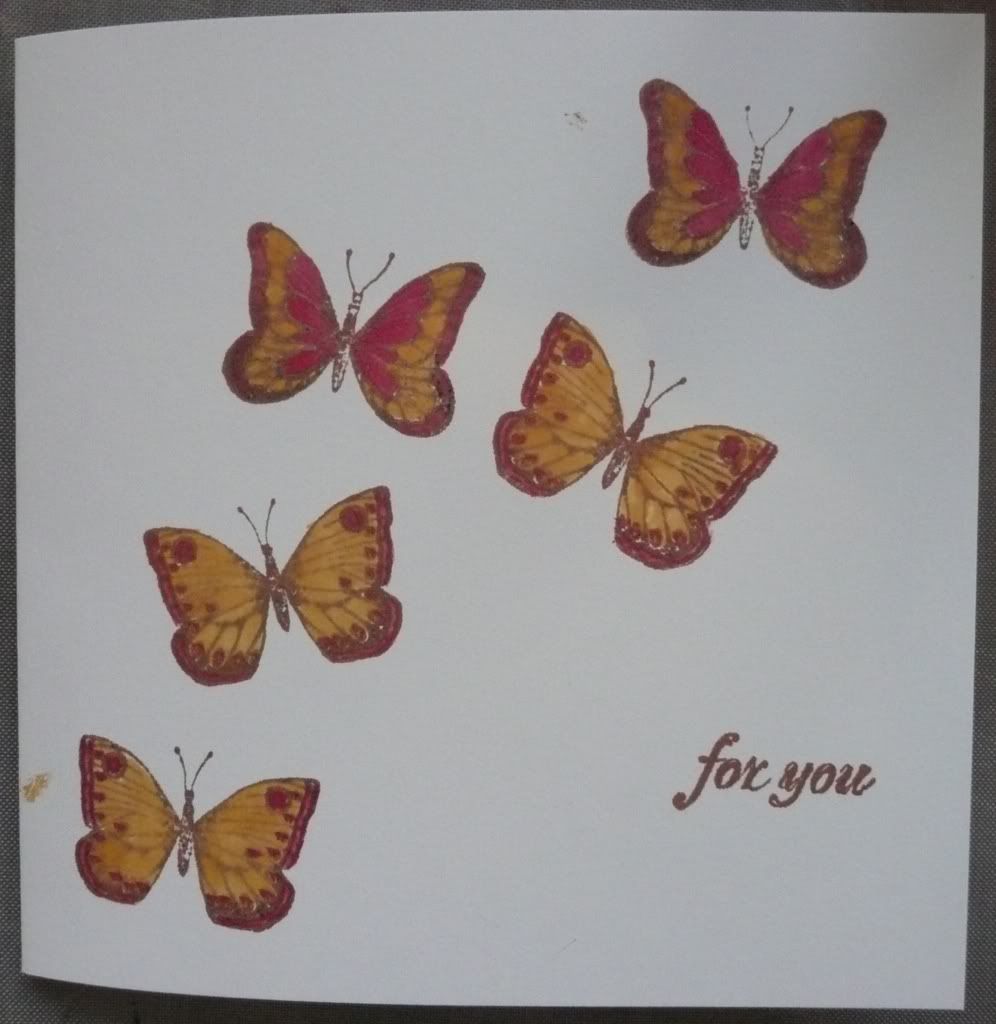
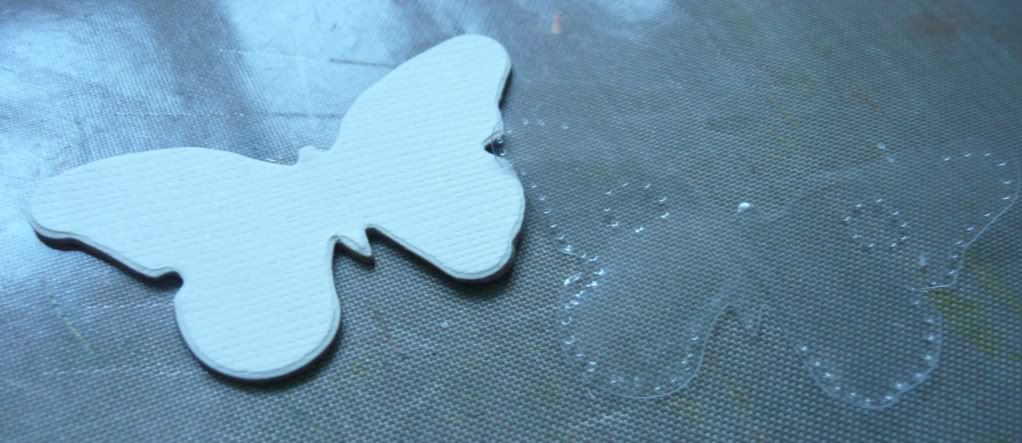
The butterflies are cArtUs stamps and are coloured in with alcohol inks.

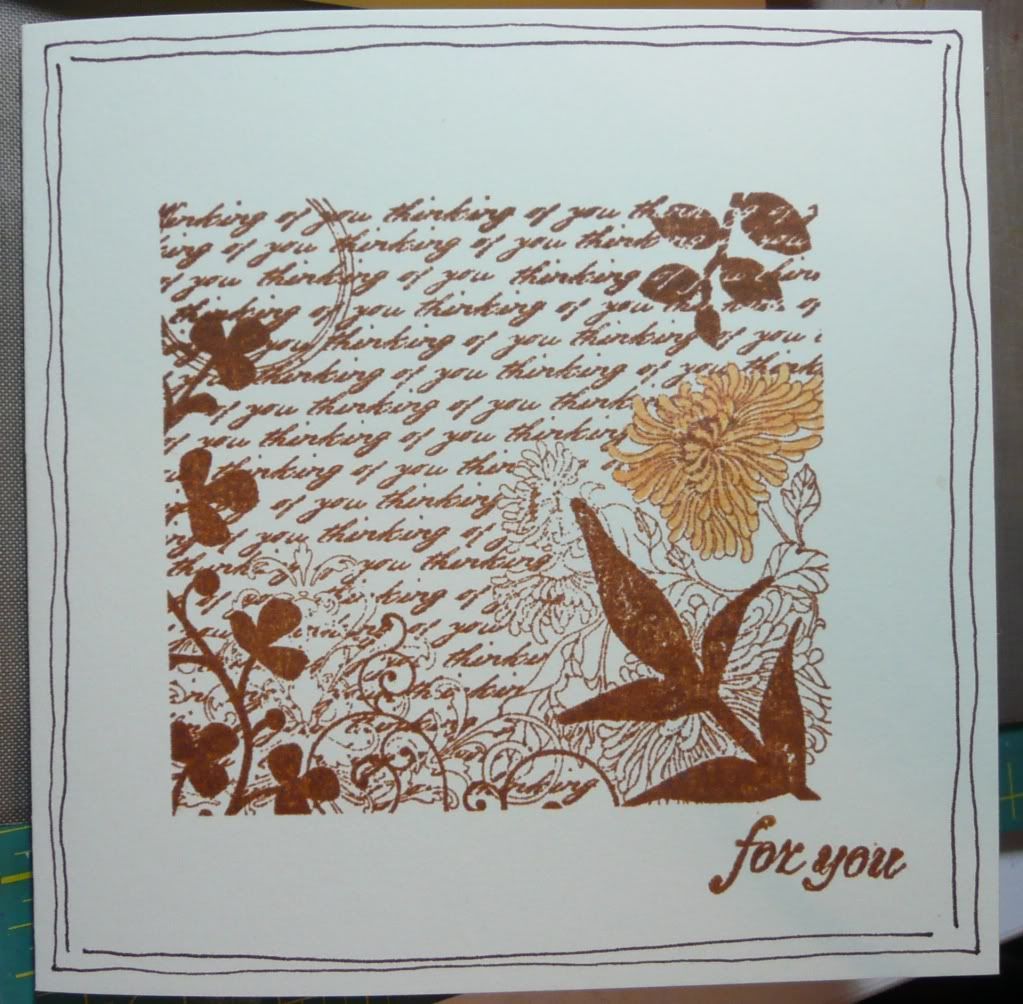
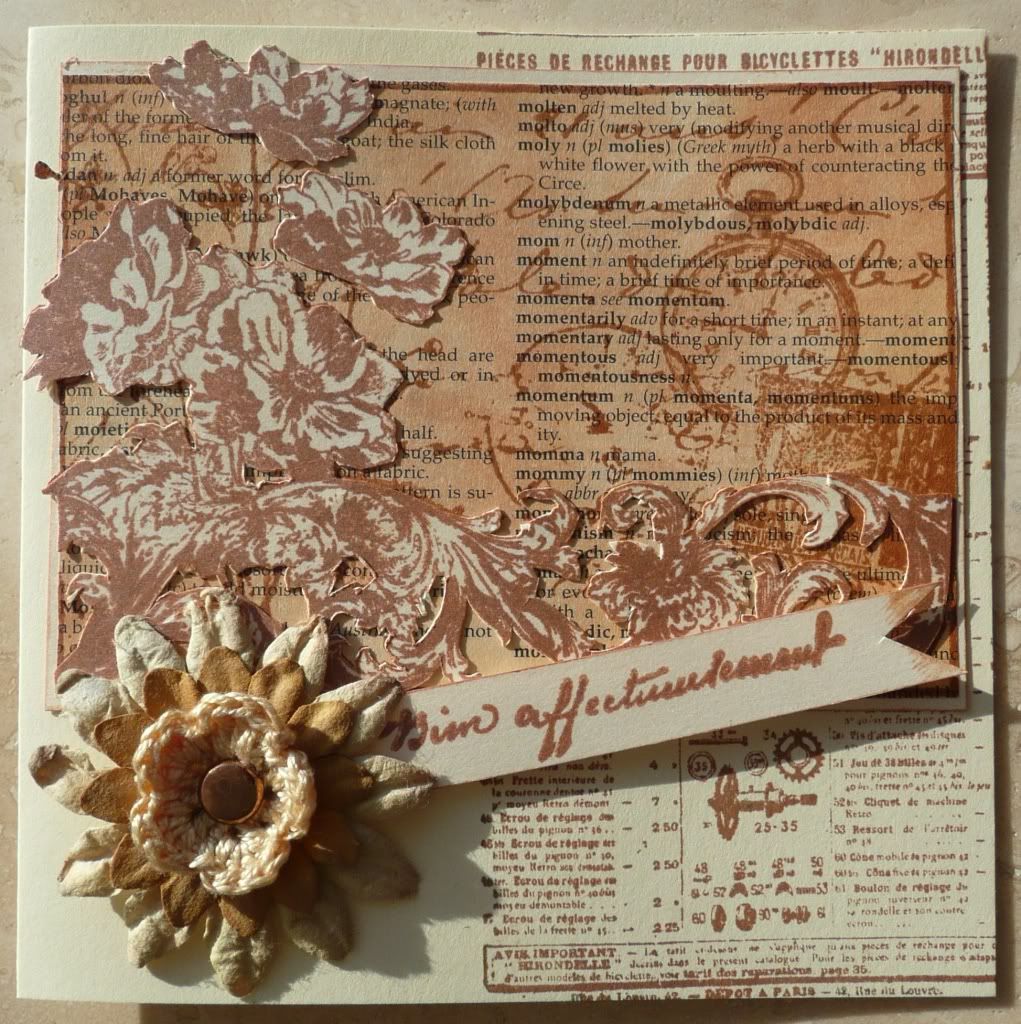
This is the card featured in my WOYWW post - I made it to send out with a parcel. The background stamp is a Timh Holtz steampunk one and the main image and greeting are from a set of Artmeio stamps. The main image is stamped onto a dictionary page which I'd coloured with Tea Dye Distress Ink and I stamped it again onto cream shimmer card and cut out the flowers and flourishes parts and layered them over the full image.

That's it for cards.. now for the ATCs:

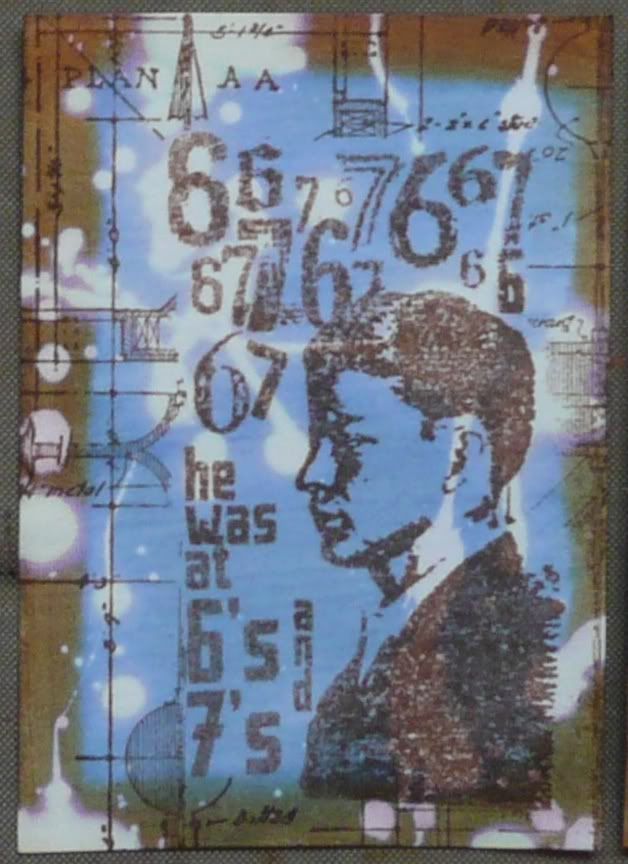
This was one of a set (all the same design) that I made for a swap on UKS. The background is Distress Stains splashed with bleach and the main image is a PaperArtsy stamp which I then masked and stamped over with a Tim Holtz steampunk stamp.

This card was designed for a specific swap... I agreed to trade a lovely card with a lady on ATCsforall.com and offered to make her a Stargate-themed card in return (we'd gotten chatting and discovered a mutual love of Stargate! :D) and this was the result! I'd recently bought some Stickles in some lovely bluish and icey sort of shades and it occured to me that they'd be fabulous for trying to recreate the shimmer of an active gate. :) I made the background using Dylusions and Cosmic Shimmers spray inks and printed out a photo of a section of gate, glued to cardboard and cut it out. I then filled in the gate with the Stickles and added a few diamante "stars". :) I actually made a set of 3 of this design.

This Halloween-themed ATC was partly inspired by this gorgeous shimmery cobweb pattern fabric that I picked up at the market (the photo really doesn't do it justice!). The background behind the fabric (not really visible in this photo) is done with alcohol inks and the cute little skeleton is a download from the Graphics Fairy. :)

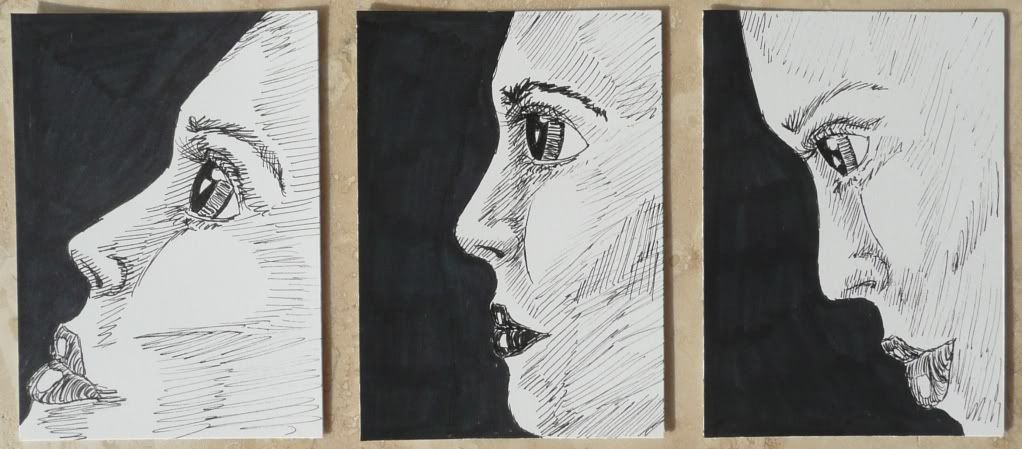
This set of ATCs are hand-drawn in fineliner and the background filled in with black marker pen. I've been getting quite into drawing lately (more about that later) and these were just a bit of a doodling experiment.

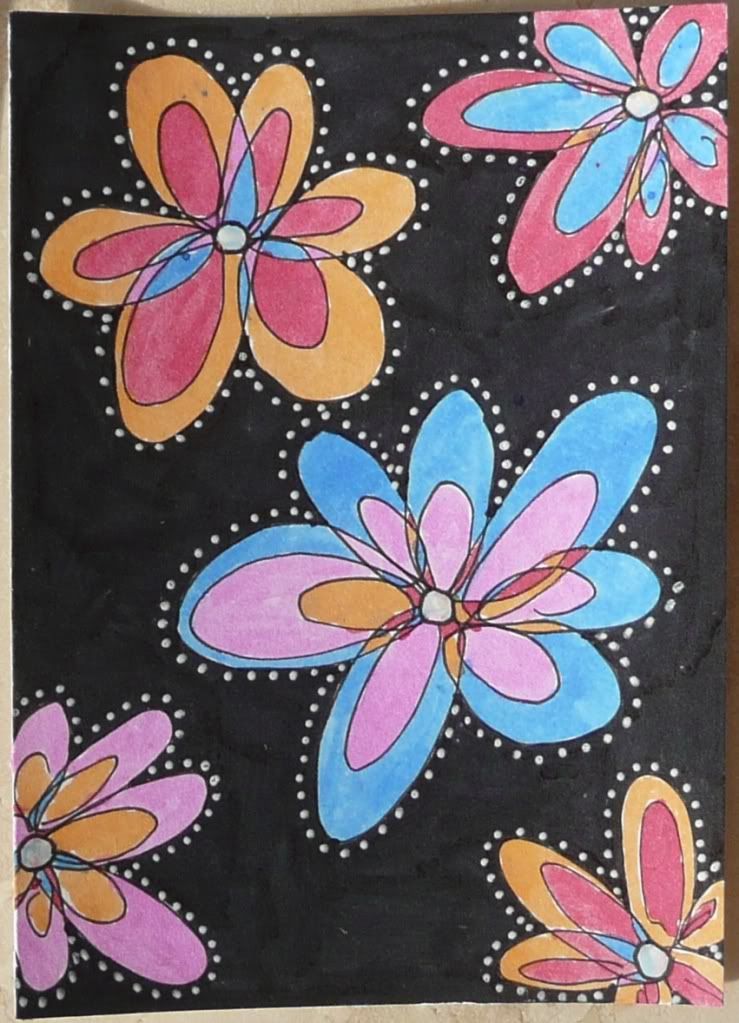
This is another doodled ATC. The flowers were doodled in fineliner pen and the background again filled in with marker pen. The flowers were coloured in with Cosmic Shimmer Acrylic Drawing Inks and I added dots around the edges with a white gel pen.

And finally... the background for this card was inked with Tumbled Glass Distress Ink and then I used the same ink to dab through a circle pattern mask and to stamp with a Tim Holtz steampunk stamp. The flourishes are another Tim Holtz stamp and the butterflies are cArtUs stamps and I've filled in the wings with Stickles.

Right. *Phew*. I think I'm up to date now! :D

WOYWW - 2 November 2011

November already? How did that happen? Eesh. I'd better start thinking about christmas presents... and Mia's birthday too!

And I suppose I'd better think about making some christmas cards too.

But for now there's no sign of christmas on my desk:

The mess is encroaching once again... fuelled by a bit of a frantic crafting session week before last (I spent most of last week away from home visiting family so no crafting got done for a while). Tidying is desperately needed, as ever, and I will get around to it one of these days... honest! ;)

Amongst all the mess is a little notecard I made yesterday to send out with a parcel. Would love to tell you more but it's sooper-sekrit! Tee hee! :D

Thanks for stopping by to marvel at the mess, hope you're having a fab WOYWW.

Tuesday 1 November 2011

Butterflies Fluttering By...

As part of the UKScrappers sponsors blog hop, my final DT project for Scrap Revolution is now up over at the Scrap Revolution blog. There's a step by step tutorial of how I made it.. and there are some goodies on offer, as part of the blog hop (free UK shipping and a pack of the die-cut butterflies shapes used in my project). :)

I went a bit butterfly barmy on this project... they're just so pretty and I love the Tim Holtz Mini Butterflies Movers and Shapers dies. I decorated my butterflies in various ways and thought it would be nice, as a tie-in to the full project details, to post a little mini tutorial here of decorated mini butterflies.

I started by die-cutting butterfly shapes from chipboard, patterned paper and acetate.

Some of the chipboard butterflies I painted with Copper Adirondack Paint Dabber and allowed to dry:

I then stamped some of the acetate butterflies with a script stamp using brown StazOn ink:

I bent the wings up a little and used Glossy Accents to glue the actetate butterfly on to of the painted one, glueing just along the body:

And to finish I added blobs of Copper Stickles glue along the body:

I glued butterfly shapes cut from patterned paper onto chipboard butterflies and decorated some of them using Stickles and adhesive pearls:

I decorated acetate butterflies using Stickles, adhesive pearls and also a piercing tool, bent up the wings a little and glued onto more of the paper-covered butterflies:


And finally, I made a ribbon-covered butterfly shape by measuring out a piece of card bigger than a chipboard butterfly and then covering it with glue and attaching strips of brown ribbon across it:

I allowed the glue to dry completely and then die-cut a butterfly shaped from the ribbon-covered card.

And here's how the various finished butterflies looked on the completed project:

These little butterfly dies are so versatile and there's a gazillion ways to decorate them! Hope you enjoyed my little butterfly barmy tutorial. :)
Related Posts Plugin for WordPress, Blogger...